Easy Rotisserie Chicken Enchilada Recipe | 30-Minute Dinner
When weeknights get busy, nothing beats a pan of bubbling, cheesy enchiladas that go from oven to table with minimal fuss. These Easy Rotisserie Chicken Enchiladas are everything you want in a cozy dinner: savory, saucy, and generously layered with flavor—without the long simmer times or complicated prep. You’re starting with a store-bought rotisserie chicken, which means you’re already halfway to satisfying, from-scratch comfort food.
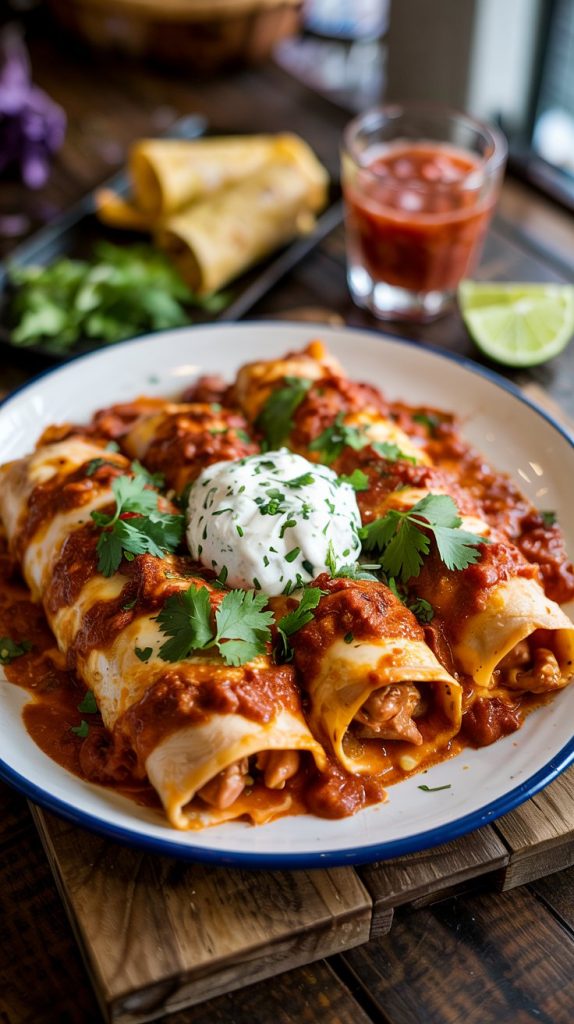
Expect tender shredded chicken tucked into warm tortillas, smothered with bright, tangy enchilada sauce, and finished with a golden, cheesy crust. The steps are straightforward, the ingredients are flexible, and you’ll get tips to make each bite melt-in-your-mouth delicious. It’s the kind of dish you’ll make once and then crave again the next week.
What Makes These Rotisserie Chicken Enchiladas Irresistible
These enchiladas deliver restaurant-level flavor with home-cooked heart, using shortcuts that don’t compromise taste. Rotisserie chicken brings seasoned, juicy meat to the party, while a quick stovetop sauté of aromatics deepens the flavor. The result is a saucy, cheesy bake that’s comforting enough for Sunday dinner yet easy enough for Monday night. Plus, the recipe is endlessly adaptable—choose red or green sauce, corn or flour tortillas, and round it out with beans, corn, or extra veggies as you like.
What You’ll Need for Easy Rotisserie Chicken Enchiladas
- 1 large rotisserie chicken, shredded (about 3 cups) — the star of the dish; pre-cooked and well-seasoned for maximum convenience.
- 10–12 corn tortillas (6-inch) — classic enchilada texture and flavor; sturdy enough to roll without getting mushy when warmed.
- 2 cups enchilada sauce (red or green) — the saucy backbone; choose your spice level and brand you love, or use homemade if you have time.
- 2 cups shredded cheese (Mexican blend, Monterey Jack, or cheddar) — melts beautifully for that irresistible, bubbly finish.
- 1 small yellow onion, finely diced — builds savory sweetness and depth in the filling.
- 1 bell pepper, diced (any color) — adds color, crunch, and a gentle sweetness.
- 2 cloves garlic, minced — brings aromatic warmth to the filling.
- 1 teaspoon ground cumin — earthy backbone that enhances the sauce’s complexity.
- 1 teaspoon chili powder — mild heat and smoky, peppery flavor in the filling.
- 1/2 teaspoon dried oregano (Mexican if available) — herbal note that brightens the sauce and chicken.
- 1/2 teaspoon kosher salt, plus more to taste — balances and heightens all the flavors.
- 1/4 teaspoon black pepper — rounds out the seasoning blend.
- 1 tablespoon olive oil (or neutral oil) — for sautéing the aromatics.
- 1/4 cup chicken broth or water — used to loosen the sauce and keep the enchiladas moist.
- 1/2 cup fresh cilantro, chopped (divided) — adds freshness; some goes in the filling, the rest as garnish.
- 1 lime, cut into wedges — a squeeze over finished enchiladas wakes up the whole dish.
- Optional: 1 can black beans, drained and rinsed — adds protein, fiber, and heartiness.
- Optional: 1/2 cup frozen corn (thawed) — gentle sweetness and texture contrast in the filling.
- Optional toppings: sliced jalapeño, diced avocado, sour cream or Greek yogurt, extra cilantro — tailor each plate to taste.
- Cooking spray or a teaspoon of oil for the baking dish — prevents sticking and helps the sauce hug each tortilla.
How to Make These Enchiladas, Step by Step
- Preheat the oven to 375°F (190°C). Lightly grease a 9x13-inch baking dish with cooking spray or a thin film of oil. Tip: A little oil plus a base layer of sauce prevents sticking and keeps the tortillas soft.
- Shred the chicken. Remove skin and bones from the rotisserie chicken, then shred the meat into bite-size pieces. You should have around 3 cups. If the chicken seems dry, toss it with a few tablespoons of the sauce.
- Sauté the aromatics. Heat 1 tablespoon oil in a skillet over medium heat. Add the diced onion and bell pepper; cook 4–5 minutes until softened. Stir in garlic and cook 30 seconds until fragrant.
- Season the filling. Stir in cumin, chili powder, oregano, salt, and pepper. Cook 30 seconds to bloom the spices. Add the shredded chicken and optional beans/corn. Toss to coat and warm through. Remove from heat and stir in half the cilantro.
- Loosen the sauce. In a bowl or measuring cup, whisk together the enchilada sauce with 1/4 cup broth or water. This helps the sauce spread and soak in during baking.
- Sauce the baking dish. Spread 1/2 cup of the thinned sauce across the bottom of the prepared dish to create a moisture cushion for the tortillas.
- Warm the tortillas. To prevent cracking, wrap them in a damp paper towel and microwave 30–45 seconds; or warm in a dry skillet for 20–30 seconds per side. Warm tortillas are more flexible and roll without tearing.
- Assemble the enchiladas. Working one at a time, place a warm tortilla on a plate. Spoon 1/4 cup of chicken filling along the center, sprinkle with a pinch of cheese (reserve most for topping), and roll snugly. Place seam-side down in the baking dish. Repeat with remaining tortillas and filling.
- Top with sauce and cheese. Pour the remaining sauce evenly over the rolled enchiladas. Use a spoon to nudge sauce along the edges so nothing dries out. Sprinkle the rest of the cheese over the top.
- Bake covered, then uncover. Cover the dish with foil (tent it slightly to prevent sticking) and bake 15 minutes. Remove foil and bake an additional 8–12 minutes, until the sauce is bubbling and cheese is melted and lightly golden.
- Optional broil. For extra color, broil on high 1–2 minutes, watching closely to avoid burning.
- Rest and garnish. Let the enchiladas rest 5–10 minutes so the sauce settles. Sprinkle with remaining cilantro and serve with lime wedges, plus any toppings you like.
Timing and Prep Breakdown
Active prep: 20–25 minutes (shredding chicken, sautéing, assembling)
Cook time: 23–27 minutes (including covered/uncovered baking)
Total time: About 50–60 minutes (includes preheating and a quick rest)
Yield: Serves 6 (about 2 small enchiladas per serving, using 10–12 corn tortillas)
Your enchiladas are ready to enjoy when the cheese is fully melted, the sauce is bubbling around the edges, and the tortillas look soft and glossy. A brief rest helps everything hold together, making serving easier and the flavors more cohesive.
Helpful Tips for Best Results
- Warm your tortillas well. This is the single best way to prevent cracking. If using corn tortillas, warming is essential.
- Use a sauce cushion. A thin layer of sauce under the enchiladas keeps them tender and prevents sticking to the dish.
- Don’t skimp on seasoning. Even with a flavorful rotisserie chicken, a quick sauté with aromatics and spices makes the filling pop.
- Balance moisture. If your sauce is very thick, thin it with broth or water. Too thick leads to dry enchiladas; too thin can make them soggy.
- Roll, don’t overstuff. About 1/4 cup filling per tortilla is a good guide. Overfilling causes tearing and uneven baking.
- Cheese strategy. A little inside for gooey pockets, more on top for a beautiful crust. Choose a good melter like Monterey Jack or a Mexican blend.
- Make it your own. Add chopped spinach, sautéed mushrooms, or roasted poblano strips for extra veggies; swap red sauce for salsa verde for a tangy twist.
- Gluten-free friendly. Use 100% corn tortillas and check labels on sauce and spices to ensure they’re gluten-free.
- Make-ahead & freeze. Assemble, cover tightly, and refrigerate up to 24 hours or freeze up to 2 months. Thaw overnight and bake, adding 5–10 minutes as needed.
Nutrition at a Glance
Approximate per serving (1/6 of recipe; about 2 enchiladas):
- Calories: ~480
- Protein: ~34 g
- Carbohydrates: ~38 g
- Total Fat: ~20 g
- Saturated Fat: ~9 g
- Fiber: ~7 g (with beans and corn; ~4 g without)
- Sodium: ~1,000–1,200 mg (varies by sauce and cheese)
- Sugars: ~5 g
These numbers will vary based on the tortillas, cheese, and sauce brand you choose, as well as optional add-ins. For lighter fare, try reduced-fat cheese, extra veggies, and a lower-sodium sauce—and serve with a crisp side salad.
Your Questions, Answered
Can I use flour tortillas instead of corn?
Yes. Flour tortillas are soft and easy to roll; use 8-inch tortillas and fill them lightly. Note that flour tortillas can be a bit softer after baking than corn. If using flour, skip warming or warm briefly and handle gently to avoid tearing.
What’s the best way to make these ahead?
Assemble the enchiladas in a sauced dish, top with sauce and cheese, then cover tightly and refrigerate up to 24 hours. Bake straight from the fridge at 375°F (190°C), adding 5–10 extra minutes. For freezing, wrap well, thaw overnight, and bake as directed.
How can I make them spicier or milder?
For more heat, add chopped jalapeños to the filling, use a hot enchilada sauce, or sprinkle in cayenne. For milder enchiladas, choose a mild sauce and skip spicy add-ins; a dollop of sour cream can help soften heat at the table.
A Parting Note
There’s something special about a dish that invites everyone to the table with the promise of comfort and good conversation. These Easy Rotisserie Chicken Enchiladas do just that—familiar, flavorful, and fuss-free. Whether you’re feeding family, a crowd of friends, or simply meal-prepping for the week, this pan delivers warmth in every bite. Cook once, gather often, and enjoy how a few simple steps and a reliable rotisserie chicken can turn an ordinary evening into a little celebration.