Ground Chicken Fried Rice Recipe: Easy, Quick, and Flavorful
There’s something wonderfully comforting about a skillet of fried rice—each grain glossy and distinct, mingling with tender bits of chicken, bright vegetables, and that deep, savory aroma you can smell from across the room. This Ground Chicken Fried Rice captures all of that in a quick, weeknight-friendly package. It’s hearty without feeling heavy, budget-friendly, and endlessly customizable to match what’s in your fridge.
In this recipe, you can expect a satisfying balance of textures and flavors: soft scrambled eggs, juicy seasoned ground chicken, pops of sweetness from peas and carrots, and a whisper of toasted sesame at the finish. You’ll learn how to get those perfectly separated grains, how to build flavor in layers, and how to adapt the dish to your taste—spicy, mild, extra-vegetable, or gluten-free. It’s the kind of meal that’s easy to cook and even easier to love.
What Makes This Ground Chicken Fried Rice Irresistible
This dish shines because it brings restaurant-style results to your home kitchen with minimal fuss. Ground chicken cooks fast and absorbs flavors beautifully, so you get savory depth without long marinating. The rice crisps at the edges while staying tender in the center, thanks to high heat and a smart order of cooking. You’ll taste a gentle warmth from fresh ginger and garlic, the umami of soy and oyster sauce, and a bright lift from a splash of rice vinegar at the end. It’s balanced, satisfying, and scalable—perfect for a solo dinner or a table full of friends.
What You’ll Need: Ingredients for Ground Chicken Fried Rice
- 4 cups cold cooked rice (day-old jasmine or long-grain) – The star of the show; cold, dry rice ensures separate, non-mushy grains.
- 1 pound ground chicken (93–96% lean) – Tender, mild protein that quickly takes on seasoning.
- 2 large eggs – Adds richness, silkiness, and the classic fried-rice feel.
- 1 cup peas and carrots (frozen is perfect) – A colorful, sweet-savory vegetable base that cooks in minutes.
- 4 scallions, thinly sliced (white and green parts) – Fresh bite and a bright finish.
- 3 cloves garlic, minced – Aromatic foundation that deepens the overall flavor.
- 1 tablespoon fresh ginger, minced – Lively heat and fragrance; keeps the dish from tasting flat.
- 2–3 tablespoons low-sodium soy sauce – Savory backbone; low-sodium keeps seasoning in your control.
- 1 tablespoon oyster sauce (optional but recommended) – Adds glossy depth and extra umami complexity.
- 1–2 teaspoons rice vinegar or a squeeze of lime – A touch of acidity to balance the richness.
- 1 teaspoon toasted sesame oil – Nutty aroma that ties everything together at the finish.
- 2 tablespoons neutral high-heat oil (canola, peanut, or avocado) – For stir-frying without smoking.
- 1/2 teaspoon white pepper (or black pepper) – Gentle heat and aroma, classic in fried rice.
- 1/4–1/2 teaspoon red pepper flakes or chili crisp (optional) – For a subtle kick if you enjoy spice.
- Salt, to taste – Adjusts overall seasoning at the end.
- Optional add-ins: diced bell pepper, corn, mushrooms, baby spinach, sesame seeds for garnish – Make it your own, using what you have.
- Gluten-free swap: tamari or coconut aminos instead of soy sauce – Keeps the flavors rich without the gluten.
How to Make It, Step by Step
- Prep the rice. If using day-old rice, break up any clumps with your fingers so the grains are loose. If you’ve just cooked the rice, spread it on a baking sheet, let steam escape for 10 minutes, then refrigerate for at least 30 minutes to dry slightly. Dry rice is key to avoiding stickiness.
- Whisk and cook the eggs. Beat the eggs with a pinch of salt. Heat a large wok or wide skillet over medium-high heat and add 1 teaspoon of neutral oil. Pour in the eggs, let them set for a few seconds, then gently scramble until just cooked and soft. Transfer to a plate and keep nearby.
- Brown the ground chicken. Return the pan to high heat and add 1 tablespoon of oil. Add the ground chicken in an even layer and let it sear undisturbed for 1–2 minutes for good browning. Break it up with a spatula into small, bite-size pieces and cook until no longer pink, 3–4 minutes. Season lightly with salt and a pinch of white pepper.
- Sauté aromatics. Push the chicken to one side of the pan. Add the remaining 1 tablespoon oil if the pan looks dry. Add the garlic and ginger to the open side and stir-fry for 30–45 seconds, just until fragrant. Mix them through the chicken to coat it in flavor.
- Add vegetables. Stir in the peas and carrots, cooking for 1–2 minutes until heated through and bright. If using any quick-cooking add-ins (like bell pepper or mushrooms), add them now and sauté until just tender.
- Introduce the rice. Add the cold rice to the pan and toss to combine with the chicken and vegetables. Use the back of your spatula to press the rice into the hot surface for 30–60 seconds in spots; this helps it crisp lightly. Repeat a few times, stirring between presses so the rice heats evenly.
- Season the skillet. Drizzle the soy sauce and oyster sauce over the rice, tossing and folding to coat every grain. Sprinkle in the white pepper and add red pepper flakes if using. Taste as you go so you can adjust the saltiness and heat to your preference.
- Finish with eggs and scallions. Return the scrambled eggs to the pan along with most of the sliced scallions (save a few for garnish). Drizzle in the sesame oil and the rice vinegar (or lime). Toss just until everything is glossy and fragrant, then taste again and adjust with a splash more soy or vinegar as needed.
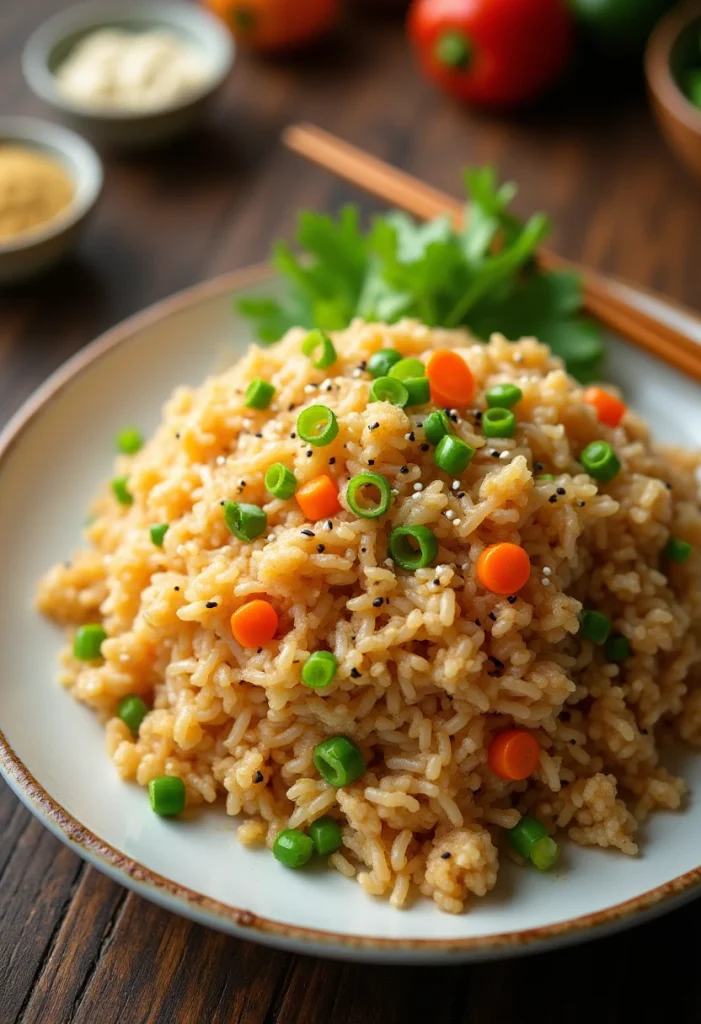
- Serve and enjoy. Remove from heat and top with remaining scallions and sesame seeds if you like. Serve hot straight from the pan. Leftovers keep well, and the flavors deepen by tomorrow.
Time & Prep at a Glance
Prep time: about 15 minutes, including chopping aromatics and slicing scallions. If you’re cooking rice fresh, add 30–60 minutes to chill and dry it before stir-frying (or use pre-cooked rice).
Cook time: 12–15 minutes, depending on your stove and pan heat. Total time: around 30 minutes when using day-old rice. This meal is ready to enjoy right away; it’s at its best the moment it comes off the heat when the rice is steamy and the edges are a touch crisp.
Yield: Serves 4 as a main dish. If you’re feeding a crowd or planning for lunches, the recipe scales easily—just avoid overcrowding the pan; cook in batches for the best texture.
Pro Tips to Nail It Every Time
- Start with dry, cold rice. This prevents clumping and gives you those distinct, bouncy grains that define great fried rice.
- Get the pan hot. High heat creates light toasty notes and a hint of crispness. Preheat until a drop of water sizzles on contact.
- Use a wide surface area. A wok is ideal, but a large skillet works too. The more contact the rice has with the hot pan, the better the texture.
- Don’t crowd the pan. If you double the recipe, cook the rice and chicken in separate batches to avoid steaming.
- Press, then toss. Press the rice into the pan briefly, then toss and repeat. This technique builds golden bits without drying the whole dish.
- Measure sauces ahead. Have soy, oyster sauce, and vinegar ready so you can season swiftly while everything is hot.
- Add sesame oil at the end. Heat can dull sesame oil’s fragrance, so finish with it for the fullest aroma.
- Balance with acidity. A splash of rice vinegar or lime sharpens flavors and keeps the dish from tasting too salty or heavy.
- Customize the veg. Quick-cooking vegetables like bell peppers or mushrooms are great; add leafy greens (like spinach) at the very end to wilt.
- Try a pat of butter. For a velvety finish, melt in a teaspoon of butter just before serving. It rounds out the flavors beautifully.
- Gluten-free and low-sodium options. Swap soy sauce for tamari or coconut aminos, and use low-sodium versions of your sauces to control saltiness.
- Make it spicier. Chili crisp, sambal, or a drizzle of sriracha will add lively heat without overwhelming the dish.
Nutrition at a Glance
These numbers are approximate and will vary depending on brands and exact measurements. This breakdown is for 4 servings.
| Per Serving | Amount |
|---|---|
| Calories | ≈ 460 |
| Protein | ≈ 30 g |
| Carbohydrates | ≈ 52 g |
| Fat | ≈ 17 g |
| Saturated Fat | ≈ 4 g |
| Fiber | ≈ 3–4 g |
| Sugars | ≈ 3–5 g |
| Sodium | ≈ 700–900 mg (varies by sauce) |
| Cholesterol | ≈ 180 mg |
Tip: For lower sodium, use reduced-sodium soy sauce, skip or reduce oyster sauce, and finish with extra vinegar and fresh scallions for brightness instead of extra salt.
Your Questions, Answered
Can I use brown rice or another grain?
Yes. Brown rice works beautifully and adds a nutty flavor and extra fiber; be sure it’s fully cooked and chilled before stir-frying. Quinoa can also be used, but it’s more delicate—toss gently and avoid pressing it too hard into the pan. With either swap, keep the heat high and the grains cold for the best texture.
How do I make this gluten-free or lower in sodium?
For gluten-free, use tamari or coconut aminos in place of soy sauce and verify your oyster sauce (or omit it). To reduce sodium, choose low-sodium tamari and season lightly at first. Balance with acidity—a little extra rice vinegar or lime brightens flavors without relying on more salt.
What’s the best way to store and reheat leftovers?
Cool leftovers quickly, then store in an airtight container in the refrigerator for up to 4 days. For freezing, portion into freezer-safe bags or containers and freeze up to 2 months. Reheat in a hot skillet with a teaspoon of oil or a splash of water to re-steam the rice, or microwave in short bursts, stirring between intervals. Finish with fresh scallions or a drizzle of sesame oil to wake up the flavors.
A Few Parting Bites
Cooking is at its best when it feels welcoming and adaptable, and this Ground Chicken Fried Rice is just that: inviting, flexible, and ready to suit your kitchen and your cravings. With a few smart techniques—dry rice, high heat, and balanced seasoning—you’ll bring restaurant-worthy flavor to your table in minutes. Share it as a cheerful weeknight dinner, pack it for lunches, or dress it up with extra veggies and garnishes for friends. However you serve it, I hope it becomes a reliable favorite you’ll reach for again and again. Happy cooking—and enjoy every savory bite.