Peanut Butter and Jelly Cookies Recipe | Soft & Chewy Treats
In this recipe, I’ll guide you step by step so you feel confident from the first whisk to the final bake. You’ll get helpful tips to keep your cookies soft, flavorful, and picture-perfect, plus small tricks for customizing the flavors to suit your favorite PB&J combo. By the end, you’ll have a plate of cookies that taste like childhood, but with a polished, bakery-style finish. Let’s bake something cozy and joyful.
- What Makes These PB&J Cookies Irresistible
- What You’ll Need for PB&J Thumbprint Cookies
- How to Bake Peanut Butter and Jelly Cookies, Step by Step
- Timing & Preparation Details
- Tips to Help You Nail It Every Time
- Nutritional Snapshot (Approximate, Per Cookie)
- Questions Bakers Often Ask
- Wrapping Up with a Sweet Note
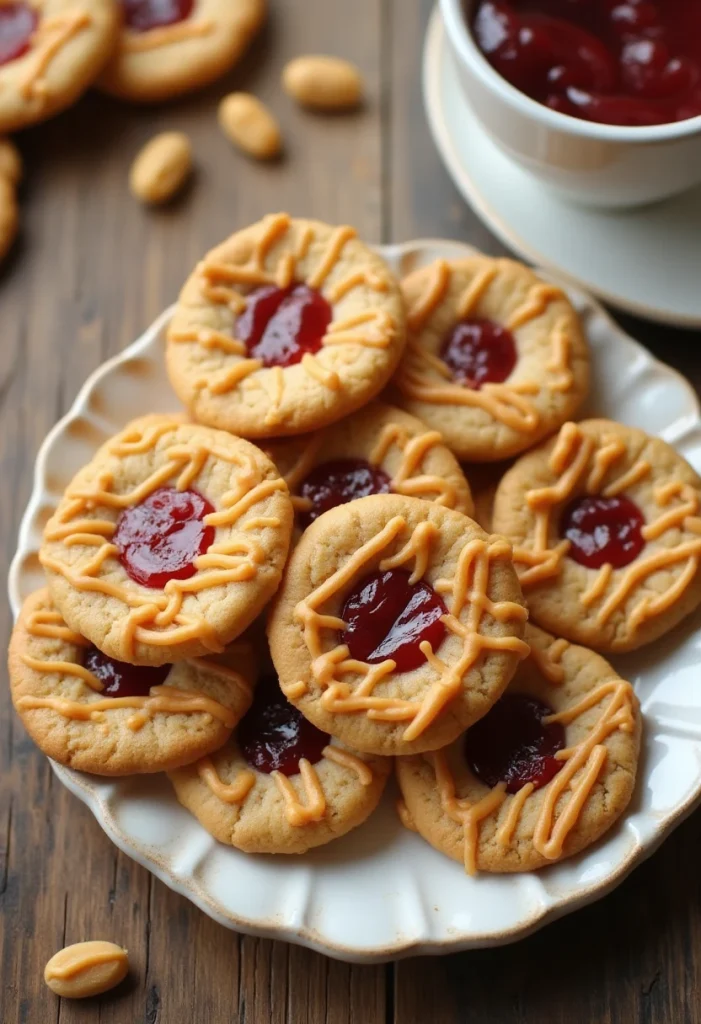
These cookies combine the comfort of a classic peanut butter cookie with the playful charm of thumbprint jam centers. The dough bakes up soft and tender, with just enough chew to keep each bite interesting. The jam is warm and glossy, adding a burst of fruit that cuts through the richness. They’re simple to make, freeze beautifully, and are endlessly adaptable—use strawberry, grape, raspberry, or even a swirl of two flavors for fun. Best of all, the method is straightforward, and the results are consistently impressive.
- All-purpose flour (1 3/4 cups / about 220 g): Provides structure so the cookies hold their shape while staying soft.
- Baking soda (1/2 tsp): Helps the cookies spread gently and develop a tender crumb.
- Baking powder (1/2 tsp): Adds a little extra lift for a lighter texture.
- Fine salt (1/2 tsp): Balances sweetness and enhances the peanut flavor.
- Unsalted butter, softened (1/2 cup / 113 g): Creates richness and a soft, tender cookie.
- Creamy peanut butter, no-stir preferred (3/4 cup / about 190 g): Delivers that classic peanut taste and helps the dough hold together. No-stir keeps the texture consistent.
- Granulated sugar (1/2 cup / 100 g): Sweetens and encourages lightly crisp edges.
- Light brown sugar, packed (1/2 cup / 110 g): Adds moisture and subtle caramel notes for chew.
- Large egg, room temperature (1): Binds the dough and contributes to tenderness.
- Pure vanilla extract (1 tsp): Rounds out the flavors with warmth.
- Jam or jelly (about 1/2 cup / 160 g): Strawberry, grape, raspberry, or your favorite; seedless jams make the neatest centers.
- Optional: Extra granulated sugar (2–3 tbsp): For rolling dough balls if you like a sparkly finish.
- Optional: Chopped roasted peanuts (1/4 cup): Adds a bit of crunch around the edges.
- Optional: Flaky sea salt: A tiny sprinkle at the end to intensify flavors and balance sweetness.
- Prep your pans and oven. Preheat the oven to 350°F (175°C). Line two baking sheets with parchment paper for easy release and even browning.
- Loosen the jam. Stir your jam or jelly in a small bowl until smooth. If it’s very thick, warm it gently for 10–15 seconds in the microwave to make it spoonable. This helps prevent cracking and makes filling cleaner.
- Whisk dry ingredients. In a medium bowl, whisk the flour, baking soda, baking powder, and salt until evenly combined. Set aside.
- Cream the fats and sugars. In a large mixing bowl, beat the softened butter, peanut butter, granulated sugar, and brown sugar until light and fluffy, 2–3 minutes. The mixture should look slightly pale and aerated.
- Add egg and vanilla. Beat in the egg and vanilla extract just until incorporated. Scrape down the bowl to catch any stray bits.
- Bring the dough together. Add the dry ingredients to the wet ingredients and mix on low speed just until no streaks of flour remain. The dough will be soft but not sticky. If it seems too crumbly to hold a ball, mix for a few more seconds; if needed, add 1–2 teaspoons of milk to help it come together.
- Chill briefly (optional but helpful). For cleaner thumbprints and minimal spread, cover the bowl and chill the dough for 20–30 minutes. Chilling makes shaping easier and helps the cookies keep their shape.
- Portion the dough. Scoop the dough into 1.5-tablespoon portions (a small cookie scoop works well). Roll each portion into a smooth ball. If you like, roll the balls in granulated sugar or finely chopped peanuts for texture.
- Create the wells. Place the dough balls about 2 inches apart on the prepared baking sheets. Using your thumb or the back of a 1/2-teaspoon measuring spoon, press a deep well into the center of each ball. Don’t press all the way through; leave a sturdy base so the jam stays put.
- Par-bake for best results. Bake the cookies for 7 minutes, then remove from the oven. The cookies will be puffed and pale. Use the same spoon to gently re-press the wells, as they may have risen while baking.
- Fill with jam. Spoon about 1/2 teaspoon of jam into each well. Don’t overfill; the jam will spread slightly as the cookies finish baking.
- Finish baking. Return the cookies to the oven and bake for 3–5 more minutes, until the edges are set and the bottoms are just barely golden. The jam should look glossy and slightly thickened.
- Cool and set. Let the cookies cool on the baking sheet for 5 minutes, then transfer to a wire rack to cool completely. If using flaky sea salt, sprinkle a tiny pinch on the jam while it’s still warm.
- Serve. Enjoy the cookies slightly warm or at room temperature. The centers remain soft and jammy, the edges delicate and tender.
Alternative method (fill before baking): If you prefer, you can add the jam before the first bake. Make slightly shallower wells and fill lightly to prevent overflow. Bake 10–12 minutes total, watching closely to avoid bubbling over. The par-bake method above is more foolproof for neat centers.
Timing & Preparation Details
- Prep time: About 20 minutes to measure, mix, and shape.
- Chill time (optional): 20–30 minutes for easier shaping and better definition.
- Bake time: 10–12 minutes per batch (split into a 7-minute par-bake plus 3–5 minutes after filling).
- Total time: Approximately 60–75 minutes, including optional chilling and cooling.
- Yield: About 22–26 cookies, depending on scoop size.
- When they’re ready: The cookies are done when edges are set and bottoms are just lightly golden. Let them cool at least 10–15 minutes so the jam sets and the cookies lift easily.
Tips to Help You Nail It Every Time
- Measure flour accurately. Too much flour can make cookies dry and crumbly. If possible, weigh your flour or spoon and level it gently into the cup.
- Use no-stir peanut butter. Natural varieties with separated oil can cause greasy or spread-prone dough. If using natural, stir extremely well and chill longer.
- Don’t skip the brief chill. Even 20 minutes tightens the dough, making thumbprints cleaner and reducing spread.
- Smooth the jam first. Loosening the jam makes it easy to portion and prevents ragged, cracked centers.
- Par-bake, then fill. This simple trick gives the neatest, most defined wells and prevents overflow.
- Bake just until set. Peanut butter cookies dry quickly. Pull them when the bottoms barely color and the centers look soft—they’ll firm as they cool.
- Customize the finish. A quick roll in sugar or peanuts adds sparkle and crunch. A tiny pinch of flaky salt over the jam makes flavors pop.
- Rotate the pan. If your oven has hot spots, rotate sheets halfway through to ensure even baking.
- Make-ahead friendly. Shape balls, indent, and freeze on a sheet. Transfer to a bag once solid; bake from frozen, adding 1–2 minutes.
- Flavor ideas. Strawberry jam and grape jelly are classics. Raspberry (seedless) gives tart contrast; apricot adds sunny brightness; a swirl of two flavors is pretty and delicious.
Values below are estimates based on a yield of 24 cookies and the ingredient quantities listed above (without optional peanuts or finishing salt). Exact numbers will vary with brand and portion size.
| Calories | ~165–175 |
| Total Fat | ~8–9 g |
| Saturated Fat | ~3–4 g |
| Carbohydrates | ~21–23 g |
| Sugars | ~12–14 g |
| Protein | ~3–4 g |
| Fiber | ~1 g |
| Sodium | ~95–130 mg |
Questions Bakers Often Ask
Can I use natural peanut butter in this recipe?
Yes, but stir it extremely well to reincorporate the oil, and consider chilling the dough longer for cleaner shaping. No-stir creamy peanut butter gives the most reliable texture and spread.
Don’t overbake, and store the cooled cookies in an airtight container at room temperature with a small piece of bread or a brown sugar saver. The bit of moisture helps maintain softness.
Absolutely. Freeze shaped, indented dough balls on a tray, then store in a bag and bake from frozen, adding 1–2 minutes. Baked cookies also freeze well for up to 2 months; thaw at room temperature.
Wrapping Up with a Sweet Note
Peanut Butter and Jelly Cookies are the kind of treat that never fails to make people smile. They’re simple, cozy, and full of personality—perfect for sharing at a gathering or enjoying with a cup of tea on a quiet afternoon. With a few thoughtful steps and a couple of smart tricks, you’ll have cookies that taste like a warm memory and look like they came from a favorite bakery. Here’s to baking something that brings comfort and connection, one jam-filled bite at a time.