Homemade Sandwich Bread: Easy, Soft, and Perfect Loaf Recipe
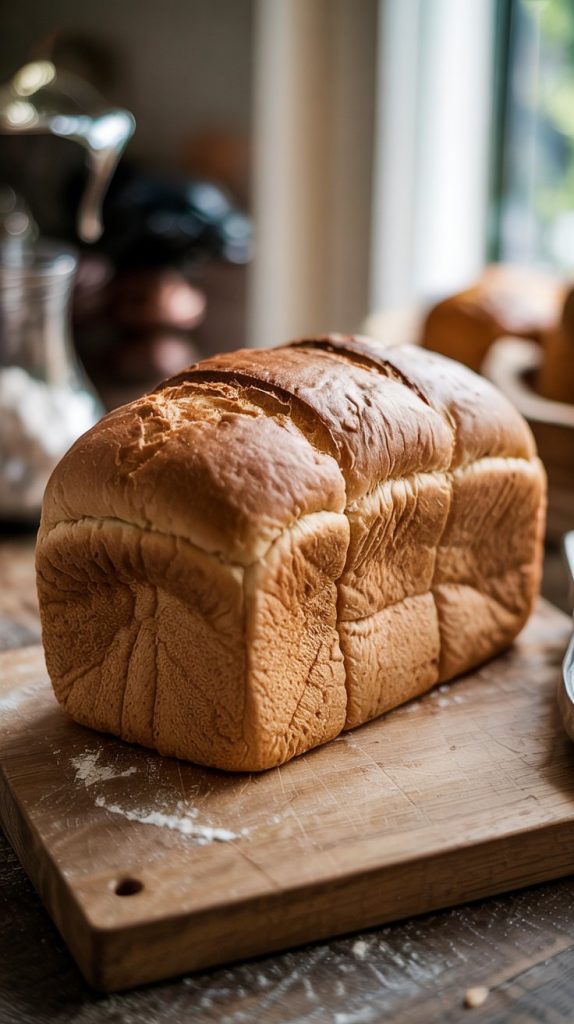
There’s something deeply comforting about the steady rhythm of making bread—the warm water whisked with yeast, the soft dough gathering under your hands, the smell that fills the kitchen as it bakes. This homemade sandwich bread is exactly what you hope for: soft but sturdy, lightly sweet, and wonderfully sliceable. You’ll get a loaf that’s perfect for everything from morning toast to lunchtime sandwiches and late-night grilled cheese. This recipe is designed to be approachable no matter your experience level, with clear steps, flexible options, and tips that help you bake with confidence. By the end, you’ll be pulling a golden loaf from the oven and thinking, “I made that.”
- Why This Homemade Sandwich Bread Belongs in Your Kitchen
- What You’ll Need: Ingredients for a Cozy, Sliceable Loaf
- From Mixing Bowl to Golden Loaf: Step-by-Step Guide
- When It’s Ready: Timing & Preparation Details
- Pro Tips for a Soft, Beautifully Risen Loaf
- Your Loaf at a Glance: Nutritional Snapshot
- Your Questions, Answered: Frequently Asked Queries
- A Warm Send-Off: Final Thoughts
Why This Homemade Sandwich Bread Belongs in Your Kitchen
Homemade sandwich bread is special because it strikes a beautiful balance: it’s tender enough for soft slices, yet substantial enough to hold your favorite fillings without tearing. This loaf brings a gentle, homey flavor that outshines store-bought bread, and it stays soft for days. You’ll love how forgiving the dough is, how delightful the aroma becomes as it bakes, and the sense of accomplishment that comes with slicing into your own loaf. Whether you prefer a butter-rich, slightly sweet crumb or a simpler loaf with olive oil, this recipe adapts easily to your taste and routine. It’s a practical staple and a small everyday luxury all at once.
What You’ll Need: Ingredients for a Cozy, Sliceable Loaf
- Bread flour (3 1/2 cups / about 420 g): The higher protein level builds a strong, elastic gluten network for a soft yet structured crumb and a tall rise.
- Warm water (1 cup / 240 ml, about 105–110°F): Activates the yeast and hydrates the flour; the temperature should feel warm but not hot.
- Milk (1/2 cup / 120 ml, room temp): Adds tenderness and a slightly richer flavor; use whole or 2% for best results. Can substitute water for a leaner loaf.
- Active dry or instant yeast (2 1/4 tsp / 7 g): The leavening that makes your bread rise. Instant yeast can be mixed directly with flour; active dry benefits from proofing.
- Sugar or honey (2 tbsp): Feeds the yeast and lightly sweetens the bread; honey brings a touch of floral warmth.
- Unsalted butter or olive oil (3 tbsp), softened or liquid: Adds richness and keeps the crumb soft for several days.
- Fine sea salt (1 1/2 tsp): Strengthens the dough and balances flavor; don’t skip it.
- Optional: Egg wash (1 egg beaten with 1 tbsp water): For a shiny, golden crust.
- Optional: Milk powder (1–2 tbsp): Enhances tenderness and browning if you want a bakery-style finish.
- Optional: Neutral oil or butter for greasing: Prevents sticking in the bowl and loaf pan.
From Mixing Bowl to Golden Loaf: Step-by-Step Guide
- Proof the yeast (if using active dry): In a small bowl, whisk warm water with sugar or honey until dissolved. Sprinkle the active dry yeast over the top and let it sit 5–10 minutes until foamy. If using instant yeast, skip proofing and add it directly to the flour in the next step.
- Combine dry ingredients: In a large mixing bowl (or the bowl of a stand mixer), add bread flour and salt. If using instant yeast, add it now and whisk to distribute evenly.
- Add liquids and fat: Pour in the foamy yeast mixture (or warm water if using instant yeast), milk, and butter or olive oil. If you’re mixing by hand, use a sturdy spoon until a shaggy dough forms. In a stand mixer, fit the dough hook and mix on low until combined.
- Rest briefly (optional autolyse): Let the shaggy dough rest for 10–15 minutes. This short pause allows flour to hydrate and makes kneading easier and more effective.
- Knead to develop gluten: Knead by hand on a lightly oiled surface for 8–10 minutes, or with a mixer on medium-low for 6–8 minutes. The dough should become smooth, elastic, and slightly tacky, but not sticky. If the dough clings excessively, dust with 1–2 tablespoons of flour; if it’s dry, add a teaspoon of water at a time.
- Check for windowpane: Pinch off a small piece and gently stretch it. If you can pull it into a thin, translucent sheet without tearing, the gluten is well developed. If it tears quickly, knead 1–2 minutes more and check again.
- First rise: Shape the dough into a ball and place it in a lightly greased bowl. Cover with a damp towel or plastic wrap and let it rise in a warm, draft-free spot until doubled in size, about 60–90 minutes. Cooler kitchens may need up to 2 hours.
- Prepare your pan: Grease a 9x5-inch (23x13 cm) loaf pan. For extra insurance against sticking, line with a long strip of parchment that overhangs the sides.
- Shape the loaf: Gently deflate the dough and turn it onto a lightly floured surface. Pat it into a rectangle about 8x12 inches (20x30 cm). Starting from the short end, roll it up firmly, tucking as you go to build tension. Pinch the seam closed and tuck the ends under.
- Second rise: Place the shaped dough seam-side down in the prepared pan. Cover and let rise until the dough crowns about 1 inch above the rim of the pan, 45–75 minutes depending on room temperature. When pressed gently with a fingertip, the dough should spring back slowly and leave a slight indentation—this means it’s ready.
- Preheat the oven: During the final rise, heat the oven to 350°F (175°C). Position a rack in the center. If you like a softer crust, place an empty pan on a lower rack and add a cup of hot water just before baking to create gentle steam.
- Optional glaze: For a glossy top, brush the loaf with egg wash just before baking. For a softer finish, brush with milk instead.
- Bake the bread: Place the loaf in the oven and bake for 30–35 minutes until golden brown. The loaf should sound hollow when tapped on the bottom. An instant-read thermometer inserted in the center should register 190–200°F (88–93°C).
- Cool properly: Remove the bread from the pan after 5–10 minutes and cool on a wire rack. Let it cool at least 1 hour before slicing to set the crumb and prevent squashing.
- Slice and serve: Use a serrated knife to cut even slices. Enjoy fresh or toast lightly to bring out the aroma and gentle sweetness.
When It’s Ready: Timing & Preparation Details
This recipe yields one standard 9x5-inch loaf. While most of your time is hands-off, a bit of planning makes the experience smooth and relaxed.
- Active prep time: About 25–30 minutes (mixing, kneading, shaping).
- First rise: 60–90 minutes, or until doubled (cooler rooms may take up to 2 hours).
- Second rise: 45–75 minutes, depending on temperature and yeast activity.
- Bake time: 30–35 minutes at 350°F (175°C).
- Cooling time: At least 1 hour before slicing; for ultra-neat sandwich slices, cool fully and rest 3–4 hours or overnight.
- Total time: Approximately 3–4 hours, mostly unattended rising.
Storage: Keep at room temperature in a bread bag, paper bag lined with plastic, or wrapped in a clean towel for up to 4 days. For longer storage, slice and freeze in a zip-top bag; toast straight from frozen.
Pro Tips for a Soft, Beautifully Risen Loaf
- Mind the liquid temperature: Aim for 105–110°F (40–43°C). Too hot can weaken or kill yeast; too cool slows the rise.
- Weigh your ingredients if possible: Using grams keeps hydration consistent and helps prevent dense or overly sticky dough.
- Adjust for humidity: Dough that clings stubbornly can take a spoonful or two of extra flour; crumbly dough may need a teaspoon or two of water. Make small adjustments and knead fully before adding more.
- Develop gluten well: Smooth, elastic dough equals better structure and a higher rise. The windowpane test is your friend.
- Don’t rush the rise: Letting dough double at its own pace builds flavor and texture. If your kitchen is cool, create a cozy proofing spot by turning your oven on for 1 minute, then off, and placing the covered bowl inside.
- Shape with tension: Rolling the dough firmly and sealing the seam helps the loaf rise upward rather than spreading outward.
- For an extra-soft crumb: Replace 2–3 tablespoons of water with milk or add 1 tablespoon milk powder. Brushing the warm loaf with melted butter softens the crust.
- Whole wheat variation: Swap up to 50% of the bread flour with white whole wheat flour. You may need 1–2 tablespoons more water and a slightly longer rise.
- Check doneness by temperature: A center temp of 190–200°F ensures a set crumb without overbaking.
- Let it cool completely: It’s tempting to slice early, but waiting helps the crumb set, giving you neat, sandwich-perfect slices.
Your Loaf at a Glance: Nutritional Snapshot
Nutrition will vary based on ingredients and slice thickness, but here’s an approximate guide for one slice when the loaf is cut into 12 slices:
| Per Slice (1/12 loaf) | Approximate Amount |
|---|---|
| Calories | 170–190 |
| Protein | 6–7 g |
| Carbohydrates | 30–34 g |
| Fat | 3–5 g |
| Saturated Fat | 1–2 g |
| Fiber | 1–2 g (more with whole wheat) |
| Sugar | 2–3 g |
| Sodium | 220–260 mg |
These numbers assume bread flour, milk, and butter. If you switch to olive oil or water-only, the profile will shift slightly.
Your Questions, Answered: Frequently Asked Queries
Can I use all-purpose flour instead of bread flour?
Yes. All-purpose flour makes a lovely loaf, though it may rise slightly less due to its lower protein. If using all-purpose, knead thoroughly to build structure, and watch the dough rather than the clock—your rise times may vary.
What’s the difference between instant and active dry yeast here?
Instant yeast can be mixed directly with the dry ingredients and often proofs a little faster. Active dry yeast benefits from proofing in warm water with sugar to wake it up. Both work beautifully; choose what you have and follow the appropriate step.
How do I freeze the bread for later?
Let the loaf cool completely. Slice it, then place slices in a freezer-safe bag, pressing out extra air. Freeze up to 3 months. You can toast slices straight from the freezer or thaw at room temperature for 20–30 minutes.
A Warm Send-Off: Final Thoughts
Baking your own sandwich bread is a simple act that brings a lot of joy—your kitchen fills with warmth and aroma, and your table fills with something you made with care. This loaf is reliable, flexible, and ready for your everyday life, whether that means buttered toast with jam, hearty sandwiches, or grilled cheese on a rainy afternoon. With a few gentle techniques and a little patience, you’ll find that bread baking becomes a comforting rhythm you look forward to. Every slice is a small celebration of home. When you pull this golden loaf from the oven, take a moment to admire what you’ve created—and then share it with someone you love.