Easy Sweet Condensed Milk Bread Recipe | Soft & Fluffy Bread
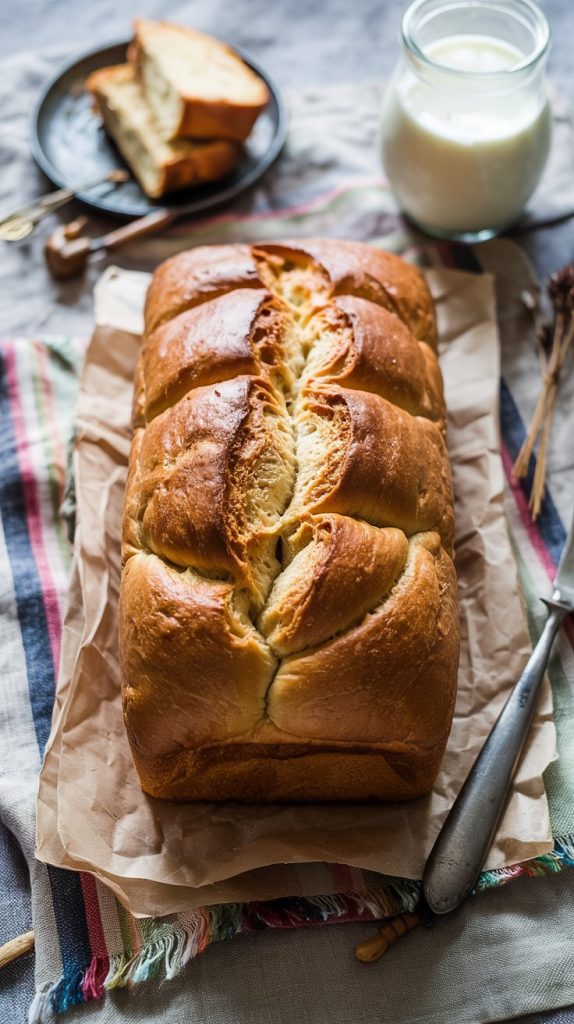
If you’ve ever wanted a loaf that’s soft, slightly sweet, and wonderfully fragrant without a lot of fuss, this Easy Sweet Condensed Milk Bread is for you. It bakes up with a tender crumb and shiny golden top, and it’s just sweet enough to eat plain—no jam or butter required, though both are lovely. Expect a dough that’s gentle to work with, a kitchen that smells like a warm bakery, and slices that toast beautifully the next day. This is the kind of bread you share with family at breakfast or tuck into as an afternoon treat. I’ll guide you through each step so you feel confident and relaxed from the first stir to the final slice.
- Why This Easy Sweet Condensed Milk Bread Will Win You Over
- What You Need: Ingredients for Easy Sweet Condensed Milk Bread
- From Mixing Bowl to Oven: Step-by-Step Guide to Making Easy Sweet Condensed Milk Bread
- Timing & Preparation Details at a Glance
- Pro Tips to Make This Loaf Shine
- Your Quick Nutritional Snapshot
- Frequently Asked Questions
- A Warm Send-Off: Final Thoughts
Why This Easy Sweet Condensed Milk Bread Will Win You Over
Some breads are special because of their simplicity, and this is one of them. Sweetened condensed milk adds richness and a nostalgic, creamy sweetness—without making the loaf heavy. It blends with warm milk and butter to create a dough that’s soft yet structured, resulting in a pillowy interior and a delicate, golden crust.
Beyond flavor, this recipe is all about ease. The steps are straightforward, the ingredients are familiar, and you can mix by hand or with a stand mixer. It’s ideal for beginner bakers and delightfully gratifying for seasoned ones. Whether you serve it warm from the oven or toast it the next day, it’s the kind of bread that feels like a hug.
What You Need: Ingredients for Easy Sweet Condensed Milk Bread
- Bread flour (3 1/2 cups / 420 g): The higher protein helps build structure for a soft, stretchy crumb.
- Sweetened condensed milk (1/2 cup / about 160 g): Adds sweetness, moisture, and an almost caramel-like richness.
- Whole milk, warmed (3/4 cup / 180 ml): Provides hydration and softness; warming helps activate the yeast.
- Unsalted butter, softened (4 tbsp / 57 g): Enriches the dough and keeps the crumb tender.
- Granulated sugar (2 tbsp / 25 g): Lightly boosts sweetness and supports yeast activity.
- Large egg (1): Contributes richness, color, and a bit of structure.
- Instant yeast (2 tsp) or active dry yeast (2 1/4 tsp): Leavens the bread and creates a soft, airy rise.
- Fine salt (1 tsp): Balances sweetness and strengthens the dough’s gluten network.
- Vanilla extract (1 tsp, optional): Adds a gentle, bakery-style aroma.
- Egg wash (1 egg + 1 tbsp milk, optional): For a glossy, golden top.
- Glaze (1 tbsp butter + 1 tbsp condensed milk, optional): Brushed on after baking for a shiny, lightly sweet finish.
Tip: If you can, weigh your ingredients. Flour especially can vary by volume, and accurate measurements mean predictable results.
From Mixing Bowl to Oven: Step-by-Step Guide to Making Easy Sweet Condensed Milk Bread
- Warm the milk: Heat the whole milk until it’s warm to the touch, about 100–110°F (38–43°C). Do not exceed 115°F (46°C) or the heat may harm the yeast.
- Mix the wet base: In a large bowl, whisk together the warm milk, sweetened condensed milk, granulated sugar, and vanilla (if using). Stir in the yeast. If using instant yeast, you can add it directly; if using active dry, let it sit for 5–10 minutes until slightly foamy.
- Combine and add the egg: Whisk the egg into the milk mixture until smooth. This is your enriched base.
- Add dry ingredients: In a separate bowl, whisk the bread flour and salt. Add about two-thirds of the flour mixture to the wet ingredients and stir until a shaggy dough forms.
- Bring the dough together: Add the remaining flour a little at a time, mixing until the dough pulls from the sides of the bowl. It should be soft and slightly tacky, not dry.
- Knead: Knead by hand on a lightly floured surface or with a stand mixer (dough hook). By mixer, knead 8–10 minutes on medium-low; by hand, 10–12 minutes. Add the softened butter in small pieces during the last few minutes, kneading until fully incorporated. The dough should feel smooth and elastic.
- Check for readiness: Do a quick “windowpane” test: Stretch a small piece of dough. If you can pull it gently until thin and slightly translucent without tearing, you’re ready. If it tears quickly, knead another minute or two.
- First rise: Shape the dough into a ball and place it in a lightly greased bowl. Cover and let rise in a warm, draft-free spot until doubled, about 60–90 minutes, depending on room temperature.
- Prepare the pan: Grease a 9x5-inch (23x13 cm) loaf pan or line it with parchment for easy removal.
- Shape the loaf: For a pretty, pull-apart look, divide the dough into 3–4 equal pieces. Roll each into a 6x8-inch (15x20 cm) rectangle, then roll up from the short side into tight logs. Arrange the logs seam-side down in the pan. Alternatively, shape into a single smooth loaf.
- Second rise: Cover and let the shaped dough rise until puffy and about 1 inch (2.5 cm) above the rim, 45–75 minutes. The dough should spring back slowly when lightly pressed.
- Preheat and glaze: Near the end of the second rise, preheat the oven to 350°F (175°C). Brush the top with egg wash if you’d like extra shine.
- Bake: Bake for 25–30 minutes until the top is deep golden. The internal temperature should read 190–195°F (88–90°C), and the loaf should sound hollow when tapped on the bottom.
- Optional finish: While still hot, brush the top with a quick glaze made from melted butter and a spoonful of sweetened condensed milk. It adds a gentle sheen and a whisper of sweetness.
- Cool and slice: Cool in the pan for 10–15 minutes, then transfer to a wire rack. Let cool at least 45 minutes before slicing so the crumb can set. Serve warm, or toast slices later for an extra-cozy treat.
Tip: If the loaf is browning too fast toward the end, tent loosely with foil and continue baking.
Timing & Preparation Details at a Glance
Here’s a helpful timeline so you can plan your bake with confidence:
- Active prep: 20–25 minutes (mixing, kneading, shaping)
- First rise: 60–90 minutes
- Shaping: 10–15 minutes
- Second rise: 45–75 minutes
- Bake time: 25–30 minutes
- Cooling: 45–60 minutes
From start to finish, you’re looking at roughly 3.5 to 4.5 hours, most of it hands-off. The bread is ready to enjoy when it has cooled enough to slice without squashing the crumb—warm is lovely, but let it rest so all that tenderness fully develops.
Pro Tips to Make This Loaf Shine
- Mind the milk temperature: Warm is good; hot is not. Staying in the 100–110°F (38–43°C) range keeps yeast happy.
- Resist extra flour: The dough should be slightly tacky. Too much flour leads to a drier loaf.
- Knead to smooth elasticity: Proper gluten development gives you that cloudlike crumb.
- Watch the dough, not just the clock: Rise times vary with temperature and humidity. Look for “doubled” and “puffy” cues.
- Use weight if possible: Weighing flour (420 g) keeps the dough consistent, especially in drier or more humid climates.
- Control browning: Egg wash gives attractive color; foil helps if the top darkens early.
- Shape for pull-apart slices: Rolling and placing multiple logs creates gorgeous layers and easy-to-tear pieces.
- Check doneness with a thermometer: 190–195°F (88–90°C) in the center is the sweet spot.
- Storage: Once cool, store airtight at room temperature up to 3 days. It toasts beautifully on day two and three.
- Freezer-friendly: Slice, wrap well, and freeze up to 2 months. Toast from frozen for instant comfort.
Your Quick Nutritional Snapshot
Below is an estimate per slice if you cut the loaf into 12 servings. Values can vary based on brands and exact measurements.
| Serving size | 1 slice (1/12 loaf) |
| Calories | ~235 |
| Carbohydrates | ~37 g |
| Protein | ~6 g |
| Fat | ~7 g |
| Fiber | ~1 g |
| Sugars | ~10–12 g |
| Sodium | ~200–250 mg |
Note: The optional butter–condensed milk glaze will add a small amount of extra calories and fat.
Frequently Asked Questions
Can I use all-purpose flour instead of bread flour?
Yes. All-purpose flour will yield a slightly less chewy, but still very tender loaf. Start with the same amount by weight (420 g), and watch hydration—if the dough feels too sticky, add a tablespoon of flour at a time. Knead just to smooth elasticity; AP flour can over-knead more easily.
How should I store and freeze this bread?
Cool completely, then keep it in an airtight bag or container at room temperature for up to 3 days. For freezing, slice the loaf, wrap tightly, and freeze up to 2 months. Reheat slices in the toaster or warm in a low oven straight from frozen for fresh-baked flavor.
Can I make it without eggs?
Yes. The loaf will be slightly less rich, but still soft. Replace the egg with 3 tablespoons (45 ml) milk plus 1 tablespoon (15 ml) neutral oil, or use 1/4 cup (60 g) unsweetened applesauce. Keep an eye on dough texture and adjust with a teaspoon or two of flour if needed.
A Warm Send-Off: Final Thoughts
Making bread at home has a way of slowing the day down and filling it with something special. This Easy Sweet Condensed Milk Bread is gentle to learn, forgiving to bake, and generous in flavor—perfect for sharing at breakfast or savoring as a quiet treat. I hope you find the same comfort in its soft crumb and golden top that so many bakers do. May your kitchen smell like a cozy bakery, and may every slice bring people a little closer to your table.