Salted Caramel Cheesecake Recipe: Creamy, Rich & Easy Guide!
There’s something wonderfully comforting about a homemade Salted Caramel Cheesecake—silky cream cheese filling, buttery graham crust, and a glossy ribbon of salted caramel that drips in all the right places. This is the kind of dessert that feels celebratory but doesn’t demand perfection: a gentle jiggle, a bit of patience, and a generous drizzle are all you need. In this recipe, you’ll learn how to make a beautifully smooth baked cheesecake that’s deeply flavored with caramel, balanced with a kiss of sea salt, and crowned with a shiny caramel topping. Expect step-by-step guidance, friendly tips, and simple techniques that help you create bakery-level results right at home.
What Makes This Salted Caramel Cheesecake Irresistible
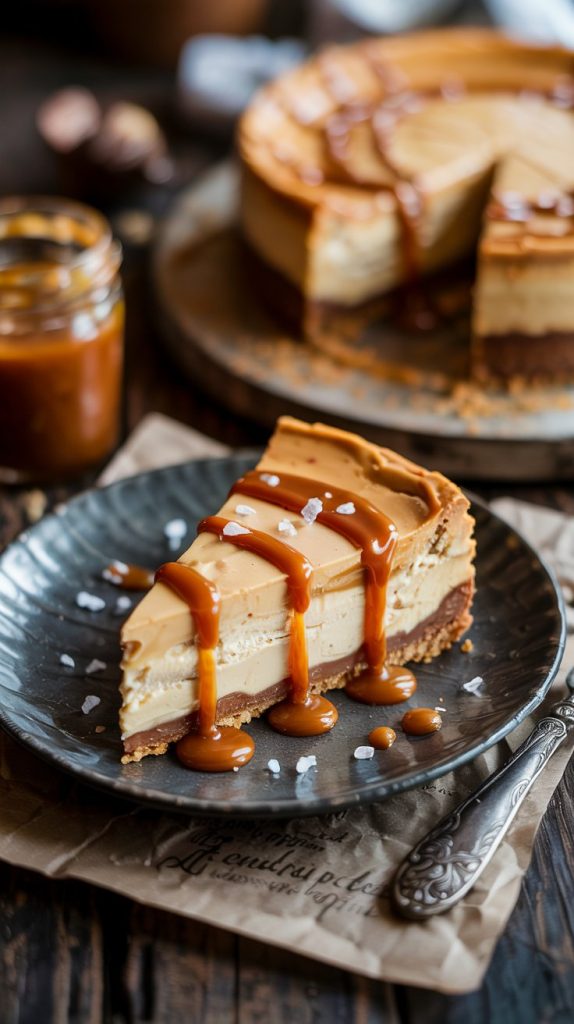
Imagine a forkful that gives you creamy, luscious cheesecake with caramel notes running all the way through—then a buttery, slightly salty crunch from the crust, and finally, that glossy, sweet-salty sauce that keeps you going back for another bite. This cheesecake delivers layered textures and flavors without being fussy. The caramel is homemade (and easier than you think), the filling is ultra-smooth, and the finish is beautiful enough for any special occasion. Best of all, the recipe is designed to be approachable, with clear steps and make-ahead options so you can bake calmly and enjoy the process.
What You’ll Need: Ingredients for Salted Caramel Cheesecake
- Graham cracker crumbs (2 cups, about 200–220 g) — The base of the crust; provides a toasty, buttery foundation.
- Light brown sugar (2 tablespoons) — Adds a caramel-like sweetness and helps the crust hold together.
- Fine sea salt (1/4 teaspoon) — Balances sweetness and enhances flavor from the ground up.
- Unsalted butter, melted (7 tablespoons) — Binds the crumbs and bakes into a crisp, golden crust.
- Granulated sugar (1 cup) — for the caramel — The star of your sauce; melts and caramelizes into that deep amber flavor.
- Water (1/4 cup) — for the caramel — Helps the sugar dissolve evenly for a smooth caramel start.
- Heavy cream (1/2 cup), warmed — Enriches the caramel, turning it velvety and pourable.
- Unsalted butter (6 tablespoons), room temp — Gives the caramel gloss and body, with a luxurious finish.
- Vanilla extract (2 teaspoons) — Adds warmth and rounds out the caramel’s complexity.
- Flaky or fine sea salt (3/4 to 1 teaspoon, to taste) — The “salted” moment that balances sweetness and intensifies flavor.
- Cream cheese, full-fat (32 ounces/900 g), room temp — The heart of the cheesecake; use full-fat for the creamiest texture.
- Granulated sugar (1 cup) — for the filling — Sweetens and softens the tang of cream cheese.
- Sour cream (3/4 cup), room temp — Adds silkiness and a gentle tang to the filling.
- Large eggs (4), room temp — Bind the batter and set the custardy texture.
- All-purpose flour or cornstarch (1 tablespoon) — A tiny bit of structure to help prevent cracks.
- Vanilla extract (2 teaspoons) — for the filling — Complements the caramel and adds depth.
- Lemon juice (1 teaspoon, optional) — A whisper of brightness that lifts the richness.
- Extra flaky sea salt, for topping — A final sparkle that signals the salted caramel experience.
How to Make It: Step-by-Step Salted Caramel Cheesecake
- Prepare your pan and oven. Heat the oven to 325°F (160°C). Wrap the outside of a 9-inch springform pan with two layers of heavy-duty foil to keep water out during baking. Lightly grease the inside and line the bottom with parchment for easy release.
- Build the crust. In a bowl, stir together graham crumbs, brown sugar, and salt. Add melted butter and mix until the crumbs feel like damp sand. Press firmly into the bottom (and about 1 inch up the sides) of the pan. Use the bottom of a measuring cup to compact it evenly. Bake for 10 minutes, then set aside to cool slightly.
- Make the salted caramel. In a medium, light-colored saucepan, combine granulated sugar and water. Cook over medium heat, swirling (not stirring) occasionally, until the mixture turns a deep amber, 8–12 minutes. Remove from heat and carefully whisk in warmed heavy cream (it will bubble vigorously). Whisk in butter until smooth, then add vanilla and salt. Set aside to cool to a pourable but thick consistency. Tip: If it seizes, return to low heat and whisk gently until smooth.
- Lower the oven temp if needed. Ensure the oven is still at 325°F (160°C). Boil a kettle of water for the water bath.
- Mix the cheesecake batter. In a large bowl with a mixer on medium-low, beat the room-temperature cream cheese with the sugar until completely smooth and lump-free, 2–3 minutes. Scrape the bowl. Add sour cream, vanilla, and lemon juice (if using); mix until combined. Blend in flour or cornstarch. Beat in the eggs one at a time on low speed, just until incorporated. Do not overmix; too much air can cause cracks.
- Flavor with caramel. Stir in about 1/3 cup of the cooled salted caramel to the batter for a caramel-kissed filling. Keep the rest for swirling and topping.
- Assemble and swirl. Pour the batter over the baked crust. Dollop 3–4 tablespoons of caramel over the surface and marble it with a skewer or butter knife. Avoid going too deep; keep the swirl near the top for a pretty finish.
- Set up the water bath. Place the foil-wrapped pan in a large roasting pan. Pour hot water into the roasting pan until it reaches about halfway up the sides of the springform. This gentle environment helps prevent cracks and keeps the texture custardy.
- Bake. Bake for 60–75 minutes. The edges should be set, and the center should still wobble slightly when you jiggle the pan. Don’t wait for the center to be firm—it will finish setting as it cools.
- Cool gradually. Turn off the oven, crack the door, and let the cheesecake rest inside for 45–60 minutes. Then remove from the water bath, discard foil, and cool on a rack for another hour.
- Chill thoroughly. Cover and refrigerate for at least 6 hours, preferably overnight, for the best texture and clean slices.
- Finish with caramel. Just before serving, loosen the springform ring and transfer the cheesecake to a serving plate. Warm the remaining caramel gently until pourable and spread a glossy layer over the top. Let it drip down the sides if you like. Sprinkle with flaky sea salt to taste.
- Slice and serve. For neat slices, warm a sharp knife under hot water, wipe dry, and cut. Repeat between slices. Enjoy every creamy, salted-sweet bite.
Timing and Prep at a Glance
Here’s the rhythm of this recipe so you can plan with ease:
- Prep time: About 40 minutes (crust, caramel, and batter)
- Bake time: 60–75 minutes
- Gradual cool: 1.5–2 hours total (in oven, then on rack)
- Chill time: 6–12 hours (overnight recommended)
- Total: Plan for a leisurely day of baking plus an overnight rest
The cheesecake is ready to enjoy after a full chill, which allows the texture to settle into its signature creaminess. If you’re serving for a special event, make it the day before so all you do on the day is pour on the caramel, add flaky salt, and slice.
Pro Tips to Nail It
- Start with truly room-temperature ingredients. Cold cream cheese resists smoothing, leading to lumps. Let the cream cheese, sour cream, and eggs rest at room temperature for 45–60 minutes.
- Go low and slow with mixing. Use low to medium-low speed, and scrape the bowl often. Less air in the batter means fewer cracks and a silkier bite.
- Color is flavor in caramel. Aim for a deep amber, not light gold. Too pale equals bland. Too dark tastes bitter. Pull from heat just before your perfect amber because it darkens off-heat.
- Keep the water out. Double-wrap your pan in heavy-duty foil, or place the springform inside a slightly larger cake pan before setting it in the water bath for extra insurance.
- Jiggle test for doneness. Look for set edges with a 2–3 inch jiggly center. Overbaked cheesecake becomes dry and can crack.
- Fixing a crack. If a crack appears, don’t stress. A gentle layer of caramel on top hides it beautifully, and the flavor is unaffected.
- Make-ahead magic. Bake the day before. Add caramel just before serving for the glossiest finish. Leftovers keep well, too.
- Salt thoughtfully. Start with 3/4 teaspoon in the caramel and taste. The final sprinkle of flaky salt on top delivers a perfect sweet-salty contrast without overpowering.
- Clean slices every time. Heat your knife with hot water and wipe between cuts. It’s a small step that yields picture-perfect pieces.
Your Nutritional Snapshot
These values are approximate and will vary based on the exact ingredients and portion sizes. Calculated for 12 slices:
- Calories: ~670 per slice
- Protein: ~7–8 g
- Carbohydrates: ~55 g
- Total Fat: ~45 g
- Saturated Fat: ~27 g
- Sugar: ~43 g
- Fiber: ~1 g
- Sodium: ~420 mg
For a lighter touch, you can cut smaller slices or serve with fresh berries to add brightness and balance.
Your Top Questions, Answered
Do I have to use a water bath?
Technically no, but it’s highly recommended. A water bath creates a humid, gentle heat that helps the cheesecake cook evenly and reduces cracking. If you prefer to skip it, bake at 300°F (150°C) and place a pan of hot water on the rack below to add moisture. Keep a close eye on doneness and avoid overbaking.
How can I prevent my cheesecake from cracking?
Several small habits help: use room-temperature dairy, mix on low speed to avoid excess air, bake in a water bath, and cool gradually with the oven door cracked. Also, stop baking when the center still wobbles slightly—cheesecake firms up as it cools.
How long does it keep, and can I freeze it?
Refrigerated, the cheesecake keeps well for 4–5 days. For freezing, chill the baked cheesecake completely, skip the caramel topping, wrap tightly, and freeze for up to 2 months. Thaw overnight in the fridge and add fresh caramel before serving for best texture and shine.
A Sweet Closing Note
There’s a special kind of joy in setting a homemade cheesecake on the table and watching faces light up. This Salted Caramel Cheesecake has that effect—elegant yet cozy, indulgent but balanced, and deeply satisfying from first glance to last bite. With a little care and a few simple techniques, you’ll create a dessert that tastes like a celebration all on its own. Whether you share it at a holiday dinner, a birthday, or a quiet weekend at home, I hope it brings warmth to your kitchen and a moment of sweet togetherness to your table. Happy baking—you’ve got this.