Hawaiian Banana Bread Recipe: Moist, Pineapple Coconut Loaf!
If you’ve ever wished your favorite banana bread could take a sunny vacation, this Hawaiian Banana Bread is exactly that—a tropical twist on a classic loaf. It’s lush and moist, with ripe bananas, juicy pineapple, toasted coconut, and buttery macadamia nuts in every slice. The aroma alone is enough to make neighbors wander over, and the first bite delivers a gentle whisper of island flavor without being overly sweet.
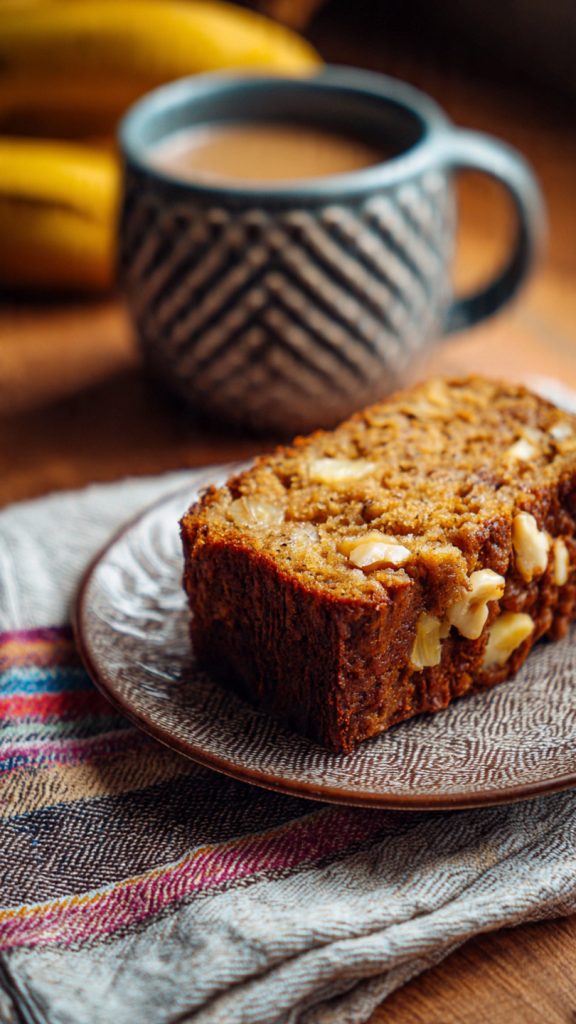
Expect a loaf that’s tender and fragrant, with a golden crust and a soft crumb that stays moist for days. The coconut adds a delicate chew, the pineapple brings brightness, and the bananas anchor everything with familiar comfort. Whether you’re baking for brunch, gifting a friend, or simply treating yourself, this bread is a little edible getaway—simple to make, joyful to share, and just adventurous enough to feel special.
- Why This Hawaiian Banana Bread Belongs in Your Kitchen
- What You’ll Need: Ingredients for Hawaiian Banana Bread
- How to Make Hawaiian Banana Bread, Step by Step
- Baking Time, Prep, and When It’s Ready
- Pro Tips to Make It Shine
- Nutritional Snapshot at a Glance
- Your Questions, Answered
- Final Notes to Send You Off Smiling
Why This Hawaiian Banana Bread Belongs in Your Kitchen
This recipe is all about balance—homey banana bread bolstered by tropical accents that don’t overpower. You’ll taste warm spices and vanilla, then a burst of pineapple, and finally the rich, toasty note of coconut and macadamias. It slices cleanly, holds up beautifully for toasting, and is even better the next day. It’s make-ahead friendly and freezer-friendly, making it just as practical as it is fun.
Above all, it’s forgiving. Slightly overripe bananas? Perfect. A few pantry swaps? No problem. With a few smart techniques and gentle mixing, you’ll get a lofty, tender crumb that feels bakery-worthy without any fuss.
What You’ll Need: Ingredients for Hawaiian Banana Bread
- All-purpose flour (2 cups / about 250 g) — The structure of the loaf; enough to lift and shape without turning dense.
- Light brown sugar (3/4 cup / about 150 g) — Adds sweetness and a touch of molasses flavor for depth and moisture.
- Granulated sugar (1/4 cup / about 50 g) — Brightens sweetness and helps the crust caramelize slightly.
- Baking soda (1 teaspoon) — Works with the acidic ingredients to create lift.
- Baking powder (1 teaspoon) — Provides extra rise for an airy crumb.
- Kosher salt (1/2 teaspoon) — Balances sweetness and sharpens all the flavors.
- Ground cinnamon (1 teaspoon) — Adds warmth and familiar banana-bread aroma.
- Ground nutmeg (1/4 teaspoon) — A gentle spice that enhances the banana and pineapple notes.
- Neutral oil (1/2 cup / 120 ml) — Keeps the loaf exceptionally moist and tender.
- Eggs (2 large) — Bind the batter and add richness and structure.
- Very ripe bananas (3 medium, mashed; about 1 1/2 cups / 360 g) — The soul of the bread; the riper, the sweeter and more flavorful.
- Greek yogurt or sour cream (1/2 cup / 120 g) — A touch of tang and moisture for a plush crumb.
- Pure vanilla extract (1 1/2 teaspoons) — Rounds out the sweetness and enhances the tropical flavors.
- Crushed pineapple, well-drained (1 cup; from an 8 oz can) — Adds juicy brightness; drain thoroughly so the crumb stays light.
- Sweetened shredded coconut (1/2 cup / about 50 g) — A soft chew and coconut fragrance throughout the loaf.
- Chopped macadamia nuts (1/2 cup / about 65 g; optional) — Buttery crunch and authentic “island” personality.
- Lime zest (1 teaspoon; optional) — A zesty lift that makes the flavors pop.
- Dark rum (1 tablespoon; optional) — A subtle, round note that complements banana and pineapple.
- Turbinado/Demerara sugar (1–2 tablespoons; optional topping) — For a crunchy, sparkling crust.
- Unsalted butter or nonstick spray (for the pan) — Ensures easy release and tidy slices.
How to Make Hawaiian Banana Bread, Step by Step
- Prep the pan and oven. Heat the oven to 350°F (175°C). Grease a 9×5-inch loaf pan with butter or nonstick spray. For extra insurance, line with a parchment sling, leaving overhang for easy lifting.
- Drain the pineapple. Place crushed pineapple in a fine sieve and press firmly to remove excess juice. Too much liquid can weigh down the loaf. If you like, reserve 1–2 teaspoons of juice to whisk into the wet ingredients for subtle flavor.
- Toast the coconut and nuts (optional but recommended). In a dry skillet over medium heat, toast the shredded coconut and macadamias separately until lightly golden and fragrant, 2–4 minutes. Cool briefly. Toasting intensifies flavor and adds crunch.
- Whisk the dry ingredients. In a medium bowl, combine flour, baking soda, baking powder, salt, cinnamon, and nutmeg. Whisk to evenly distribute leaveners and spices.
- Mash the bananas. In a large bowl, mash the ripe bananas until mostly smooth with a few small lumps. The lumps bake into pockets of banana goodness.
- Combine the wet mixture. To the bananas, whisk in brown sugar, granulated sugar, oil, eggs, yogurt or sour cream, vanilla, and optional rum and lime zest. Mix until cohesive and glossy.
- Bring the wet and dry together. Sprinkle the dry mixture over the wet. Using a spatula, gently fold just until you see a few streaks of flour. Avoid overmixing—this keeps the crumb tender.
- Fold in the add-ins. Add the drained crushed pineapple, coconut, and macadamias. Fold just until evenly distributed. The batter will be thick and scoopable.
- Fill the pan. Scrape the batter into the prepared loaf pan and smooth the top. Sprinkle with a little coconut and turbinado sugar for a lightly crackly, golden crust.
- Bake. Place the pan on the center rack and bake for 55–65 minutes. Begin checking at 50 minutes. A tester inserted in the center should come out with a few moist crumbs but no wet batter. If the top is browning too quickly, tent loosely with foil.
- Cool strategically. Let the loaf cool in the pan on a rack for 10–15 minutes to set, then lift it out and cool completely. This helps the crumb finish setting and prevents gumminess.
- Slice and enjoy. Use a serrated knife for clean slices. Serve slightly warm, at room temp, or toasted with a pat of butter or a swipe of cream cheese.
Baking Time, Prep, and When It’s Ready
This is a straightforward bake with a few steps that elevate the result. The real key is giving it a bit of cooling time—your patience will be rewarded with tidier slices and a beautifully even crumb.
| Prep Time | 15–20 minutes (includes draining pineapple and optional toasting) |
| Bake Time | 55–65 minutes at 350°F (175°C) |
| Cooling | 10–15 minutes in pan, then cool on rack 45–60 minutes |
| Total Time | About 1 hour 45 minutes |
| Servings | 1 loaf (about 10–12 slices) |
When it’s ready: The top will be deep golden, slightly domed, and a toothpick should come out mostly clean. The loaf should feel springy when lightly pressed. Resist slicing right away; cooling lets the crumb set so each slice is moist, not mushy.
Pro Tips to Make It Shine
- Use very ripe bananas. Deeply speckled or even blackened peels are ideal. Riper bananas bring sweetness and flavor without extra sugar.
- Drain pineapple thoroughly. Press out moisture so the loaf rises tall, not dense. If using fresh pineapple, chop finely and blot with paper towels.
- Don’t overmix. Stop folding as soon as you no longer see dry streaks. Overmixing develops gluten and can make the bread tough.
- Tent with foil if needed. If the top browns fast, loosely cover after the 35–40 minute mark and continue baking until the center tests done.
- Measure flour accurately. Spoon flour into the cup and level, or weigh it (about 250 g). Too much flour equals a dry loaf.
- Toast coconut and nuts. A quick toast amplifies flavor and crunch. Let them cool before folding into the batter.
- Customize wisely. No macadamias? Use pecans or walnuts. Prefer unsweetened coconut? Add 1–2 extra tablespoons sugar to compensate.
- Let it rest overnight. Wrapped at room temperature, the flavors meld and the crumb becomes extra tender by day two.
- Freezer-friendly. Slice, wrap individually, and freeze. Reheat in a toaster or warm oven for fresh-baked flavor anytime.
Nutritional Snapshot at a Glance
Nutrition will vary with exact ingredients and portion size, but here’s an approximate per-slice breakdown assuming 12 slices and inclusion of coconut and macadamias:
| Calories | ~340 |
| Protein | ~5 g |
| Total Carbohydrates | ~48 g |
| Total Fat | ~16 g |
| Saturated Fat | ~5 g |
| Fiber | ~3 g |
| Total Sugars | ~24 g |
| Sodium | ~230 mg |
For a lighter loaf, skip the macadamias and use unsweetened coconut; for a richer loaf, keep both and enjoy the extra texture and flavor.
Your Questions, Answered
Can I make this gluten-free?
Yes. Use a 1:1 gluten-free all-purpose flour blend that includes xanthan gum. Let the batter rest 10 minutes before baking to hydrate the flour. The loaf may be slightly more delicate, but it bakes up beautifully.
Can I use frozen bananas?
Absolutely. Thaw them in a bowl and include the flavorful juices in your mash. If the bananas seem excessively watery, reduce the yogurt by 1–2 tablespoons to keep the batter balanced.
How should I store and freeze the bread?
Cool completely, then wrap tightly. It keeps at room temperature for up to 3 days. For longer storage, slice, wrap individually, and freeze up to 3 months. Thaw at room temp or reheat in a toaster oven until warmed through.
Final Notes to Send You Off Smiling
There’s a special kind of comfort in banana bread—the kind that makes a kitchen feel like home. This Hawaiian-inspired version carries that cozy feeling with a bright, tropical twist, so every slice tastes like sunshine. It’s the loaf you bake for a weekend breakfast, pack for a picnic, or share with a neighbor just because.
Most of all, it’s the kind of recipe that invites you to play: a handful of toasted nuts here, a little lime zest there, maybe a pinch of coconut on top. However you make it your own, you’ll end up with something irresistible. Warm bread, shared smiles, and a house that smells amazing—what more could you ask from one pan and a bowl?