Best Banana Bread Recipe: Moist, Simple & Perfect Every Time
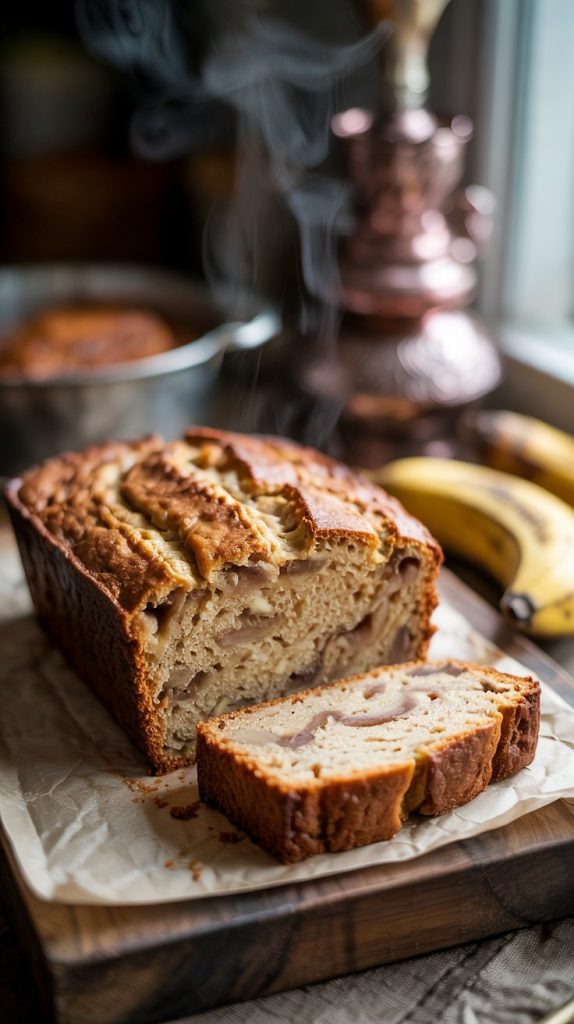
There’s something undeniably comforting about a warm loaf of banana bread cooling on the counter. The kitchen fills with a sweet, cozy aroma, and you know you’re moments away from a tender slice that tastes like home. This recipe gives you a soft, moist crumb with a gentle banana flavor and just the right amount of sweetness—classic, but with room for your personal twist. Whether you’re baking for a rainy afternoon, a brunch table, or a friend who needs a pick-me-up, this banana bread delivers every time. Expect clear steps, simple ingredients, and a forgiving process that’s perfect for both new bakers and seasoned home cooks.
What Makes This Banana Bread Irresistible
This banana bread balances comfort and reliability with a few thoughtful touches that elevate it. Mashed, extra-ripe bananas create a naturally moist crumb, while a splash of vanilla and a pinch of cinnamon warm up the flavor without overpowering the fruit. The method keeps mixing simple and gentle so the loaf stays tender rather than dense. You’ll also find flexible options—like using yogurt or sour cream for richer moisture and nuts or chocolate chips for texture—so you can adapt it to whatever you’re craving. It’s the kind of recipe that becomes a house favorite because it never fails and always feels special.
Gather Your Banana Bread Ingredients
- 3 large very ripe bananas (about 1 1/2 cups mashed) — The star of the show; their sweetness and moisture define the flavor and texture.
- 1/2 cup unsalted butter, melted and slightly cooled — Adds richness and a tender crumb; melted butter makes mixing easy.
- 3/4 cup granulated sugar — Provides sweetness and helps with browning; balanced so the banana flavor still shines.
- 1/4 cup light brown sugar, packed — A hint of caramel depth and extra moisture from molasses.
- 2 large eggs, room temperature — Bind the loaf and contribute structure and moisture.
- 1 teaspoon pure vanilla extract — Rounds out the flavor and complements the banana beautifully.
- 1/2 cup plain Greek yogurt or sour cream — Keeps the crumb plush and tender; a gentle tang that balances sweetness.
- 1 1/2 cups all-purpose flour — The base structure; just enough to hold everything together without getting dry.
- 1 teaspoon baking soda — The primary leavener; reacts with the banana’s acidity and the yogurt/sour cream to lift the batter.
- 1/2 teaspoon baking powder — Gives a little extra rise for a taller, lighter loaf.
- 1/2 teaspoon fine sea salt — Enhances all the flavors and balances the sweetness.
- 1/2 teaspoon ground cinnamon (optional) — A subtle warmth that complements banana without stealing the spotlight.
- 1/2 cup chopped walnuts or pecans (optional) — Adds nutty crunch and richness; toast them for deeper flavor.
- 1/2 cup chocolate chips (optional) — For chocolate lovers; turns a classic loaf into a treat without fuss.
- Nonstick spray or butter, for the pan — Ensures an easy release so your loaf comes out cleanly.
Your Step-by-Step Banana Bread Game Plan
- Preheat and prepare the pan. Set your oven to 350°F (175°C). Grease a 9x5-inch loaf pan and line it with a parchment sling that overhangs the long sides. The parchment makes it easy to lift out the loaf without breaking.
- Mash the bananas. In a large mixing bowl, mash the bananas with a fork until mostly smooth with a few small lumps. You’re aiming for about 1 1/2 cups. Ripe bananas with lots of brown spots are ideal—they’re sweeter and mash more easily.
- Mix the wet ingredients. Whisk in the melted, slightly cooled butter, granulated sugar, and brown sugar until combined. Add the eggs one at a time, whisking thoroughly after each. Stir in the vanilla and the yogurt (or sour cream) until the mixture looks cohesive and creamy.
- Combine the dry ingredients. In a separate bowl, whisk together the flour, baking soda, baking powder, salt, and cinnamon (if using). This ensures the leaveners are evenly distributed and prevents streaks of baking soda in the loaf.
- Bring it together gently. Sprinkle the dry mixture over the wet mixture and fold with a rubber spatula just until no visible streaks of flour remain. If you’re adding nuts or chocolate chips, fold them in now. A light hand avoids overmixing, which can make banana bread tough.
- Fill the pan and smooth. Scrape the batter into the prepared pan and smooth the top with the spatula. For a bakery-style look, you can lightly score a shallow line down the center with a butter knife to encourage an even crack as it bakes.
- Bake. Place the pan on the middle rack and bake for 55 to 65 minutes. The top should be deeply golden, and a toothpick inserted into the center should come out mostly clean with just a few moist crumbs. If the top is browning too quickly, tent it loosely with foil during the last 15 minutes.
- Check for doneness. Beyond the toothpick test, you can use an instant-read thermometer: the center should register about 200°F (93°C) when done. This extra check helps avoid underbaked middles.
- Cool with care. Let the loaf rest in the pan on a wire rack for 10 to 15 minutes to set the structure, then use the parchment to lift it out. Cool for at least 45 minutes before slicing so the crumb stays moist and doesn’t squish.
- Slice and enjoy. Use a serrated knife for neat slices. Serve warm or at room temperature, plain or with a pat of butter, a drizzle of honey, or a smear of cream cheese.
Prep, Bake, and Rest: Timing at a Glance
- Prep time: 15 to 20 minutes (mashing, mixing, and lining the pan)
- Bake time: 55 to 65 minutes at 350°F (175°C)
- Cooling/rest time: 1 hour (minimum; the loaf continues to set as it cools)
You can certainly sneak a warm slice after 30 to 40 minutes of cooling, but waiting the full hour rewards you with clean slices and a perfectly set crumb. The banana flavor actually deepens overnight, so it’s excellent the next day too.
Pro Tips for Banana Bread Success
- Choose very ripe bananas. Look for bananas heavily speckled or mostly brown. The darker they are, the sweeter the loaf and the easier they mash.
- Measure flour lightly. If not using a scale, fluff the flour, spoon it into your cup, and level it off. Packed flour makes dense bread.
- Keep butter warm, not hot. If the butter is too hot, it can scramble the eggs or seize the yogurt. Aim for melted and just slightly warm to the touch.
- Don’t overmix. Stir just until the dry streaks vanish. Overmixing develops gluten and can make the loaf tough or rubbery.
- Customize thoughtfully. Nuts add crunch; chocolate chips add sweetness; dried fruit adds chew. Keep mix-ins to about 1 cup total so the loaf bakes evenly.
- Tent if needed. If the top browns early, a loose foil tent protects the crust while the center finishes baking.
- Let it cool before slicing. It’s tempting to slice right away, but a short rest sets the crumb. Use a serrated knife to avoid squashing the loaf.
- Storage tips: Wrap tightly and keep at room temperature for 2 to 3 days, or refrigerate up to 1 week. For longer storage, freeze slices with parchment between them and store in a freezer bag.
- Revive leftovers. Lightly toast a slice and add butter or almond butter. Warming brings out the banana aroma and softens the crumb.
A Quick Nutrition Snapshot
Approximate nutrition per serving (1 slice, 1/12 of a 9x5-inch loaf; without optional mix-ins):
- Calories: ~260
- Protein: ~4 g
- Carbohydrates: ~36 g
- Total Fat: ~11 g
- Saturated Fat: ~6 g
- Fiber: ~2 g
- Total Sugars: ~19 g
- Sodium: ~230 mg
Values will vary based on specific ingredients and any additions (nuts and chocolate chips will increase calories and fat slightly, while whole-wheat flour can add fiber). Use this as a helpful estimate rather than an exact measurement.
Questions You Might Be Wondering About
How ripe should my bananas be?
Very ripe—think bananas with plenty of brown spots or an overall deep brown peel. The darker the peel, the sweeter and softer the fruit, which means more flavor and moisture. If your bananas are yellow and you’re eager to bake, you can ripen them faster by baking unpeeled bananas at 300°F (150°C) for 15 to 20 minutes, then cooling before mashing.
Can I swap butter for oil?
Yes. Use 1/2 cup neutral oil (like canola or vegetable) in place of the melted butter. Oil yields a slightly moister, softer crumb, while butter adds a richer flavor. Both are delicious—choose based on your preference or what you have on hand.
How do I store and freeze banana bread?
Cool completely, then wrap tightly in plastic or store in an airtight container. It stays fresh at room temperature for 2 to 3 days or in the fridge for up to a week. For freezing, slice the loaf, place parchment between slices, and seal in a freezer bag. Thaw at room temperature or gently toast straight from frozen for a warm, almost-fresh slice.
A Cozy Closing Thought
Baking banana bread has a way of turning simple ingredients into something that feels like a hug. It’s the kind of recipe you pull out when you want to share a treat, welcome a neighbor, or make a morning coffee feel more special. With tender crumb, a fragrant crust, and flavors that deepen by the next day, this loaf is as dependable as it is delightful. I hope it becomes your trusty, go-to recipe—the one you know you can count on, and the one that sparks a little joy every time you mix, bake, slice, and share. Happy baking, and enjoy every warm, fragrant moment.