Cheesy Ground Chicken and Rice Burritos Recipe | Easy Dinner
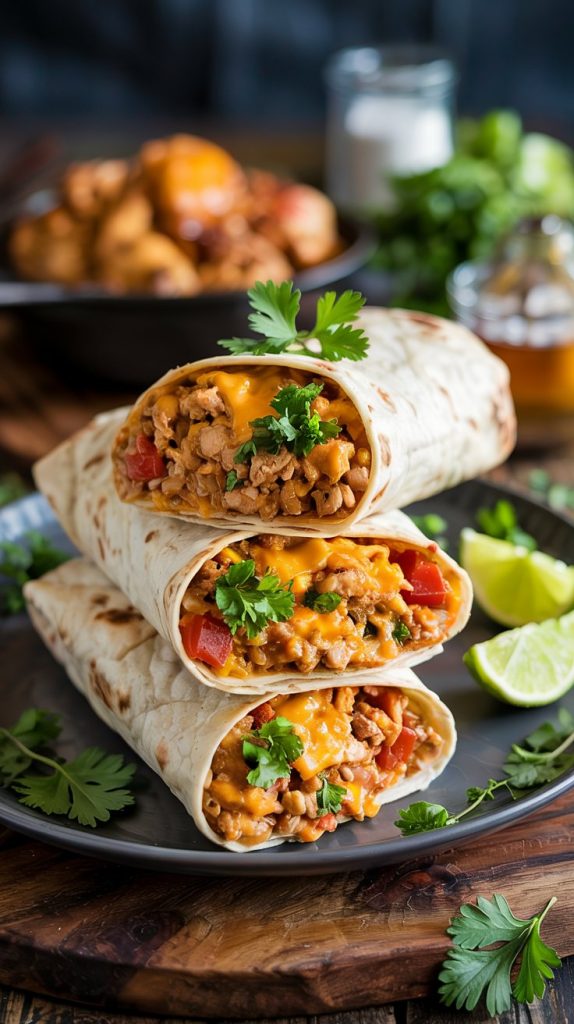
Imagine scooping up a warm, cheesy burrito that’s stuffed to the brim with savory ground chicken, tender rice, melty cheese, and bright pops of corn and beans—all wrapped in a soft tortilla and toasted until golden. That’s the kind of comfort this recipe brings to your table. These Cheesy Ground Chicken and Rice Burritos are easy enough for a weeknight, hearty enough to satisfy a crowd, and endlessly customizable so you can make them your own. Expect a creamy, well-seasoned filling with a little zing of lime and plenty of gooey cheese in each bite. We’ll walk through every step together, from prepping the filling to rolling the perfect burrito and getting that irresistible toasty finish.
- Why These Cheesy Ground Chicken and Rice Burritos Will Win You Over
- What You’ll Need for Cheesy Ground Chicken and Rice Burritos
- How to Make Cheesy Ground Chicken and Rice Burritos, Step by Step
- Prep, Cook Time, and Make-Ahead Notes
- Helpful Tips for Best Results
- Nutrition at a Glance
- Your Questions, Answered
- A Warm Wrap-Up
Why These Cheesy Ground Chicken and Rice Burritos Will Win You Over
This dish is a reliable weeknight champion—big on flavor, quick to assemble, and friendly to budgets. Ground chicken keeps things light yet satisfying, while rice and beans boost heartiness without complicating the process. The cheesy, saucy filling is spiced just right, so every bite tastes intentionally balanced. Plus, the recipe scales easily for meal prep and freezes beautifully. Whether you’re feeding a family or stocking up for the week, these burritos deliver a warm, comforting payoff with very little fuss. Best of all, you can adjust the heat, swap the cheese, or pile on fresh toppings to suit your mood.
What You’ll Need for Cheesy Ground Chicken and Rice Burritos
- 1 lb (450 g) ground chicken – Lean, mild protein that soaks up spices and stays tender.
- 3 cups cooked rice (white or brown) – Adds body and keeps the filling satisfying; leftover rice works perfectly.
- 1 medium onion, diced – Savory base flavor that sweetens as it cooks.
- 1 red bell pepper, diced – Adds color, crunch, and a gentle sweetness.
- 3 cloves garlic, minced – Brings aromatic depth to the filling.
- 2 tablespoons tomato paste – Concentrated tomato richness that helps the sauce cling to the filling.
- 1 tablespoon chili powder – Warm, earthy backbone of spice.
- 1 teaspoon ground cumin – Nutty, smoky undertone that pairs well with chicken and beans.
- 1 teaspoon smoked paprika – A subtle smoky note that boosts savoriness.
- 1/2 teaspoon dried oregano – Herbal lift that rounds out the seasoning.
- 1/2–1 teaspoon kosher salt, to taste – Enhances all the flavors; adjust based on broth and cheese.
- 1/4 teaspoon black pepper – A little bite to balance the richness.
- 1/4 teaspoon red pepper flakes (optional) – For gentle heat; add more if you like it spicy.
- 1 cup black beans, rinsed and drained – Creamy texture and extra protein and fiber.
- 1 cup corn kernels (fresh, frozen, or canned) – Sweet pops that brighten the filling.
- 1 can (10–14 oz) diced tomatoes with green chiles, drained – Adds tang and mild heat without making the mixture watery.
- 1/2 cup low-sodium chicken broth – Loosens the mixture and helps meld flavors.
- 2 tablespoons fresh lime juice – Bright, fresh acidity that wakes up the cheese and spices.
- 1/3 cup chopped fresh cilantro – Fresh, herbal finish that keeps things lively.
- 2 cups shredded cheese (Cheddar, Monterey Jack, or Pepper Jack) – Melty, creamy richness; a blend gives great flavor.
- 8 large flour tortillas (10-inch) – Soft, flexible wrap that holds generous fillings.
- 1–2 tablespoons olive oil – For sautéing and toasting the burritos.
- Optional toppings: sour cream or Greek yogurt, hot sauce, avocado, shredded lettuce – Add creaminess, heat, and crunch to serve.
How to Make Cheesy Ground Chicken and Rice Burritos, Step by Step
- Cook or warm the rice. If you don’t have leftover rice, cook it now so it’s ready when the filling is done. Fluff and spread it on a plate to steam off excess moisture.
- Sauté aromatics. Heat 1 tablespoon olive oil in a large skillet over medium heat. Add onion and bell pepper; cook 4–5 minutes until softened. Stir in garlic and cook 30 seconds until fragrant.
- Brown the ground chicken. Add the chicken to the skillet, breaking it up with a spoon. Cook 5–7 minutes until no longer pink and lightly browned.
- Season deeply. Sprinkle in chili powder, cumin, smoked paprika, oregano, salt, black pepper, and red pepper flakes if using. Stir to coat the meat and vegetables.
- Stir in tomato paste. Add tomato paste and cook 1 minute, letting it caramelize slightly. This step adds depth and helps the mixture cling together.
- Deglaze and simmer. Pour in the chicken broth, scraping up any browned bits. Add the diced tomatoes with green chiles. Simmer 3–4 minutes to thicken slightly.
- Add beans and corn. Stir in black beans and corn; cook 2–3 minutes so everything is warmed through.
- Fold in the rice. Add the rice and gently fold to combine. The mixture should be cohesive but not wet. If it looks dry, splash in a little more broth; if too loose, simmer 2 more minutes.
- Finish with lime and cilantro. Stir in lime juice and cilantro. Taste and adjust seasoning with salt, pepper, or more chili powder as needed.
- Warm the tortillas. Microwave tortillas under a damp paper towel for 20–30 seconds or warm in a dry skillet. Warm tortillas are pliable and resist tearing.
- Assemble the burritos. Lay a tortilla on a board. Sprinkle a little cheese in the center, add a generous scoop of filling, then top with another pinch of cheese. Keep filling about 2 inches from the edges.
- Roll tightly. Fold the sides in over the filling, then roll from the bottom up, tucking as you go for a snug burrito. Place seam-side down. Repeat with remaining tortillas.
- Toast for a golden finish. Heat a film of oil in a skillet over medium. Place burritos seam-side down and cook 1–2 minutes per side until lightly crisp and the cheese melts. This step locks in the roll and adds a delightful crunch.
- Serve with toppings. Plate burritos with sour cream or Greek yogurt, hot sauce, avocado slices, and shredded lettuce, if you like.
Prep, Cook Time, and Make-Ahead Notes
- Prep Time: 20 minutes (chopping, measuring, warming tortillas)
- Cook Time: 25–30 minutes (filling + toasting)
- Total Time: 45–50 minutes
- Yield: About 8 large burritos
- Skill Level: Easy–Moderate (mostly simple techniques)
Make-Ahead: The filling keeps well in the fridge for up to 4 days. Reheat gently and assemble fresh burritos when ready to eat. You can also roll the burritos and refrigerate them tightly wrapped; toast just before serving.
Freezing: Wrap assembled (untoasted) burritos tightly in foil, place in a freezer bag, and freeze up to 2 months. Thaw overnight in the fridge or bake from frozen at 350°F (175°C) for 30–40 minutes, flipping once, until hot in the center.
Reheating: Toast in a skillet over medium heat 3–5 minutes per side or bake at 350°F (175°C) for 10–15 minutes. For crispness, avoid microwaving, or microwave briefly just to warm and then finish in a skillet.
Helpful Tips for Best Results
- Use day-old rice if possible. Slightly drier rice absorbs flavors without making the filling mushy.
- Season in layers. Salt a little at each stage to build depth rather than trying to fix it at the end.
- Keep the filling cohesive. A touch of tomato paste and a brief simmer help everything hold together in the tortilla.
- Warm those tortillas. Soft, warm tortillas resist cracking and roll more neatly.
- Cheese as “glue.” Sprinkle cheese under and over the filling so it melts and helps seal the burrito as it toasts.
- Don’t overfill. Use about 3/4 cup filling per 10-inch tortilla for easy rolling and tidy slices.
- Add a freshness pop. A squeeze of lime and a handful of cilantro keep the filling from tasting heavy.
- Toast to finish. That brief skillet toast creates a delicate crust and warms the cheese through.
- Customize the heat. Swap in Pepper Jack or a spicier chili powder if you like more kick.
- Meal-prep friendly. Portion the filling into containers and build burritos throughout the week.
Nutrition at a Glance
Numbers will vary based on brands and swaps, but here’s a reasonable estimate for one large burrito (1 of 8), using 93% lean ground chicken, large flour tortillas, and a Cheddar/Monterey Jack blend:
| Calories | ~580 |
| Protein | ~28 g |
| Carbohydrates | ~65 g |
| Total Fat | ~23 g |
| Fiber | ~7 g |
| Sodium | ~900–1,000 mg (depends heavily on broth, cheese, and tortillas) |
To lighten things up, use reduced-fat cheese, whole-wheat or low-carb tortillas, and low-sodium broth and beans. For extra protein without many calories, increase the chicken and reduce the rice slightly.
Your Questions, Answered
Can I use brown rice instead of white?
Absolutely. Brown rice adds a nutty flavor and extra fiber. Make sure it’s fully cooked and not too moist before folding it into the filling.
How do I make it spicier (or milder)?
For more heat, add extra red pepper flakes, use Pepper Jack cheese, or stir in chopped jalapeños. For a milder burrito, skip the flakes, use mild chili powder, and opt for plain diced tomatoes instead of those with green chiles.
What’s the best way to freeze and reheat these burritos?
Wrap each burrito tightly in foil, place in a freezer bag, and freeze up to 2 months. Reheat from frozen in a 350°F (175°C) oven for 30–40 minutes, flipping once, or thaw overnight and toast in a skillet until hot and crisp.
A Warm Wrap-Up
These Cheesy Ground Chicken and Rice Burritos are the kind of recipe you’ll return to again and again—comforting, flexible, and generous enough to share. Whether you’re making a quick family dinner or stocking your freezer for busy days, the steps are simple and the results are consistently satisfying. With a few smart techniques—seasoning in layers, keeping the filling cohesive, and toasting for that golden finish—you’ll end up with burritos that taste as good as they look. I hope you enjoy building them your way, adding the toppings you love, and serving them to the people who make your table feel like home. Happy cooking, and happy eating.