Coffee Brownies with Mocha Frosting Recipe | Best-Ever Fudgy
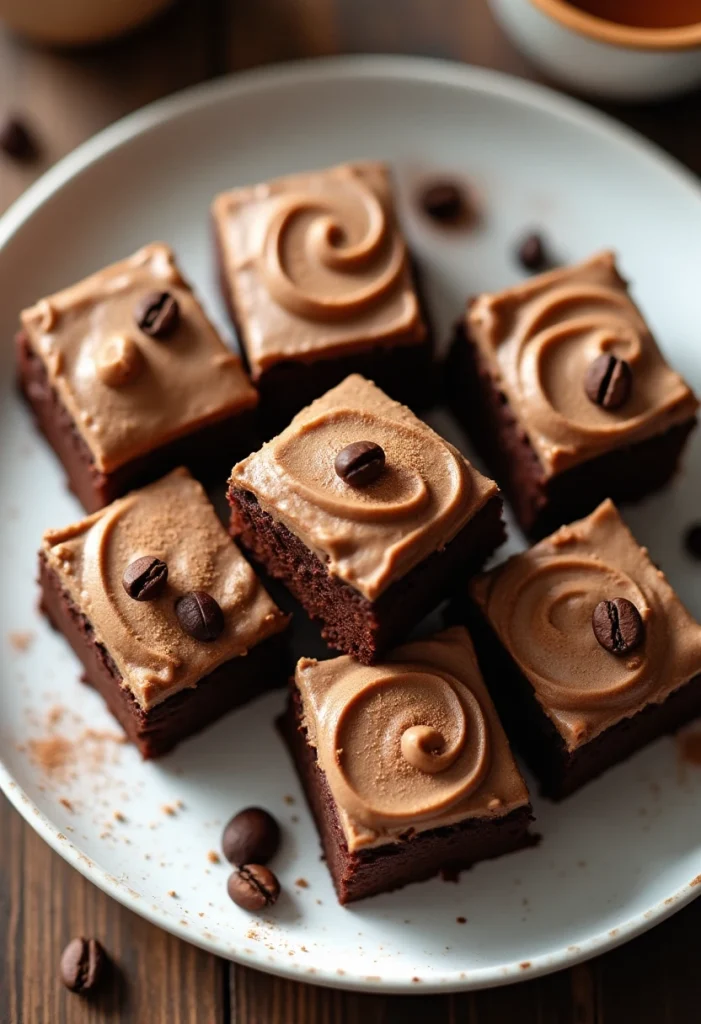
Some desserts whisper; these Coffee Brownies with Mocha Frosting sing. Imagine a square that’s deep, dark, and fudgy, with a glossy top and the gentle hum of espresso running through every bite. Then add a silky mocha frosting—lightly whipped, chocolatey, and kissed with coffee—to tie everything together. This is the kind of treat that feels special enough for guests, yet cozy enough for a quiet afternoon with your favorite mug. If you love the way coffee elevates chocolate, you’re in exactly the right place. Expect rich flavor, soft centers, crisp edges, and a frosting that’s smooth, creamy, and never too sweet. I’ll walk you through each step so you feel confident from preheating the oven to that first, glorious slice.
- What Makes These Coffee Brownies with Mocha Frosting Irresistible
- What You’ll Need: Ingredients for Coffee Brownies with Mocha Frosting
- How to Make Coffee Brownies with Mocha Frosting, Step by Step
- Baking Schedule & Prep Timeline
- Helpful Tips for Standout Results
- Nutrition at a Glance
- Questions You Might Have
- A Sweet Send-Off
What Makes These Coffee Brownies with Mocha Frosting Irresistible
These brownies are all about balance: bold cocoa and dark chocolate, a hint of espresso for depth, and a plush frosting that doesn’t steal the spotlight. Coffee intensifies the chocolate rather than competing with it, creating a full, rounded flavor. You’ll get a brownie with a tender, fudgy interior and that coveted shiny, crinkly top. The mocha frosting is whipped just enough to be spreadable and airy, with a mellow coffee note. They slice cleanly, pack beautifully, and taste even better the next day. Whether you’re baking for a party or just treating yourself, these are the brownies you reach for when you want a little moment of luxury. They’re the bake everyone asks you to bring again.
What You’ll Need: Ingredients for Coffee Brownies with Mocha Frosting
- Unsalted butter (3/4 cup / 170 g for brownies + 1/2 cup / 115 g for frosting): Provides richness and a tender crumb; the base of both fudgy brownies and creamy frosting.
- Dark chocolate, roughly chopped (6 oz / 170 g, 60–70%): Melts into the batter for deep flavor and fudginess.
- Granulated sugar (3/4 cup / 150 g): Sweetens and helps create that shiny, crinkly top.
- Light brown sugar (3/4 cup / 150 g): Adds moisture and a hint of caramel undertone.
- Large eggs (3) + 1 egg yolk, room temperature: Bind, set structure, and add chew; extra yolk increases richness.
- Pure vanilla extract (2 teaspoons for brownies + 1 teaspoon for frosting): Rounds out the chocolate and coffee notes.
- Espresso powder (2–3 teaspoons for brownies + 1–3 tablespoons strong brewed coffee or espresso for frosting): Intensifies chocolate; in frosting, adds true mocha character. If using powder only, dissolve in a little hot water.
- All-purpose flour (3/4 cup / 95 g): Just enough to set the brownies without drying them out.
- Unsweetened cocoa powder (1/4 cup / 25 g for brownies + 1/4 cup / 25 g for frosting): Layers on chocolate flavor; Dutch-process or natural both work.
- Fine sea salt (1/2 teaspoon for brownies + a pinch for frosting): Balances sweetness and amplifies flavor.
- Powdered sugar (2 cups / 240 g): The backbone of a smooth, fluffy mocha frosting.
- Heavy cream or whole milk (2–4 tablespoons): Adjusts frosting to your desired spreadable texture.
- Optional mix-ins (1/2 cup chocolate chunks or chips): Adds pockets of melty chocolate for extra indulgence.
- Optional topping (flaky sea salt or cocoa nibs): A finishing flourish for texture and contrast.
How to Make Coffee Brownies with Mocha Frosting, Step by Step
- Prep your pan and oven. Heat the oven to 350°F (175°C). Line an 8-inch (20 cm) square metal pan with parchment, leaving overhang on two sides for easy lifting. Lightly grease the parchment.
- Melt the butter and chocolate. In a heatproof bowl set over barely simmering water (or gently in the microwave), melt 3/4 cup butter and the chopped dark chocolate until smooth. Stir frequently and remove from heat as soon as it’s melted. Let it cool for 3–4 minutes so it’s warm, not hot.
- Bloom the coffee. Stir 2–3 teaspoons espresso powder into the warm chocolate-butter mixture to dissolve. This “blooms” the coffee and intensifies the chocolate flavor.
- Whisk in the sugars. Add granulated and brown sugars to the warm mixture and whisk until glossy and combined. The warmth helps dissolve the sugars, contributing to that shiny top.
- Add eggs gradually. Whisk in the eggs and the additional yolk one at a time, mixing well after each addition. Beat for 30–45 seconds until the batter looks thick and shiny. Stir in 2 teaspoons vanilla.
- Combine dry ingredients. In a separate bowl, whisk together flour, 1/4 cup cocoa powder, and 1/2 teaspoon fine sea salt. Sift if your cocoa is clumpy.
- Fold, don’t overmix. Add the dry ingredients to the wet and fold gently with a spatula just until no dry streaks remain. If using chocolate chunks, fold them in. The batter will be thick and glossy.
- Spread and bake. Scrape the batter into the prepared pan and smooth the top. Bake for 22–28 minutes for an 8-inch pan, or until a toothpick inserted near the center comes out with a few moist crumbs. Do not overbake; fudgy brownies will firm as they cool.
- Cool completely. Place the pan on a rack and let the brownies cool fully in the pan, about 1–2 hours. This helps them set for clean slicing and prevents the frosting from melting.
- Make the mocha frosting. In a mixing bowl, beat 1/2 cup softened butter with a pinch of salt until creamy. Sift in powdered sugar and 1/4 cup cocoa powder. Beat on low to combine, then on medium until fluffy, 1–2 minutes.
- Add the coffee and vanilla. Gradually beat in 1–3 tablespoons cooled strong coffee or espresso and 1 teaspoon vanilla. Add 2–3 tablespoons heavy cream or milk to reach a spreadable, silky consistency. Taste and adjust coffee strength or sweetness as you like.
- Frost and finish. Lift the cooled brownie slab from the pan using the parchment overhang. Spread the frosting in swoops and swirls. Sprinkle with flaky sea salt or cocoa nibs if you enjoy a little crunch and contrast.
- Slice and serve. For the cleanest cuts, chill the frosted brownies for 20–30 minutes, then use a sharp knife wiped clean between slices. Serve at room temperature for the best texture and flavor.
Baking Schedule & Prep Timeline
Here’s a simple plan so you know exactly when your brownies will be ready to enjoy.
- Prep time: 20 minutes (lining the pan, melting, mixing)
- Bake time: 22–28 minutes (8-inch pan)
- Cooling time: 60–90 minutes, until completely cool
- Frosting and finishing: 10–15 minutes
- Optional chill for neat slices: 20–30 minutes
When it’s ready: Plan on about 2 to 2 1/2 hours from start to first bite, depending on how long you cool and chill before slicing. They hold beautifully, so you can bake the day before and frost the next morning if that’s easier.
Helpful Tips for Standout Results
- Use room-temperature eggs. They incorporate more easily and give a glossier batter and a better rise at the edges.
- Beat the eggs and sugar well. Whisking until thick and glossy helps you achieve a shiny top and chewy texture.
- Don’t skip the salt. A little salt sharpens the chocolate and keeps the sweetness in check.
- Cool the chocolate mixture slightly before adding eggs. Warm is fine; hot risks scrambling.
- Choose the right pan. A light-colored metal pan bakes most evenly; glass can run hot and may require a few minutes’ adjustment.
- Test for doneness early. Start checking at 22 minutes. Look for moist crumbs on the toothpick, not wet batter.
- Bloom the coffee. Dissolving espresso powder in the warm butter-chocolate mixture maximizes its flavor and disperses it evenly.
- Adjust mocha intensity to taste. For bold coffee flavor, use the higher end of espresso/coffee in both batter and frosting; for subtle, scale back.
- Slice smart. Warm a knife under hot water, wipe dry, slice, and repeat for ultra-clean edges.
- Storage. Keep in an airtight container at cool room temperature for 2–3 days, or refrigerate up to 5 days. They freeze well (unfrosted or frosted) for up to 2 months; wrap tightly and thaw overnight in the fridge.
Nutrition at a Glance
Approximate per serving, based on 16 brownies and typical ingredients:
- Calories: ~370
- Total Fat: ~21 g
- Saturated Fat: ~13 g
- Carbohydrates: ~46 g
- Fiber: ~2 g
- Sugars: ~36 g
- Protein: ~4 g
- Sodium: ~120 mg
These figures are estimates and will vary with brands, cocoa type, and exact measurements. If you need precise numbers, plug your ingredients into a nutrition calculator.
Questions You Might Have
Can I make these without espresso powder?
Yes. Substitute 2–3 tablespoons of very strong brewed coffee or espresso in the batter in place of the espresso powder, reducing the vanilla slightly if you like. Just keep the mixture warm, not hot, and add the liquid with the wet ingredients. The flavor will be slightly softer but still delicious.
How can I make them gluten-free?
Use a high-quality 1:1 gluten-free all-purpose blend that includes xanthan gum. Measure carefully and avoid overmixing once the flour goes in. Bake time may vary by a minute or two, so start checking early for moist crumbs.
Do they freeze well?
Absolutely. Wrap the brownie slab (unfrosted or frosted) tightly in plastic, then foil, and freeze for up to 2 months. Thaw overnight in the refrigerator, then bring to room temperature before serving. If freezing unfrosted, add the mocha frosting after thawing for the freshest texture.
A Sweet Send-Off
There’s something quietly joyful about a pan of brownies cooling on the counter, especially when they carry the cozy aroma of coffee. These Coffee Brownies with Mocha Frosting deliver the best of both worlds: classic, fudgy comfort and a café-style twist. They’re the kind of treat that makes weeknights feel special and gatherings feel warmer. Share them with friends, pack a square for someone who needs a pick-me-up, or savor one slowly with your favorite cup. However you enjoy them, take pride in the simple ritual of stirring, baking, and frosting—each step adding up to something memorable. And when the compliments come (they will), you’ll know exactly how to make them again. Happy baking—and here’s to many chocolate-coffee moments ahead.