Honey Garlic Boneless Chicken Thighs | Quick & Juicy Recipe!
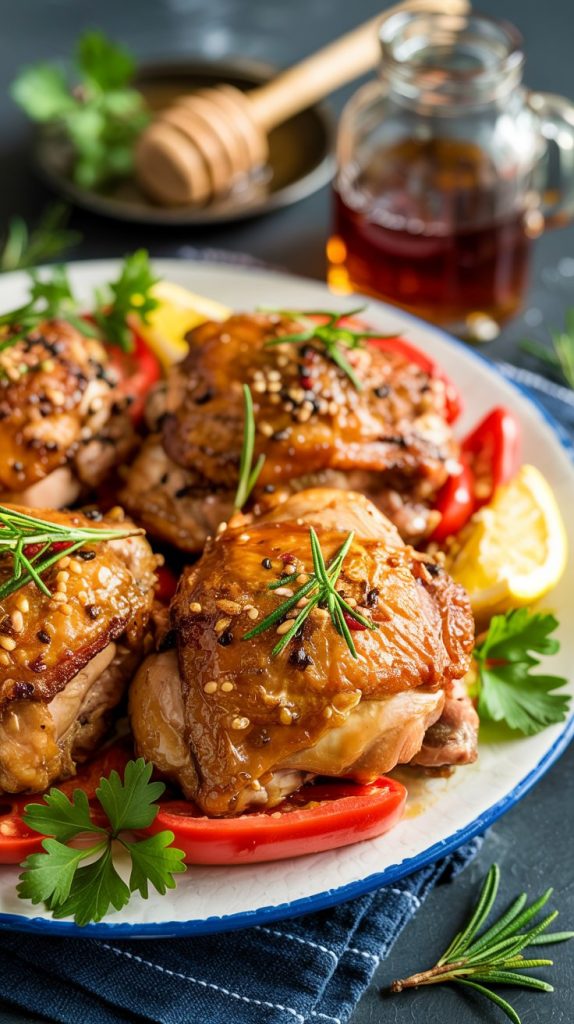
If you’re craving something savory, sweet, and utterly satisfying, these Honey Garlic Boneless Chicken Thighs are the answer. Tender, juicy chicken coated in a glossy, garlicky honey glaze feels like takeout-meets-home-cooking in the best way possible. This is a weeknight-friendly recipe that still tastes special enough for company, ready in about 30–40 minutes with minimal fuss. Expect irresistible caramelization, a balanced sauce that’s neither cloying nor salty, and a reliable method that works every time. You’ll finish with a skillet of sticky-sauced chicken that begs for a bowl of rice or a pile of roasted vegetables.
- Why This Honey-Garlic Chicken Thighs Recipe Wins Hearts
- What You’ll Need: Ingredients for Honey Garlic Boneless Chicken Thighs
- How to Make It: Step-by-Step Guide to Honey Garlic Boneless Thighs
- Time & Prep: What to Expect
- Cook Like a Pro: Tips for Knockout Results
- Nutritional Snapshot (Approximate)
- Your Top Questions, Answered
- A Warm Send-Off: Final Thoughts
Why This Honey-Garlic Chicken Thighs Recipe Wins Hearts
It’s hard to beat the combination of honey and garlic—comforting, familiar, and bold. This version uses boneless chicken thighs for maximum juiciness and quick cooking, plus a simple pan sauce that turns glossy and clingy in minutes. The result is a family-friendly dish with just enough heat, sweetness, and tang to keep every bite interesting. It’s also flexible: make it mild or spicy, add a little butter for richness, or finish with sesame and scallions for a restaurant-style flourish. No complicated techniques, just solid steps that deliver flavor every single time.
What You’ll Need: Ingredients for Honey Garlic Boneless Chicken Thighs
- Boneless, skinless chicken thighs (about 2 pounds / 900 g) – Naturally juicy and forgiving, they stay tender and soak up the sauce.
- Salt and black pepper – Essential seasoning that highlights the meat’s flavor from the inside out.
- Neutral oil (1–2 tablespoons) – Helps achieve a deep, even sear without burning; use canola, avocado, or grapeseed.
- Garlic (4–5 cloves, finely minced) – The star aromatic; it infuses the sauce with savory depth and warmth.
- Honey (1/4 to 1/3 cup) – Provides sweetness, encourages caramelization, and creates that signature sticky glaze.
- Soy sauce (low-sodium, 3 tablespoons) – Adds umami and savory balance so the honey doesn’t dominate.
- Rice vinegar or apple cider vinegar (1–1½ tablespoons) – A touch of acidity brightens the sauce and keeps it from tasting heavy.
- Crushed red pepper flakes (optional, 1/4–1/2 teaspoon) – A gentle kick that complements the sweetness without overpowering.
- Water or chicken broth (1/4 cup) – Thins the sauce slightly so it reduces to the perfect consistency.
- Cornstarch (1–2 teaspoons) + cold water (1 tablespoon) – A quick slurry to ensure the sauce thickens into a glossy coat.
- Unsalted butter (optional, 1 tablespoon) – Swirled in at the end for a silky finish and extra flavor.
- Sesame oil (optional, 1/2 teaspoon) – A tiny drizzle adds a toasty, nutty aroma.
- Green onions (2–3, sliced) – Freshness and color to finish the dish.
- Sesame seeds (optional) – A simple garnish for texture and visual appeal.
How to Make It: Step-by-Step Guide to Honey Garlic Boneless Thighs
- Pat the chicken dry. Trim excess fat and pat the thighs with paper towels. Dry chicken sears better, which means more flavor and a better glaze later.
- Season simply. Sprinkle both sides with salt and black pepper. You’re building a base layer of flavor before the sauce ever touches the pan.
- Mix the sauce. In a small bowl, whisk together honey, soy sauce, vinegar, water/broth, and red pepper flakes (if using).
- Reserve a little. Pour off 2–3 tablespoons of the sauce into a separate cup for finishing and set aside. This ensures you have clean sauce that’s never touched raw chicken.
- Optional quick marinade. Toss the chicken in the remaining sauce and let it sit for 15–30 minutes at room temperature. If you’re skipping the marinade, head straight to the skillet.
- Preheat the pan. Warm a large skillet over medium-high heat. Add the oil and wait until it shimmers. A hot pan is key to that deep, flavorful sear.
- Sear the thighs. Shake off excess marinade and add the chicken in a single layer without crowding. Cook 4–6 minutes, undisturbed, until deeply golden on the first side.
- Flip and finish searing. Turn each thigh and cook another 3–4 minutes. If they’re thick, reduce the heat slightly to avoid scorching. Transfer chicken to a plate (it will finish in the sauce).
- Sauté the garlic. Lower heat to medium. If the pan is dry, add a teaspoon of oil. Add the minced garlic and cook 30–45 seconds until fragrant, stirring constantly. Don’t let it brown too much—it can turn bitter.
- Deglaze with sauce. Pour in the remaining marinade from the bowl (not the reserved clean portion). Scrape up any browned bits; that’s pure flavor.
- Simmer and thicken. Stir together cornstarch and cold water to make a slurry. When the sauce begins to bubble, whisk in the slurry a little at a time until the sauce thickens to a glossy, syrupy consistency.
- Return the chicken. Add the thighs back to the skillet, nestling them in the sauce. Spoon the sauce over the top and cook 2–3 minutes, until the internal temperature reads 165°F (74°C).
- Finish the glaze. Stir in the reserved clean sauce for a fresh pop of flavor and, if using, swirl in the butter and a drizzle of sesame oil to round everything out.
- Rest briefly. Remove from heat and let the chicken rest for 3–5 minutes. This helps the juices settle and the glaze cling beautifully.
- Garnish and serve. Scatter sliced green onions and sesame seeds over the chicken. Serve with rice, noodles, or steamed vegetables, making sure to spoon extra sauce over everything.
Alternate oven finish: After searing both sides, transfer the skillet to a 400°F (200°C) oven for 6–8 minutes to finish cooking. Bring the skillet back to the stovetop to thicken and glaze the sauce as directed.
Time & Prep: What to Expect
- Prep time: 10 minutes (trimming, mixing the sauce, and chopping garlic/greens)
- Optional quick marinade: 15–30 minutes for deeper flavor
- Cook time: 14–18 minutes total, depending on thigh thickness and skillet heat
- Rest time: 3–5 minutes to lock in juiciness
- Total time: About 30–40 minutes (including optional marinade)
The dish is ready to enjoy when the chicken reaches 165°F (74°C), the sauce is shiny and clings to the meat, and you can drag a spoon through the skillet and see a brief trail before it fills in.
Cook Like a Pro: Tips for Knockout Results
- Pat dry thoroughly: Moisture is the enemy of browning. Dry chicken equals a better sear and deeper flavor.
- Don’t crowd the pan: Give thighs space so steam doesn’t build. If needed, cook in batches and combine in the sauce at the end.
- Heat management matters: Start hot for color, then reduce slightly so the honey doesn’t scorch.
- Go for golden, not burnt: The line between caramelized and bitter is thin. If the pan is getting too dark, add a splash of water and lower the heat.
- Make a clean reserve of sauce: Always set aside some sauce before it touches raw chicken; it brightens the final glaze.
- Use a thermometer: Pull at 165°F (74°C) for perfectly cooked thighs every time.
- Adjust to taste: Too sweet? Add a splash more vinegar or soy. Too salty? Stir in a little water and a dash more honey.
- Oil your measuring spoon: Coat the spoon with a little oil before measuring honey—it’ll slide right out.
- Optional butter swirl: A tablespoon of butter whisked in off heat adds restaurant-style gloss and richness.
- Finish with freshness: Scallions and sesame seeds add crunch and color, lifting the whole dish.
Nutritional Snapshot (Approximate)
Values will vary based on portion sizes, exact ingredients, and optional additions like butter or sesame oil. The estimate below assumes 4 servings from 2 pounds of boneless, skinless thighs, using 1/4 cup honey and 1–2 tablespoons oil.
- Per serving: ~390 calories
- Protein: ~33 g
- Carbohydrates: ~24 g
- Total fat: ~15 g
- Saturated fat: ~4 g
- Sugar: ~20 g
- Sodium: ~650 mg
- Fiber: ~0–1 g
Note: Using 1/3 cup honey, butter, or full-sodium soy sauce will increase calories and sodium.
Your Top Questions, Answered
Can I use chicken breasts instead of thighs?
Yes. Pound breasts to an even thickness, then sear 3–4 minutes per side and finish in the sauce until they reach 165°F (74°C). Breasts are leaner, so avoid overcooking and consider the butter swirl for extra juiciness.
Can I bake this instead of pan-searing?
Absolutely. Arrange seasoned thighs in a baking dish, brush with some sauce, and bake at 400°F (200°C) for 18–22 minutes until 165°F (74°C). Meanwhile, simmer the remaining sauce on the stovetop and thicken with cornstarch. Toss baked thighs in the thickened glaze before serving.
How do I make it less sweet or spicier?
To cut sweetness, reduce honey by a tablespoon and add 1–2 teaspoons more vinegar. For heat, add extra red pepper flakes or a squeeze of sriracha to the sauce. Adjust gradually and taste as you go.
A Warm Send-Off: Final Thoughts
There’s something particularly comforting about a skillet of honey-garlic chicken: it’s simple, fragrant, and deeply satisfying. With a good sear, a balanced sauce, and a few smart touches, you can turn a weeknight into something memorable without spending hours in the kitchen. Share it over rice with someone you love, pass the skillet to the table family-style, and enjoy how quickly it disappears. Cooking should feel joyful and welcoming, and this dish brings that spirit to every plate. May it become one of those recipes you return to again and again—reliable, delicious, and always worth the few steps it takes to make.