Soft and Chewy Lemon Cookies – Easy, Zesty Bakery-Style Tips
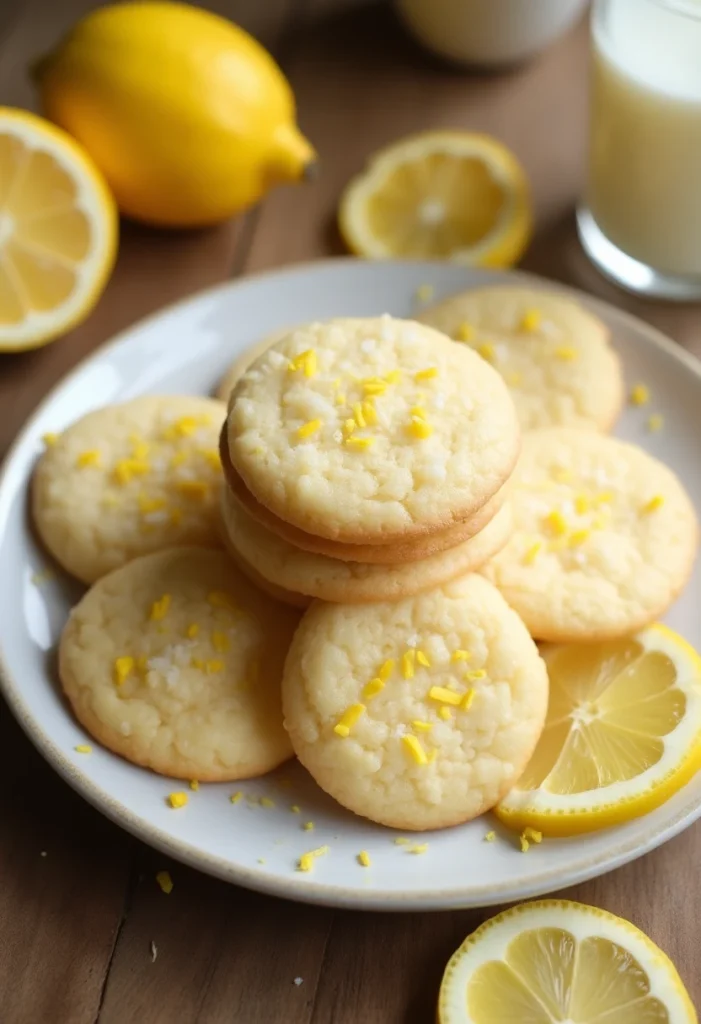
Imagine a cookie that smells like sunlit kitchens, tastes like bright, fresh lemon, and stays soft and chewy for days. That’s exactly what you can expect from these Soft and Chewy Lemon Cookies. They’re tender in the center, lightly crisp at the edges, and full of vibrant citrus flavor—thanks to real lemon zest and juice. Whether you’re baking for a weekend treat, a spring gathering, or a cozy afternoon pick-me-up, these cookies deliver simple joy in every bite. And the process? Surprisingly straightforward, with small touches that make a big difference in flavor and texture. Let’s make something bright and beautiful together.
- What Makes These Soft & Chewy Lemon Cookies Irresistible
- What You’ll Need for Tender, Zesty Lemon Cookies
- How to Make Them, One Easy Step at a Time
- Time, Yields, and When They’re Ready
- Helpful Tips for Bakery-Style Results
- Nutrition at a Glance
- Your Top Questions, Answered
- Final Reflections Before You Bake
These cookies strike a rare balance: they’re buttery and plush without being cakey, lively with lemon without tipping into sour, and sweet without feeling heavy. The secret is a mix of techniques—rubbing lemon zest into sugar to release fragrant oils, adding a touch of cornstarch for tenderness, and baking just until set so the centers stay moist. If you love a cookie that’s easy to make yet tastes like it came from a bakery, this recipe will quickly become a favorite.
- All-purpose flour (2 1/4 cups / 270 g): Provides structure without making the cookies dense.
- Cornstarch (2 teaspoons): Softens the crumb for that coveted chewy, tender bite.
- Baking powder (1/2 teaspoon): Lifts the cookies so they’re not heavy.
- Baking soda (1/2 teaspoon): Reacts with lemon juice for lightness and a slightly crinkled top.
- Fine sea salt (1/2 teaspoon): Balances sweetness and brightens lemon flavor.
- Unsalted butter, softened (3/4 cup / 170 g): Creates richness and a soft, melt-in-the-mouth texture.
- Granulated sugar (3/4 cup / 150 g): Sweetens and helps the cookies spread. You’ll also use extra for rolling.
- Light brown sugar (1/4 cup / 50 g): Adds moisture and a hint of caramel depth for chewiness.
- Large egg (1): Binds the dough and adds structure.
- Extra egg yolk (1): Adds richness for a chewier, softer center.
- Fresh lemon zest (2 tablespoons, from about 2 large lemons): The aromatic heart of the cookie—pure lemon flavor without extra liquid.
- Fresh lemon juice (2 tablespoons / 30 ml): Bright acidity that lifts the whole cookie.
- Vanilla extract (1 1/2 teaspoons): Rounds out citrus notes and adds warmth.
- Sour cream or plain Greek yogurt (1 tablespoon / 15 g, optional): Keeps cookies moist for days and adds subtle tang.
- For rolling: 1/3 cup (65 g) granulated sugar mixed with 1 teaspoon finely grated lemon zest.
- Optional lemon glaze: 1 cup (120 g) powdered sugar, 2–3 tablespoons fresh lemon juice, and a tiny pinch of salt for balance.
How to Make Them, One Easy Step at a Time
- Preheat your oven to 350°F (175°C). Line two baking sheets with parchment paper. This prevents sticking and encourages even browning.
- Make lemon sugar for extra fragrance: In a small bowl, combine 3/4 cup granulated sugar with 2 tablespoons lemon zest. Use your fingertips to rub the zest into the sugar for 30–60 seconds until it’s moist and aromatic. This step releases the essential oils for maximum lemon flavor.
- Prepare rolling sugar: In another small bowl, stir together 1/3 cup granulated sugar with 1 teaspoon lemon zest. Set aside for coating the dough balls later.
- Whisk the dry ingredients: In a medium bowl, whisk flour, cornstarch, baking powder, baking soda, and salt until well combined. Set aside.
- Cream the butter and sugars: In a large bowl (or stand mixer), beat the softened butter, lemon-infused sugar, and light brown sugar on medium speed for 2–3 minutes until pale and fluffy. Scrape down the bowl as needed to ensure even mixing.
- Add egg and yolk: Beat in the egg and the extra yolk until the mixture looks smooth, glossy, and slightly thickened—about 30–45 seconds. This step helps with chewiness and structure.
- Add the flavor boosters: Mix in the lemon juice, vanilla extract, and sour cream (if using) on low speed just until combined. The mixture may look slightly curdled—don’t worry; the dry ingredients will bring it together.
- Combine wet and dry: Add the flour mixture in two additions, mixing on low just until no streaks of flour remain. Stop as soon as the dough comes together to avoid tough cookies. The dough should be soft and a little sticky.
- Chill (optional but recommended): Cover and chill the dough for 30 minutes. Chilling firms the butter, helps prevent excessive spreading, and deepens flavor.
- Portion the dough: Use a 1.5-tablespoon scoop (about 30 g) to portion dough into balls. Roll each one in the lemon-vanilla rolling sugar and place on prepared sheets, spacing about 2 inches (5 cm) apart.
- Flatten slightly: Gently press the tops to about 1-inch thickness. This helps them bake evenly while staying soft in the center.
- Bake: Bake 9–11 minutes, rotating the sheets halfway through. The cookies are done when the edges look set and the tops are still pale and slightly puffy. The centers will continue to set as they cool.
- Cool: Let cookies rest on the baking sheet for 5 minutes, then transfer to a wire rack to cool completely. This brief rest helps them firm up without drying out.
- Optional glaze: Once cool, whisk powdered sugar, lemon juice, and a tiny pinch of salt until smooth and drizzle-able. Spoon or drizzle over cookies and let set 10–15 minutes.
- Serve and enjoy: The cookies are wonderfully soft the day they’re baked and stay tender for several days in an airtight container.
Time, Yields, and When They’re Ready
- Active prep time: About 20 minutes
- Optional chill time: 30 minutes
- Bake time: 9–11 minutes per batch
- Cooling time: 15–20 minutes
- Total time: About 1 hour 15 minutes (including chill and cool)
- Yield: Approximately 22–24 cookies, depending on scoop size
You’ll know these cookies are ready to enjoy when their edges are set, the tops are still pale, and they feel soft to the touch. If you’re unsure, err on the side of slightly underbaked—they’ll continue to firm up on the tray and stay deliciously chewy.
Helpful Tips for Bakery-Style Results
- Rub zest into sugar: This is the single best trick for big lemon flavor without extra liquid. It infuses the sugar with fragrant oils.
- Use room-temperature butter and eggs: They cream more easily, trapping air for lighter, softer cookies.
- Measure flour accurately: If you can, weigh it. Otherwise, fluff, spoon into the cup, and level. Too much flour makes cookies dry and thick.
- Don’t overmix once the flour goes in: A few gentle turns past “just combined” is ideal. Overmixing develops gluten and toughens the cookie.
- Chill if your kitchen is warm: A short 30-minute chill makes the dough easier to handle and prevents overspreading.
- Bake to pale perfection: Pull them when they’re just set at the edges. A pale center equals a chewy center.
- Rotate the pans: Even ovens have hot spots. Rotating halfway through helps cookies bake evenly and consistently.
- Try the “cookie scoot” for perfect circles: As soon as cookies come out, gently encircle each one with an inverted round cutter or bowl and swirl. It tidies edges without compressing the center.
- For extra lemon pop: Add a few drops of pure lemon extract to the dough, or sprinkle a little lemon zest over the glaze before it sets.
Nutrition at a Glance
Approximate nutrition per cookie (without glaze), based on 24 cookies. Values will vary with ingredient brands and portion size.
| Serving | Calories | Total Fat | Carbohydrates | Protein | Sugars | Sodium | Fiber |
|---|---|---|---|---|---|---|---|
| 1 cookie | 150 | 6 g | 22 g | 2 g | 12 g | 115 mg | 0.5 g |
With glaze, add approximately 20–25 calories and 4–5 g sugar per cookie. These numbers are estimates and intended for general guidance.
Your Top Questions, Answered
Yes. Scoop and roll the dough in sugar, then freeze on a tray until firm. Transfer to a freezer bag and bake from frozen, adding 1–2 minutes to the bake time. Baked cookies also freeze well—cool completely, freeze in a single layer, then store in an airtight container for up to 2 months. Thaw at room temperature.
How can I make these gluten-free?
Use a quality 1:1 gluten-free baking flour blend that includes xanthan gum. Let the mixed dough rest 10 minutes before scooping to hydrate the flour. Expect slightly less spread; consider pressing the dough balls a touch flatter before baking.
Can I use Meyer lemons or add lemon extract?
Absolutely. Meyer lemons are sweeter and floral—delicious if you want a softer citrus note. If you love an extra punch, add 1/4–1/2 teaspoon pure lemon extract to the dough in addition to the zest and juice. Avoid artificial extracts, which can taste harsh.
Final Reflections Before You Bake
There’s something joyfully simple about pulling a tray of fresh lemon cookies from the oven—the way the fragrance fills the room, the warm edges giving way to a soft, citrusy center. These Soft and Chewy Lemon Cookies are a little celebration you can bake any day of the week, and they’re just as welcome at birthdays, picnics, or quiet afternoons with tea. I hope you find as much pleasure in the process as in the first bite. Bake a batch, share a few, and keep a couple tucked away for tomorrow. After all, small treats can brighten more than just your kitchen—they can bring people together, one sunny cookie at a time.