Pistachio Chocolate Brownies Recipe | Fudgy, Nutty Easy Bake
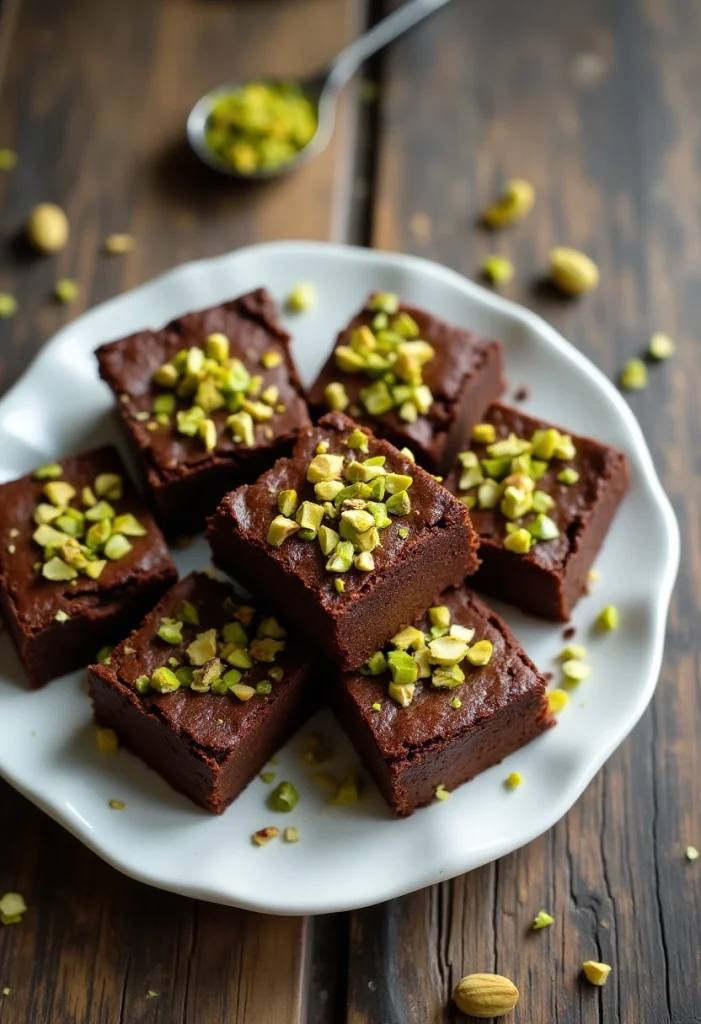
Picture this: a tray of glossy, crackly-topped brownies that slice into fudgy squares studded with emerald pistachios. These Pistachio Chocolate Brownies bring the perfect balance of deep cocoa richness and buttery nuttiness, with just enough texture to keep every bite interesting. Whether you’re baking for a gathering or just craving something special for a cozy evening, this recipe delivers crowd-pleasing results without complicated steps. You’ll learn how to achieve that coveted shiny crust, how to keep the center decadently moist, and how to bring the pistachios forward for flavor and crunch. Expect a brownie that’s indulgent yet nuanced, sweet but not cloying, and irresistibly fragrant from freshly toasted nuts. Most importantly, you’ll feel confident making them again and again. Let’s bake something unforgettable together.
- What Makes These Pistachio Chocolate Brownies Irresistible
- What You’ll Need: Ingredients & Their Roles
- How to Make Them: A Friendly, Step-by-Step Walkthrough
- Timeframe: Prep, Bake, and Cool
- Pro Tips to Bake with Confidence
- Watch Outs: Mistakes to Sidestep
- Nutrition at a Glance
- Your Questions, Answered
- A Warm Send-Off
What Makes These Pistachio Chocolate Brownies Irresistible
These brownies are all about contrast—chewy edges against a soft, fudgy center, dark chocolate richness balanced with the warm, earthy sweetness of pistachios. Toasted pistachios add a gentle crunch and a natural buttery aroma. A hint of cocoa and optional espresso amplifies the chocolate flavor without making the brownies taste like coffee. With a few smart techniques, you’ll get the classic crackly top you see in bakery brownies and a texture that keeps beautifully for days. They feel luxurious but are refreshingly straightforward to make.
What You’ll Need: Ingredients & Their Roles
- Unsalted butter (170 g / 6 oz) – Melts with chocolate for a glossy, fudgy base and adds richness.
- Dark or semisweet chocolate, 60–70% (170 g / 6 oz), chopped – The backbone of flavor; melting it ensures a deep, smooth chocolatey crumb.
- Granulated sugar (200 g / 1 cup) – Helps create that crackly, shiny top and balances cocoa’s bitterness.
- Light brown sugar (90 g / 1/2 cup, packed) – Adds moisture and a hint of caramel depth for fudgier texture.
- Large eggs (3) – Provide structure and richness; whipping with sugar contributes to the shiny crust.
- Pure vanilla extract (2 tsp) – Rounds out flavors and boosts the chocolate’s complexity.
- All-purpose flour (80 g / about 2/3 cup) – Just enough to bind; limited flour keeps the brownies dense and fudgy.
- Dutch-process cocoa powder (35 g / about 1/3 cup) – Intensifies chocolate flavor and color; smooth and not too acidic.
- Fine sea salt (1/2 tsp) – Essential for balance; heightens both chocolate and pistachio notes.
- Instant espresso powder (1 tsp, optional) – Enhances chocolate flavor without adding pronounced coffee taste.
- Roasted, unsalted pistachios, roughly chopped (120 g / 1 cup) – Provide crunchy texture and buttery, nutty flavor.
- Chocolate chips or chunks (85 g / 1/2 cup, optional) – Pockets of melty chocolate for added indulgence.
- Pistachio butter or paste (2 tbsp, optional) – Swirled on top for extra pistachio punch and a pretty marbled finish.
- Flaky sea salt (a pinch, for topping) – Finishes the brownies with sparkle and contrast.
How to Make Them: A Friendly, Step-by-Step Walkthrough
- Preheat and prep the pan. Heat the oven to 350°F (175°C). Line an 8-inch (20 cm) square pan with parchment, leaving an overhang on two sides for a lifting “sling.” Lightly grease the exposed sides of the pan. A parchment sling makes flawless removal and clean slicing much easier.
- Toast the pistachios. If your pistachios are not pre-roasted, spread them on a baking sheet and toast in the hot oven for 6–8 minutes, until fragrant and slightly deeper in color. Let cool, then chop roughly. Toasting unlocks their rich, buttery flavor.
- Melt the chocolate and butter. In a heatproof bowl, combine the chopped chocolate and butter. Melt gently over a saucepan of barely simmering water (double-boiler method) or in the microwave in 20–30 second bursts, stirring often, until smooth. Set aside to cool for 5 minutes.
- Whip eggs and sugars. In a large bowl, whisk the granulated sugar, brown sugar, eggs, and vanilla for 2–3 minutes until the mixture is slightly thickened and lighter in color. You can use a hand mixer for ease. This step is key for the signature crackly top.
- Combine with chocolate. Whisk the warm (not hot) chocolate-butter mixture into the egg-sugar mixture until well blended. If using, stir in the espresso powder now.
- Fold in dry ingredients. In a separate bowl, whisk together the flour, cocoa powder, and salt. Sift if lumpy. Add to the wet mixture and fold gently with a spatula just until no dry streaks remain. Stop the moment it looks combined to preserve fudginess.
- Add the mix-ins. Fold in most of the chopped pistachios and the chocolate chips or chunks, reserving a spoonful of pistachios for the top.
- Optional pistachio swirl. Warm the pistachio butter for 10–15 seconds to loosen. Scrape the batter into the prepared pan, then dollop the pistachio butter over the surface. Use a knife or skewer to swirl it through the top in gentle figure-eights.
- Top and bake. Smooth the surface, sprinkle the reserved pistachios over the top, and add a pinch of flaky sea salt. Bake for 24–28 minutes, until the edges are set and the center has a shiny, crackly surface. A toothpick inserted near the center should come out with a few moist crumbs, not wet batter.
- Cool with patience. Let the pan cool on a rack until just warm, about 1 hour. Use the parchment sling to lift the slab out. For the cleanest slices, chill for 20–30 minutes before cutting.
- Slice and serve. Use a sharp chef’s knife or a bench scraper, wiping the blade between cuts. Serve slightly warm, at room temperature, or even chilled—each version has its charms.
- Store smartly. Keep brownies in an airtight container at room temperature for up to 3 days or refrigerate for up to 1 week. Freeze well-wrapped squares for up to 2 months; thaw at room temperature.
Timeframe: Prep, Bake, and Cool
- Active prep: 20 minutes
- Baking time: 24–28 minutes
- Cooling: 60 minutes in pan, plus 20–30 minutes optional chill for tidy slices
- Total time: About 1 hour 50 minutes
- Yield: 16 squares (8x8-inch pan)
The brownies are ready to enjoy once they’re cool enough to slice without crumbling. If you love a clean, bakery-style edge, give them that extra brief chill. If you prefer them cozy and soft, serve warm with a scoop of vanilla gelato or a dollop of lightly sweetened whipped cream.
Pro Tips to Bake with Confidence
- Use room-temperature eggs. Cold eggs can make the chocolate mixture seize or thicken too quickly. Room-temperature eggs whisk more easily and help create a glossy batter.
- Whip the sugars and eggs well. This step helps the crackly top form. A few minutes of whisking makes a big difference.
- Don’t overmix once flour goes in. Overmixing develops gluten, which leads to cakier brownies. Fold gently just until combined.
- Mind the bake window. Pull the brownies when the center still has a slight wobble and the tester shows moist crumbs. They continue to set as they cool.
- Toast the pistachios. Even if your nuts are labeled roasted, a quick warm-through brightens their flavor and crisps their texture.
- Measure by weight for precision. Weighing cocoa, flour, and chocolate yields consistent results, especially with fudgy desserts.
- Try flavor accents. A pinch of ground cardamom or the finely grated zest of half an orange complements pistachios beautifully.
- Choose your cocoa thoughtfully. Dutch-process gives a deeper, smoother chocolate profile. Natural cocoa works too but may taste slightly brighter.
- Master the slice. A warm, clean knife (run under hot water and wiped dry) gives picture-perfect squares.
Watch Outs: Mistakes to Sidestep
- Overbaking. The most common pitfall. If the center is fully dry when tested, you’ve gone too far. Aim for a few moist crumbs.
- Adding hot chocolate to the eggs. Let the melted chocolate-butter mixture cool slightly. Piping hot chocolate can scramble the eggs.
- Skipping salt. Even dessert needs salt for balance and flavor clarity, especially with nuts and chocolate.
- Using an unlined pan. Without parchment, brownies can stick and edges can over-brown. A sling also makes removal a breeze.
- Cutting too soon. Warm brownies are fragile. Let them set before slicing to avoid tearing and crumbs.
- Wrong pan size. A larger pan yields thinner, drier brownies; a smaller pan may underbake in the center. Stick to 8x8 inches or adjust time accordingly.
- Stale nuts. Nuts go rancid quickly. Taste before using. Fresh, fragrant pistachios make a huge difference.
Nutrition at a Glance
Approximate nutrition per serving (1 of 16 squares), including optional chocolate chips and swirl:
- Calories: ~320
- Protein: ~5–6 g
- Total fat: ~19–21 g
- Saturated fat: ~9–11 g
- Carbohydrates: ~32–36 g
- Fiber: ~3 g
- Total sugars: ~22–26 g
- Sodium: ~120–160 mg
These values are estimates and will vary with ingredients and portion size. For a lighter option, skip the extra chocolate chips and reduce pistachios slightly; for gluten-free, see the FAQs below.
Your Questions, Answered
Can I make these brownies gluten-free?
Yes. Use a high-quality 1:1 gluten-free all-purpose flour blend that contains xanthan gum. Weigh the flour if possible and avoid overmixing. Bake times are similar; check a couple minutes early for doneness.
What if I only have natural cocoa powder?
Natural cocoa works fine here since there’s no baking soda to react with acidity. Expect a slightly lighter color and a brighter cocoa taste. If desired, add an extra pinch of salt to balance.
How should I store and freeze them?
Store in an airtight container at room temperature for up to 3 days or refrigerate for up to 1 week. To freeze, wrap individual squares tightly, then place in a freezer bag for up to 2 months. Thaw at room temperature or warm briefly before serving.
A Warm Send-Off
Baking a pan of Pistachio Chocolate Brownies is a small act of everyday celebration. The kitchen fills with the aroma of toasted nuts and melted chocolate, and by the time you slice into that glossy top, you’ll know you’ve made something special. Share them after dinner, tuck a square into a lunchbox, or bring a tray to your next gathering—these brownies have a way of inviting conversation and smiles. With a few simple techniques and thoughtfully chosen ingredients, you’ll turn out dessert that feels as comforting as it is impressive. Here’s to crackly tops, fudgy centers, and the kind of baking that brings people together, one square at a time.