Raspberry Lemon Cheesecake Recipe: Creamy, Tangy & Easy Tips
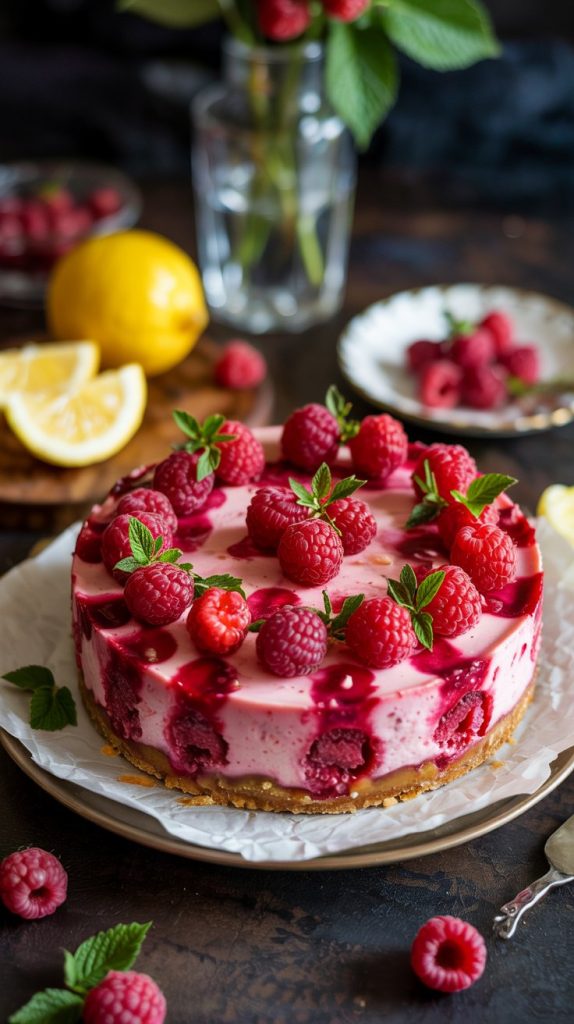
Imagine the silky richness of classic cheesecake brightened with a sunny pop of lemon and jeweled swirls of tangy raspberries. That’s this Raspberry Lemon Cheesecake—playful, elegant, and completely irresistible. It balances creamy and fresh, tart and sweet, making it the kind of dessert that turns an ordinary evening into something special. If you love a dessert that looks stunning without demanding pastry-chef skills, you’re in the right place. You’ll find this recipe friendly, forgiving, and full of small techniques that make a big difference. By the time you slice in, you’ll have a cheesecake that’s smooth, luscious, and glowing with raspberry ribbons.
- What Makes This Raspberry Lemon Cheesecake Irresistible
- What You’ll Need: Ingredients for Raspberry Lemon Cheesecake
- How to Make It: Raspberry Lemon Cheesecake, Step by Step
- Timing and Prep: What to Expect
- Pro Tips and Little Secrets for Success
- Nutrition at a Glance
- Questions, Answered
- A Sweet Send-Off
What Makes This Raspberry Lemon Cheesecake Irresistible
This cheesecake pairs velvety cream cheese with bright lemon zest and juice, then amplifies it all with ripples of homemade raspberry sauce. The crust is buttery and crisp, adding sweet, toasted notes that complement the citrus. It bakes low and slow for a plush texture, then chills into neat, picture-perfect slices. Even better, it’s designed to be approachable—no hard-to-find ingredients, and you can choose between a water bath or an easy “steam” method for crack-free results. The end result feels bakery-worthy yet comforting and familiar, the kind of dessert that invites second helpings and happy sighs.
What You’ll Need: Ingredients for Raspberry Lemon Cheesecake
- Graham cracker crumbs (1 1/2 cups / 150 g): The foundation for a crisp, buttery base that contrasts the creamy filling.
- Granulated sugar (2 tbsp for crust + 3/4 to 1 cup / 150–200 g for filling): Adds sweetness; a slightly flexible amount so you can tailor to your taste and the tartness of your lemons.
- Unsalted butter, melted (6 tbsp / 85 g): Binds crumbs into a sturdy crust and adds rich flavor.
- Fine sea salt (a pinch): Enhances overall flavor and balances sweetness.
- Cream cheese, full-fat blocks (32 oz / 900 g): The heart of your cheesecake; full-fat ensures a lush, stable texture.
- Sour cream (1/2 cup / 120 g): Softens the filling and adds gentle tang for a custardy finish.
- Large eggs (3): Provide structure and silkiness; they help the cheesecake set without becoming dense.
- Lemon zest (1–2 lemons, about 2 tsp): Packs bright citrus aroma without adding excess moisture.
- Fresh lemon juice (2–3 tbsp): Sharpens flavor and lifts the richness.
- Pure vanilla extract (1 tsp): Rounds out the tang with warm sweetness.
- Cornstarch (1 tbsp, optional but recommended): Helps prevent cracks by gently stabilizing the filling.
- Raspberries, fresh or frozen (2 cups / 250 g): The star swirl; provides tart, vivid color and flavor.
- Raspberry sauce sugar (3–4 tbsp): Sweetens the fruit without dulling its brightness.
- Lemon juice for sauce (1 tsp): Keeps the berries lively and prevents a flat flavor.
- Cornstarch for sauce (1 tsp mixed with 1 tsp cold water): Thickens the raspberry swirl so it stays striking and neat.
- Optional garnish: fresh raspberries, lemon zest curls, softly whipped cream: Finishing touches that make your cheesecake look as beautiful as it tastes.
How to Make It: Raspberry Lemon Cheesecake, Step by Step
- Prepare the pan and oven. Preheat the oven to 325°F (163°C). Line the bottom of a 9-inch (23 cm) springform pan with parchment; lightly grease the sides. For a water bath, wrap the outside of the pan in a double layer of heavy-duty foil to prevent leaks. Tip: If you prefer to skip foil, plan to use a separate pan of hot water on a lower rack for gentle steam.
- Mix and bake the crust. Stir together graham crumbs, 2 tbsp sugar, a pinch of salt, and melted butter until the texture resembles damp sand. Press firmly into the bottom and slightly up the sides of the pan. Bake 8–10 minutes until lightly fragrant. Cool on a rack while you prepare the filling.
- Make the raspberry swirl. In a small saucepan, combine raspberries, 3–4 tbsp sugar, and 1 tsp lemon juice. Cook over medium heat, stirring and mashing, until the berries release juices and begin to bubble, 3–5 minutes. Stir in the cornstarch slurry (1 tsp cornstarch mixed with 1 tsp cold water) and cook 1–2 minutes more until glossy and just thickened. Press through a fine sieve to remove seeds. Cool to room temperature. Tip: The sauce should be spoonable, not runny, so it swirls cleanly.
- Make the filling base. In a large bowl, beat cream cheese with a stand mixer or hand mixer on medium-low until completely smooth and lump-free, about 2 minutes, scraping the bowl and paddle often. Add granulated sugar (start with 3/4 cup if you like it tangier) and beat on low until combined and satiny.
- Add the dairy and flavorings. Mix in sour cream, lemon zest, lemon juice, and vanilla. Sprinkle in the cornstarch. Blend on low until just combined and silky. Important: Avoid whipping; overmixing adds air that can cause cracks.
- Incorporate the eggs. Add eggs one at a time on low speed, mixing just until each disappears. Scrape the bowl and paddle to ensure a uniform batter. The filling should be smooth, thick, and pourable.
- Assemble the cheesecake. Pour the filling into the cooled crust. Tap the pan firmly on the counter a few times to release trapped air bubbles. Spoon small pools of raspberry sauce around the surface, then drag a thin skewer or butter knife through the dots to make gentle swirls. Tip: Less swirling keeps the pattern defined and prevents muddy colors.
- Set up for baking. For a water bath: Set the foil-wrapped pan in a larger roasting pan and pour hot water around it halfway up the side of the springform. For the no-foil steam method: Place a deep pan of hot water on the rack below your cheesecake. Both encourage a tender, crack-free texture.
- Bake low and slow. Bake at 325°F (163°C) for 55–70 minutes. The edges should be set, and the center should wobble like gelatin when gently nudged. If it looks wet or sloshy, give it another 5–10 minutes. Do not overbake—carryover heat will finish the job.
- Cool gradually. Turn the oven off, prop the door open, and let the cheesecake rest inside for 45–60 minutes. This gentle cooldown helps prevent sudden temperature shocks and cracks.
- Chill fully. Transfer the pan to a wire rack to cool to room temperature, then cover and refrigerate at least 6 hours, preferably overnight. Chilling is where the magic happens: the texture sets and the flavors harmonize.
- Unmold and garnish. Run a thin knife around the edge to release the sides, then unlatch the springform. Slide the cheesecake onto a serving plate. Garnish with fresh raspberries, a whisper of lemon zest, or dollops of softly whipped cream.
- Slice neatly and serve. For clean slices, dip a sharp knife in hot water, wipe dry, and cut with gentle downward pressure, wiping between cuts. Enjoy cold or let it sit 10–15 minutes at room temperature for an extra-creamy bite.
Timing and Prep: What to Expect
Cheesecake rewards patience. While the hands-on time is minimal, proper chilling transforms it from good to unforgettable. Here’s a snapshot of the rhythm so you can plan with ease.
| Prep time | 30–40 minutes (crust, sauce, filling) |
| Bake time | 55–70 minutes at 325°F (163°C) |
| Oven cooldown | 45–60 minutes (door propped open) |
| Chill time | At least 6 hours, ideally overnight |
| Total time | About 8–12 hours, mostly inactive |
| Servings | 12 generous slices |
When is it ready? The cheesecake is best the day after baking. You’ll know it’s perfect when the center is fully set from chilling and slices stand tall with clean edges. If you press gently at the center, it should feel cool, smooth, and firm but not stiff.
Pro Tips and Little Secrets for Success
- Start with room-temperature ingredients. Softened cream cheese blends smoothly and prevents lumps. Eggs and sour cream should be at room temperature too.
- Mix on low, and don’t overbeat. Air is the enemy of a crack-free surface. Keep the speed low and scrape down the bowl often.
- Use cornstarch for insurance. A tablespoon in the filling gently stabilizes the custard and helps keep it velvety.
- Choose your moisture method. A traditional water bath yields ultra-creamy results. Prefer less fuss? A pan of hot water on the rack below still adds steam and helps prevent cracks.
- Watch for the jiggle, not the clock. The center should wobble when you nudge the pan. If it looks liquid, keep baking. If it’s fully firm, it’s likely overbaked.
- Cool slowly, then chill completely. Gradual cooling avoids sudden temperature shocks. Overnight chilling deepens flavor and ensures tidy slices.
- Get the swirl right. Cool the raspberry sauce to room temperature, then dot and swirl gently. Too much swirling can blur the pattern.
- Adjust sweetness to taste. If your lemons are extra tart or your raspberries are very tangy, add a touch more sugar to the filling or sauce to balance.
- Make ahead friendly. Cheesecake is excellent made 1–2 days in advance. It also freezes beautifully.
- Clean slices every time. A hot, dry knife and a patient hand make all the difference.
Nutrition at a Glance
These values are approximate and will vary with specific ingredients and garnishes. Based on 12 servings, without whipped cream.
- Calories: ~500 per slice
- Protein: ~7–8 g
- Carbohydrates: ~45–50 g
- Total Fat: ~32–34 g
- Saturated Fat: ~18–20 g
- Fiber: ~2 g
- Total Sugars: ~35–38 g
- Sodium: ~280–320 mg
Note: Using reduced sugar or a thinner swirl will slightly lower carbs and calories; opting for reduced-fat cream cheese will change the texture but can reduce fat content.
Questions, Answered
Can I make this without a water bath?
Yes. Place a deep pan of hot water on the rack below your cheesecake during baking. The steam gently regulates heat and minimizes cracking. While a classic water bath yields the most custardy texture, the steam method is a reliable, low-fuss alternative.
Can I use frozen raspberries, and do I need to thaw them?
Frozen raspberries work beautifully. No need to thaw—just cook them a couple minutes longer in the saucepan until they release juices and bubble. Be sure to thicken with cornstarch and cool completely before swirling.
How do I store and freeze leftovers?
Refrigerate, covered, for up to 5 days. To freeze, chill the cheesecake fully, then wrap slices (or the whole cake) tightly in plastic and foil. Freeze up to 2 months. Thaw overnight in the fridge for the best texture.
A Sweet Send-Off
There’s something so satisfying about a dessert that delivers both comfort and sparkle. This Raspberry Lemon Cheesecake does exactly that—familiar creaminess with sunlit citrus and a swirl of berry brightness, all in one elegant slice. It’s a celebration cake that feels at home on any table, from birthdays to quiet Sunday dinners. With a bit of patience and a few thoughtful steps, you’ll pull from the fridge a cheesecake that cuts cleanly, tastes balanced, and looks like it came from your favorite bakery. Most of all, enjoy the process—the gentle stirring, the scent of lemon zest, the moment the raspberry swirl takes shape. It’s the kind of kitchen ritual that invites you to slow down and savor, ideally with people you love gathered around for that first blissful bite.