Spinach Stuffed Chicken Breast Recipe | Baked, Juicy & Easy!
There’s something wonderfully cozy about Spinach Stuffed Chicken Breast—it feels special enough for a celebration yet simple enough for a weeknight. Juicy chicken is filled with creamy, garlicky spinach and cheese, then seared for a golden crust and baked until tender. Each slice reveals a beautiful swirl of green and white, and it’s as satisfying as it looks. Whether you’re feeding family, impressing a date, or just treating yourself, this recipe brings restaurant-level flavor to your own kitchen. Expect straightforward steps, adaptable ingredients, and a meal that’s elegant without being fussy.
In this guide, I’ll walk you through the whole process so you feel confident from the first cut to the final slice. You’ll get practical tips, helpful timing, and small details that make a big difference—like squeezing the spinach properly and using a thermometer for perfect doneness. Let’s turn simple ingredients into a memorable dinner.
- What Makes This Spinach-Stuffed Chicken So Irresistible
- Your Shopping List: Ingredients With Purpose
- How to Make It: A Friendly, Step-by-Step Walkthrough
- All About Timing: Prep, Cook, and Rest
- Pro Pointers: Small Tweaks for Big Results
- Nutrition at a Glance: What’s in Each Serving
- FAQs: Quick Answers to Common Questions
- A Warm Send-Off: Bringing It All to the Table
What Makes This Spinach-Stuffed Chicken So Irresistible
This dish hits the sweet spot of comforting yet fresh, creamy yet light. The chicken stays moist thanks to the rich spinach-cheese filling, and a quick sear gives it a gorgeous color that makes it look restaurant-ready. The filling is flexible—you can swap cheeses, add sun-dried tomatoes, or stir in herbs to suit your mood. It’s a one-pan wonder most of the time, and the leftovers reheat beautifully for lunch the next day. Most importantly, the method is friendly for all skill levels. With a few key tricks, you’ll slice into perfectly juicy chicken every time. If you love meals that taste like you fussed without actually fussing, this one’s for you.
Your Shopping List: Ingredients With Purpose
- 4 boneless, skinless chicken breasts (6–8 oz each) — The mild, lean base that lets the garlicky spinach filling shine.
- 1 tablespoon olive oil — Helps achieve a golden sear and adds subtle fruitiness.
- 1 teaspoon kosher salt, divided — Seasons both the chicken and the filling for balanced flavor.
- 1/2 teaspoon black pepper, divided — Adds warmth and depth without overpowering the creamy filling.
- 1/2 teaspoon paprika (sweet or smoked) — Brings gentle color and a hint of sweetness or smokiness to the crust.
- 1/2 teaspoon garlic powder — Reinforces the fresh garlic in the filling for layered flavor.
For the spinach-cheese filling:
- 4 ounces cream cheese, softened — The creamy binder that keeps the filling lush and cohesive.
- 1 cup finely chopped spinach (packed), thawed and squeezed dry if frozen — Earthy greens that bring color, nutrients, and freshness.
- 1/2 cup shredded mozzarella — Melts beautifully to give the filling a stretchy, cheesy pull.
- 2 tablespoons grated Parmesan — Adds salty, savory depth and a touch of umami.
- 2 cloves garlic, minced — Bright, aromatic backbone that keeps the filling lively.
- 1 tablespoon chopped fresh parsley (or 1 teaspoon dried) — Lifts the richness with fresh herbal notes.
- 1 tablespoon lemon zest — A quiet burst of citrus that cuts through the cheese and keeps each bite balanced.
- 1–2 tablespoons plain Greek yogurt or mayonnaise — Loosens the filling slightly for easy spreading and added juiciness.
- Pinch of red pepper flakes (optional) — A subtle kick to wake up the creamy filling.
Optional for finishing and serving:
- 1/2 cup low-sodium chicken broth — For a quick pan sauce that gathers all those tasty browned bits.
- 1 tablespoon unsalted butter — Whisks into the sauce for a silky finish.
- Lemon wedges — A fresh squeeze right before serving brightens the whole plate.
How to Make It: A Friendly, Step-by-Step Walkthrough
- Preheat the oven. Set your oven to 400°F (200°C). A hot oven ensures the chicken bakes through quickly without drying out.
- Mix the filling. In a bowl, combine cream cheese, spinach, mozzarella, Parmesan, garlic, parsley, lemon zest, Greek yogurt or mayo, a pinch of salt, pepper, and red pepper flakes if using. Stir until smooth and evenly green. The mixture should be spreadable, not runny.
- Prep the chicken breasts. Place a chicken breast flat on a cutting board. Holding your knife parallel to the board, carefully slice a pocket into the thickest side, leaving 1/2 inch uncut along the other side to create a hinge. Repeat with all breasts. Take your time here to avoid cutting through.
- Season inside and out. Sprinkle a little salt and pepper inside each pocket. Then season the outside of each breast with the remaining salt, pepper, paprika, and garlic powder. This layers flavor from the inside out.
- Stuff the chicken. Divide the spinach mixture among the breasts, spooning it into each pocket. Don’t overpack; aim for a snug but comfortable fill, leaving the edges clean so they’ll seal better.
- Secure the seam. Use 2–3 wooden toothpicks per breast to pin the opening closed. Insert them at a slight angle so they lie mostly flat; this helps keep the filling inside while searing.
- Heat the pan. Warm the olive oil in a large oven-safe skillet over medium-high heat. When it shimmers, you’re ready to sear.
- Sear to golden perfection. Add the stuffed chicken, seam side up, and sear without moving for 3–4 minutes until a deep golden crust forms. Flip carefully and sear the second side for 2–3 minutes. Color equals flavor.
- Finish in the oven. Transfer the skillet to the preheated oven and bake 12–15 minutes, or until the thickest part of the chicken reaches 165°F (74°C). A probe thermometer removes the guesswork.
- Rest the chicken. Set the chicken on a plate and tent loosely with foil for 5–7 minutes. This helps the juices redistribute, keeping your chicken succulent.
- Optional quick pan sauce. Return the skillet to medium heat. Add chicken broth and simmer, scraping up any browned bits. Reduce by about half, then whisk in the butter until glossy. Taste and adjust seasoning, then finish with a squeeze of lemon if you like.
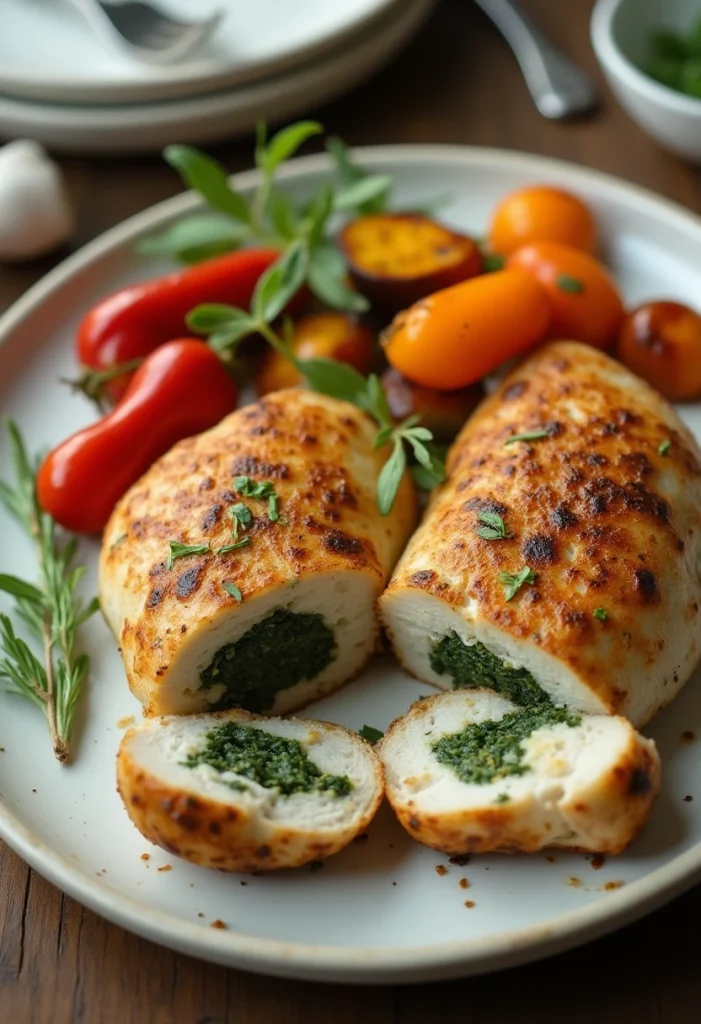
- Serve and enjoy. Slice the chicken on a slight diagonal to show off the swirled filling. Spoon a little pan sauce over the top and serve with roasted vegetables, rice, or a bright salad.
All About Timing: Prep, Cook, and Rest
Plan on about 45 minutes from start to finish, with most of that hands-on in a pleasant, steady rhythm. The filling mixes up in a few minutes, and creating a pocket in the chicken gets easier after the first one. Searing adds fast flavor and a head start on cooking, while the oven ensures even doneness. Don’t skip the resting time; those extra minutes make each slice juicier and cleaner. If you’re hosting, you can mix the filling and prep the pockets in advance so assembly is a breeze when guests arrive.
- Prep time: 15–20 minutes
- Sear time: 5–7 minutes total
- Bake time: 12–15 minutes at 400°F (200°C)
- Rest time: 5–7 minutes
- Total time: About 40–45 minutes
Pro Pointers: Small Tweaks for Big Results
- Dry the spinach well. If using frozen spinach, thaw fully and squeeze out excess moisture in a clean kitchen towel. Too much water makes the filling runny.
- Soften the cream cheese. Room-temperature cream cheese blends smoothly, preventing lumps and making stuffing easier.
- Season inside the pocket. A tiny pinch of salt and pepper inside the chicken layers flavor where it matters most.
- Use toothpicks or kitchen twine. Secure the seam to keep the filling from escaping while you sear and bake.
- Don’t overstuff. A moderate amount of filling cooks more evenly and stays put.
- Sear hot, then finish gently. A good sear locks in flavor; the oven finishes without drying the meat.
- Trust a thermometer. Pull the chicken at 165°F (74°C). Overcooking is the fastest way to dry chicken out.
- Flavor variations. Try feta and dill, sun-dried tomatoes and basil, or ricotta with lemon and thyme. Each twist gives a new feel to the same reliable method.
- Make it a meal. Pair with garlicky green beans, roasted potatoes, or a lemony couscous for a balanced plate.
Nutrition at a Glance: What’s in Each Serving
These numbers are approximate and will vary with your exact ingredients and portion sizes. The estimates below assume four servings from this recipe and include the filling but not the optional pan sauce.
| Nutrient | Approx. per serving |
|---|---|
| Calories | 420 |
| Protein | 48 g |
| Carbohydrates | 4 g |
| Dietary Fiber | 1 g |
| Total Fat | 22 g |
| Saturated Fat | 9 g |
| Sodium | 680 mg |
Tip: To lighten it up, use reduced-fat cream cheese and part-skim mozzarella, and go easy on added salt if your Parmesan is especially salty.
FAQs: Quick Answers to Common Questions
Can I use frozen spinach instead of fresh?
Absolutely. Frozen chopped spinach is convenient and works beautifully. Thaw it completely and squeeze out as much liquid as possible before mixing it into the filling. This ensures your filling stays creamy instead of watery.
Can I make this recipe ahead of time?
Yes. You can mix the filling up to 2 days in advance and keep it covered in the fridge. You can also stuff the chicken up to 12 hours ahead; store it covered and bring it out while the oven preheats so it’s not ice-cold. Sear and bake just before serving for the best texture.
How do I cook this in an air fryer?
Preheat the air fryer to 375°F (190°C). Lightly oil the basket and cook the stuffed chicken 14–18 minutes, flipping halfway, until an instant-read thermometer reads 165°F (74°C). The air fryer browns nicely without searing, but you can still sear first for extra color if you’d like.
A Warm Send-Off: Bringing It All to the Table
Cooking Spinach Stuffed Chicken Breast is one of those small kitchen victories that feels bigger than the sum of its parts. With a few simple ingredients and a reliable method, you can create a meal that’s nourishing, beautiful, and generously flavored. Share it around a busy weeknight table, or set it down for a weekend dinner with friends—it suits both moments well. The best part is how adaptable it is; once you’ve got the technique, you can play with flavors and make it your own. Here’s to good food, good company, and the kind of cooking that brings people together, one delicious slice at a time.