Strawberry Crunch Cheesecake Tacos Recipe | No-Bake Dessert!
If you love strawberry shortcake, creamy cheesecake, and the fun of handheld desserts, Strawberry Crunch Cheesecake Tacos will feel like a little celebration in every bite. Crisp, sugary shells cradle a silky no-bake cheesecake filling, juicy strawberries, and a nostalgic strawberry crunch that crackles softly when you take a bite. They’re beautiful enough for a party, yet easy enough for a weeknight treat. In this guide, I’ll walk you through each step with friendly, practical tips so you can make them confidently—even if you’re new to dessert tacos.
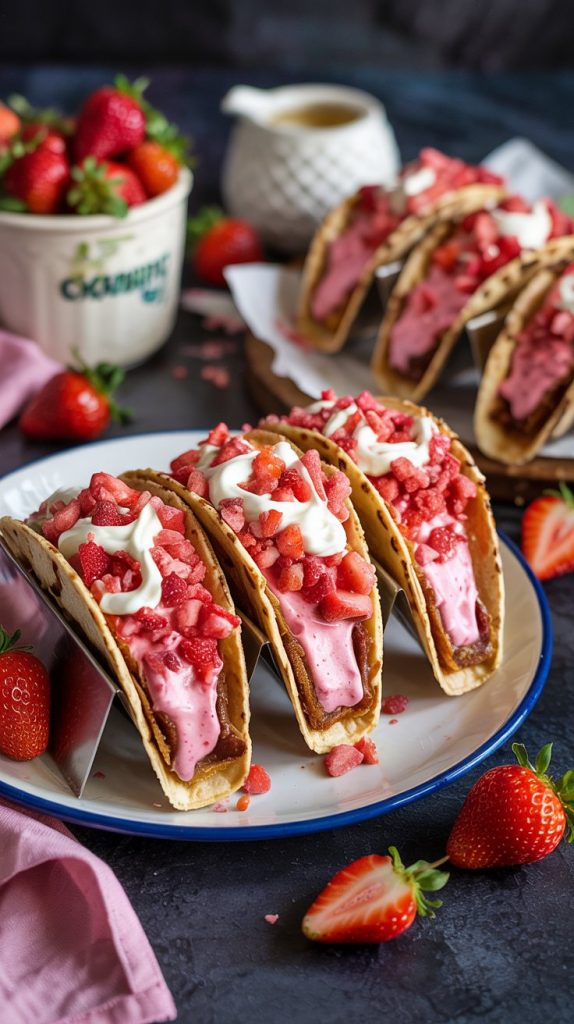
Expect a dessert that’s textural and balanced: crisp shells, fluffy filling, bright fruit, and a buttery cookie-strawberry crumb on top. You’ll find shortcuts, make-ahead options, and a few creative swaps to make this recipe your own. Let’s build something delightful together.
- Reasons You’ll Fall for These Strawberry Crunch Cheesecake Tacos
- What You’ll Need: Ingredients for Strawberry Crunch Cheesecake Tacos
- How to Make Them: Step-by-Step Guide to Strawberry Crunch Cheesecake Tacos
- All About the Clock: Timing & Preparation Details
- Helpful Secrets and Tips for Success
- A Quick Nutritional Snapshot
- Your Questions, Answered: Frequently Asked Questions
- Wrapping It Up: Final Thoughts
Reasons You’ll Fall for These Strawberry Crunch Cheesecake Tacos
These dessert tacos capture all the joy of strawberry cheesecake with a fun, handheld twist. The shells are light and crisp, the filling is cloud-like but rich, and the strawberry topping brings just the right amount of brightness. The strawberry crunch adds that playful ice-cream-truck nostalgia and a buttery finish. They’re eye-catching on a dessert table, easy to scale for a crowd, and surprisingly simple to assemble. Best of all, you can prep the components ahead so serving is stress-free.
What You’ll Need: Ingredients for Strawberry Crunch Cheesecake Tacos
- Small flour tortillas (street-taco size, 4–5 inches) — Form the “taco” shells; small size is perfect for biteable portions.
- Neutral oil (for frying) or melted butter (for baking/air frying) — Helps crisp the tortillas; oil for frying or butter for brushing.
- Granulated sugar — Coats the warm shells for a delicate, sweet crunch.
- Cinnamon (optional) — A hint of warmth in the shell sugar; complements strawberries.
- Cream cheese (full-fat, softened) — The backbone of the cheesecake filling; rich and tangy.
- Powdered sugar — Sweetens and smooths the filling without graininess.
- Heavy cream (cold) — Whips into soft peaks to lighten and stabilize the filling.
- Vanilla extract — Brings depth and bakery-style aroma to the cheesecake layer.
- Lemon zest or 1 teaspoon lemon juice (optional) — Adds brightness and a cheesecake “spark.”
- Pinch of fine salt — Balances sweetness and deepens flavor.
- Fresh strawberries (diced) — Juicy, vibrant topping; choose ripe but firm berries.
- Granulated sugar (for strawberries) — Helps draw out juices and create a light sauce.
- Lemon juice — Keeps color bright and enhances freshness.
- Golden sandwich cookies (like Golden Oreos) — Base for the classic strawberry crunch.
- Freeze-dried strawberries — Intensifies strawberry flavor and color without sogginess.
- Strawberry gelatin powder (optional) — Boosts color and nostalgic strawberry shortcake flavor.
- Unsalted butter (melted) — Binds the crunch into irresistible little clusters.
- White chocolate or almond bark (optional) — For a protective drizzle inside the shells to keep them crisp longer.
- Whipped cream, fresh mint (optional) — Finishing touches for presentation and freshness.
How to Make Them: Step-by-Step Guide to Strawberry Crunch Cheesecake Tacos
- Prep the strawberry crunch.In a food processor, pulse 18–20 golden sandwich cookies until coarse crumbs form (some pea-sized bits are great for texture). Add 1 cup freeze-dried strawberries and pulse briefly to mix. If you love that nostalgic shortcake bar flavor, pulse in 1–2 tablespoons strawberry gelatin powder. Pour in 4 tablespoons melted butter and pulse a few times until the mixture clumps lightly. Spread on a parchment-lined sheet and bake at 300°F (150°C) for 6–8 minutes, just to set. Cool completely so the crunch crisps up.
- Macerate the strawberries.Combine 2 cups diced fresh strawberries with 2–3 tablespoons sugar and 1 tablespoon lemon juice. Stir and rest 10–15 minutes, until glossy and slightly saucy. If you prefer a thicker topping, warm half of the berries in a small saucepan for 2–3 minutes to release juices, then fold in the remaining fresh berries off the heat.
- Make the cinnamon-sugar for shells.Mix 1/2 cup granulated sugar with 1 teaspoon cinnamon (optional). Keep this nearby to toss the shells while they’re warm.
- Form the taco shells (frying method).Heat 1–2 inches of neutral oil in a deep skillet to 350°F (175°C). Slide in one small tortilla; after 5–7 seconds, use tongs to fold it gently in half. Hold for 10–15 seconds until it sets, then continue frying, flipping as needed, until golden and crisp (about 45–60 seconds total). Let excess oil drip, then immediately toss in cinnamon-sugar. Set upright in a muffin tin to cool and hold shape. Repeat with 12 tortillas.
Tip: Work in batches and maintain the oil temperature. If oil cools, shells may absorb oil and turn heavy instead of crisp.
- Alternative: Bake or air-fry the shells.Brush tortillas lightly with melted butter. Drape over the bars of an oven rack or fit between the cups of an upside-down muffin tin to form taco shapes. Bake at 375°F (190°C) for 7–10 minutes until golden. While warm, brush with a touch more butter and toss in cinnamon-sugar. For the air fryer, preheat to 375°F (190°C), fold tortillas over a heat-safe rack or mold, and air fry 3–5 minutes, checking often.
- Mix the no-bake cheesecake filling.In a bowl, beat 16 ounces softened cream cheese with 3/4 cup powdered sugar, 1 teaspoon vanilla, a pinch of salt, and optional lemon zest or juice until smooth. In a separate chilled bowl, whip 3/4 cup cold heavy cream to soft-medium peaks. Fold the whipped cream into the cream cheese mixture until silky and thick. Transfer to a piping bag (or a zip-top bag with a corner snipped). Chill 15–20 minutes for cleaner piping.
Key tip: Start with truly softened cream cheese and very cold cream to avoid lumps and ensure a fluffy, stable filling.
- Optional shell “seal.”If you need the shells to stay crisp longer, drizzle or brush a thin layer of melted white chocolate inside each cooled shell and let it set. This creates a barrier so moisture doesn’t seep in quickly.
- Assemble the tacos.Pipe a generous swirl or ribbon of cheesecake filling into each shell. Spoon over a tablespoon or two of the macerated strawberries. Shower with strawberry crunch so it clings to the fruit and cream. Add a tiny dollop of whipped cream and a mint leaf if you like.
- Chill briefly or serve.For slightly firmer filling, refrigerate the assembled tacos for 10–15 minutes. For maximum shell crispness, serve immediately.
- Storage notes.Store components separately: shells in an airtight container at room temperature, cheesecake filling in the fridge up to 3 days, strawberry crunch in an airtight container at room temperature up to a week, and macerated berries in the fridge for 24 hours. Assemble close to serving time for best texture.
All About the Clock: Timing & Preparation Details
- Prep time: About 40 minutes (crunch, berries, filling, sugar mix)
- Cook time: 10–15 minutes to fry or bake shells, plus 6–8 minutes to lightly toast crunch (optional)
- Chill time (optional): 10–20 minutes for the filling to set slightly
- Total time: Approximately 70–80 minutes, depending on shell method
These tacos are ready to enjoy as soon as they’re assembled, but a short chill makes the filling more mousse-like. If you’re entertaining, make the crunch, berries, and filling ahead; then crisp the shells and assemble right before serving. For peak texture, assemble within 30 minutes of serving.
Helpful Secrets and Tips for Success
- Keep temperatures in your favor. Cold cream whips faster and holds better; softened cream cheese blends smooth without lumps.
- Mind the oil temperature. Fry at 350°F (175°C) for light, crisp shells that don’t taste greasy.
- Shape with stability. Use a muffin tin, rolling pin, or oven rack to help shells keep their form as they cool.
- Seal for extra crunch time. A thin white chocolate layer inside the shell resists sogginess—especially helpful for make-ahead platters.
- Balance sweetness. Taste the filling and berries; add a pinch more salt or lemon if the mixture feels too sweet.
- Crunch control. Bake or briefly toast the crunch so it sets into little clusters; it won’t go powdery and will stick nicely to the fruit.
- Choose the right tortillas. Small, soft flour tortillas fry and bake evenly and are just the right size for handheld desserts.
- Make-ahead method. Store shells, filling, crunch, and strawberries separately. Assemble just before serving for best results.
- Presentation lift. A final sprinkle of crunch at the table adds texture and a professional look.
A Quick Nutritional Snapshot
Approximate nutrition per taco (based on 12 tacos, fried shells, and the amounts listed):
| Calories | ~360 |
| Protein | ~5 g |
| Carbohydrates | ~36 g |
| Total Fat | ~22 g |
| Saturated Fat | ~12 g |
| Fiber | ~1 g |
| Sugars | ~24 g |
| Sodium | ~170 mg |
These figures are estimates and will vary with tortilla size, frying method, and topping amounts. If you bake or air fry the shells and go lighter on crunch, the calories and fat will be lower.
Your Questions, Answered: Frequently Asked Questions
Can I bake or air fry the tortilla shells instead of frying?
Yes. Brush tortillas with melted butter, shape over an oven rack or between muffin cups, and bake at 375°F (190°C) for 7–10 minutes. For the air fryer, shape and cook at 375°F (190°C) for 3–5 minutes, checking often. Toss in cinnamon-sugar while warm. They’ll be crisp and lighter than fried versions.
How far in advance can I make these?
Make the cheesecake filling up to 3 days ahead and store chilled. Prepare the strawberry crunch up to a week in advance and keep it airtight. Macerate strawberries up to 24 hours ahead. Fry or bake shells the day of serving for best texture, and assemble just before serving or within 30 minutes.
Can I lighten the recipe or make it gluten-free?
For a lighter version, use neufchâtel (1/3 less fat) cream cheese and reduce the crunch topping slightly. Bake or air fry the shells instead of frying. To go gluten-free, swap flour tortillas for small gluten-free tortillas and use gluten-free sandwich cookies in the crunch.
Wrapping It Up: Final Thoughts
There’s something joyful about a dessert you can hold, and these Strawberry Crunch Cheesecake Tacos deliver that joy with every bite. They’re playful without being fussy, and each component is simple to master with a few thoughtful touches. Share them at birthdays, brunches, or summer evenings on the patio—any moment that calls for a sweet, shareable treat. With crisp shells, creamy filling, and bright strawberry crunch, you’ll have a dessert that invites smiles and second helpings.
Most of all, enjoy the process. From shaping the shells to sprinkling the final crumbs, you’re creating something memorable. I hope this recipe brings a little extra sweetness to your table and inspires you to keep exploring fun, creative ways to celebrate dessert.