Garlic Butter Bread Rolls | Soft, Fluffy, Easy How-To Guides
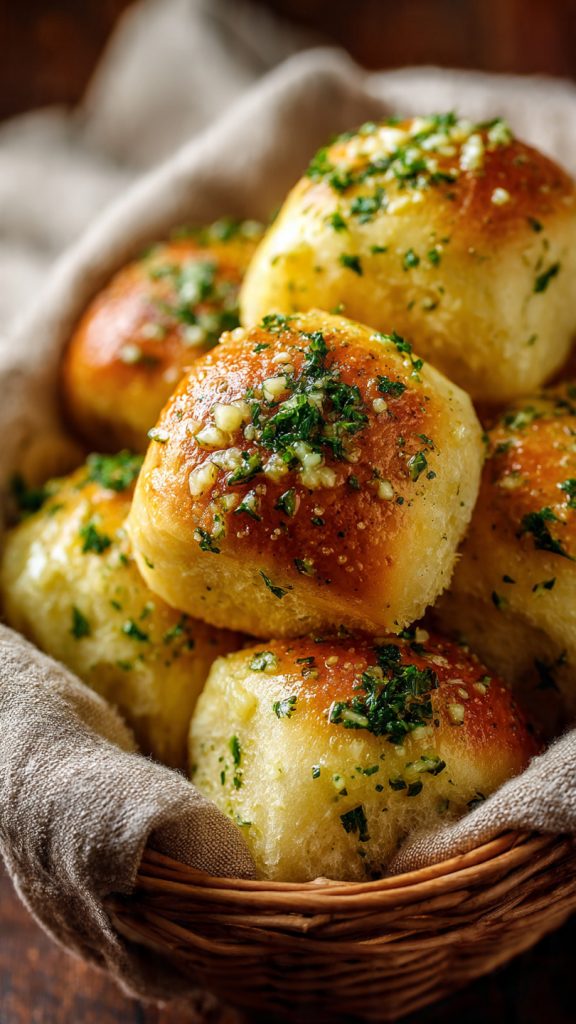
There’s something magical about the smell of warm, garlicky bread drifting through the kitchen. These Garlic Butter Bread Rolls are soft, golden, and just the right kind of indulgent—pillowy inside, lightly crisp at the edges, and brushed with a generous sheen of fragrant garlic butter. Whether you’re setting them beside a hearty soup, serving with pasta, or placing them front and center as a cozy appetizer, these rolls deliver that comforting, fresh-from-the-oven moment everyone loves.
In this recipe, you’ll learn how to make tender, bakery-style rolls at home with simple ingredients and approachable techniques. I’ll guide you through each step—from activating the yeast to shaping neat little rounds—so you always know what to look for and how to adjust along the way. Expect tips for success, common substitutions, and a foolproof garlic butter finish that’s as aromatic as it is delicious.
Why These Garlic Butter Bread Rolls Win Hearts
These rolls are the perfect marriage of soft, fluffy bread and savory, buttery garlic perfume. They’re easy to shape, forgiving if you’re new to yeast doughs, and consistently deliver a delicate crumb that pulls apart beautifully. The garlic butter soak balances richness with brightness (thanks to fresh herbs), while the light crust bakes to a gorgeous golden hue. They’re versatile enough for weeknight dinners yet special enough for holidays—and they’ll make your kitchen smell like a cozy bakery.
What You’ll Need: Ingredients for Garlic Butter Bread Rolls
- Warm milk (1 cup / 240 ml) – Hydrates the dough and adds tenderness; warmth helps activate the yeast.
- Active dry yeast (2 1/4 tsp / 7 g) – Leavens the dough so the rolls rise beautifully; instant yeast works too.
- Granulated sugar (2 tbsp / 25 g) – Feeds the yeast and adds subtle sweetness to balance the garlic butter.
- All-purpose flour (3 1/2 cups / 440 g) – Forms the structure; measured accurately for a soft, not dense, roll.
- Salt (1 1/2 tsp / 9 g) – Essential for flavor and strengthens the dough structure.
- Unsalted butter, softened (4 tbsp / 57 g) – Enriches the dough, making it tender and buttery.
- Egg (1 large) – Adds richness and helps the rolls rise higher and bake with a soft crumb.
- Egg wash (1 egg + 1 tbsp milk or water) – Gives the rolls a glossy, golden finish.
- Unsalted butter, melted (6 tbsp / 85 g) for garlic butter – The star of the topping; saturates the rolls with silky richness.
- Fresh garlic, finely minced (4–5 cloves) – Provides that irresistible garlicky aroma and flavor.
- Fresh parsley, chopped (2 tbsp) – Adds color and a fresh, bright finish to the garlic butter.
- Olive oil (1 tbsp, optional) – Blended into the butter to raise the smoke point and help the garlic cook gently.
- Parmesan, finely grated (2 tbsp, optional) – Adds a savory, cheesy edge to the garlic butter glaze.
- Lemon zest (1/2 tsp, optional) – A pop of brightness that lifts the richness of the butter.
- Flaky salt, to finish – A final sprinkle for texture and a flavor boost.
How to Make Garlic Butter Bread Rolls, Step by Step
- Warm the milk and wake up the yeast. In a small bowl, warm the milk to about 105–110°F (40–43°C)—warm to the touch, not hot. Stir in the sugar and sprinkle the yeast over the top. Let sit 5–10 minutes until foamy. If it doesn’t foam, the yeast may be inactive and you should start over with fresh yeast.
- Combine dry ingredients. In a large mixing bowl, whisk together the flour and salt. This ensures even seasoning and a smoother dough later.
- Add wet ingredients and bring it together. Pour the yeast mixture into the flour. Add the egg and softened butter. Mix with a wooden spoon or dough hook on low until a shaggy dough forms and no dry flour remains.
- Knead to a smooth, elastic dough. Knead by hand on a lightly floured surface for 8–10 minutes (or in a stand mixer on medium-low for 6–8 minutes) until the dough is smooth and stretchy. It should be slightly tacky but not sticky. Look for the “windowpane” test: if you can stretch a small piece thin enough to see light through without tearing, the gluten is developed.
- First rise. Shape the dough into a ball and place it in a lightly greased bowl, turning once to coat. Cover with a clean towel or plastic wrap and let rise in a warm, draft-free spot until doubled in size, about 60–90 minutes depending on room temperature.
- Prepare the pan. Grease a 9×13-inch (23×33 cm) baking pan or line it with parchment for easy cleanup. You can also use two 8- or 9-inch round pans for pull-apart rolls.
- Divide and shape. Gently punch down the dough to deflate. Turn it out onto a lightly floured surface and divide into 12 equal pieces (about 60–70 g each). Cup your hand over each piece and roll it against the counter in tight circles to form smooth balls.
- Second rise. Arrange the balls in the prepared pan with a little space between them so they have room to expand. Cover and let rise until puffy and nearly touching, about 30–45 minutes. When pressed lightly, the dough should spring back slowly and leave a slight indentation.
- Preheat and egg wash. While the dough proofs, preheat the oven to 375°F (190°C). Brush the tops gently with egg wash for an even, golden finish.
- Bake. Bake the rolls for 18–22 minutes, rotating the pan halfway through if your oven has hot spots. They’re done when the tops are deeply golden and the centers register around 195°F (90°C), or when a roll sounds hollow when tapped on the bottom.
- Make the garlic butter. While the rolls bake, melt the butter in a small saucepan over low heat. Add olive oil (if using) and the minced garlic. Cook gently for 1–2 minutes until fragrant but not browned. Stir in parsley, Parmesan (if using), and lemon zest. Remove from heat.
- Finish and serve. As soon as the rolls come out, brush them generously with the warm garlic butter, making sure to get down the sides and between the rolls. Sprinkle with a pinch of flaky salt. Let them rest 5–10 minutes to set, then serve warm and watch them disappear.
Time & Prep At-a-Glance
- Active prep time: About 25–30 minutes (mixing, kneading, shaping)
- First rise: 60–90 minutes, until doubled
- Second rise: 30–45 minutes, until puffy
- Bake time: 18–22 minutes at 375°F (190°C)
- Rest time: 5–10 minutes after buttering
- Total time: Approximately 2.5–3 hours, mostly hands-off
- Yield: 12 soft, pull-apart rolls
You’ll know the rolls are ready when they’re richly golden, fragrant with garlic, and tender inside. If you have a thermometer, aim for about 195°F (90°C) at the center. They should feel light when lifted and sound gently hollow when tapped on the bottom.
Pro Tips for Standout Rolls
- Mind the milk temperature. Keep it around 105–110°F (40–43°C). Milk that’s too hot can kill yeast; too cool and the yeast won’t activate well.
- Measure flour accurately. If using cups, spoon flour into the cup and level off; packed flour leads to dense rolls. Better yet, weigh your flour—440 g is your target.
- Embrace a slightly tacky dough. A bit of tackiness means good hydration, which equals soft rolls. Add flour only if absolutely necessary for handling.
- Proof in a cozy spot. Yeast loves warmth. Near (not on) a warm oven or in a turned-off oven with the light on works well. Cover the dough to prevent drying out.
- Test the proof with a gentle poke. If the indentation springs back quickly, the dough needs more time. If it doesn’t spring back at all, it may be over-proofed—bake right away.
- Protect the garlic’s flavor. Garlic burns easily. Cook it gently in butter and brush it on as soon as the rolls come out. Browned or burned garlic tastes bitter.
- Make-ahead option: After shaping, cover and refrigerate overnight. The next day, let the rolls sit at room temperature until puffy (45–75 minutes) and bake as directed.
- Freezer friendly. Freeze baked, cooled rolls for up to 2 months. Reheat wrapped in foil at 325°F (165°C) for 10–15 minutes, then refresh with a little extra garlic butter.
- Flavor twists: Add a pinch of red pepper flakes to the butter for heat, or swap parsley for chives or basil. A sprinkle of sesame or poppy seeds before baking adds texture.
Nutrition at a Glance
Approximate values per roll (1 of 12), brushed with garlic butter and optional Parmesan:
| Calories | 220 |
| Protein | 6 g |
| Total Carbohydrates | 29 g |
| Dietary Fiber | 1 g |
| Total Fat | 9 g |
| Saturated Fat | 5 g |
| Sugars | 4 g |
| Sodium | 220 mg |
These values are estimates and will vary depending on specific ingredients, portion size, and optional add-ins. If you’re tracking nutrition closely, consider weighing ingredients and using a nutrition calculator.
Questions People Often Ask
Can I use instant yeast instead of active dry yeast?
Yes. Substitute the same amount (2 1/4 tsp / 7 g) of instant yeast. You can skip the blooming step and mix it directly into the flour. Still keep the liquid warm for best results, and follow the same rise times as a guideline.
How do I make these rolls without eggs?
You can omit the egg and add 2–3 tablespoons of additional milk to maintain hydration. The rolls will still be soft, though slightly less rich. Use milk for the wash or brush with cream for a nice sheen.
What’s the best way to store and reheat leftovers?
Store cooled rolls in an airtight container at room temperature for up to 2 days, or refrigerate up to 4 days. For longer storage, freeze up to 2 months. Reheat wrapped in foil at 325°F (165°C) until warmed through, then brush with a little extra garlic butter.
A Warm Note to Finish
Few things feel as welcoming as a basket of freshly baked rolls on the table—especially when they’re glistening with garlic butter. This recipe is designed to be approachable and dependable, whether you’re baking for a quiet dinner or a big celebration. The rhythm of mixing, kneading, and shaping is satisfying, and the payoff is irresistible: soft, fragrant rolls that bring people together. I hope these Garlic Butter Bread Rolls find a happy place in your kitchen and become one of those recipes you reach for whenever you want to make a meal feel extra special.