Best Breakfast Granola Cups: Easy Yogurt-Filled Recipe Guide
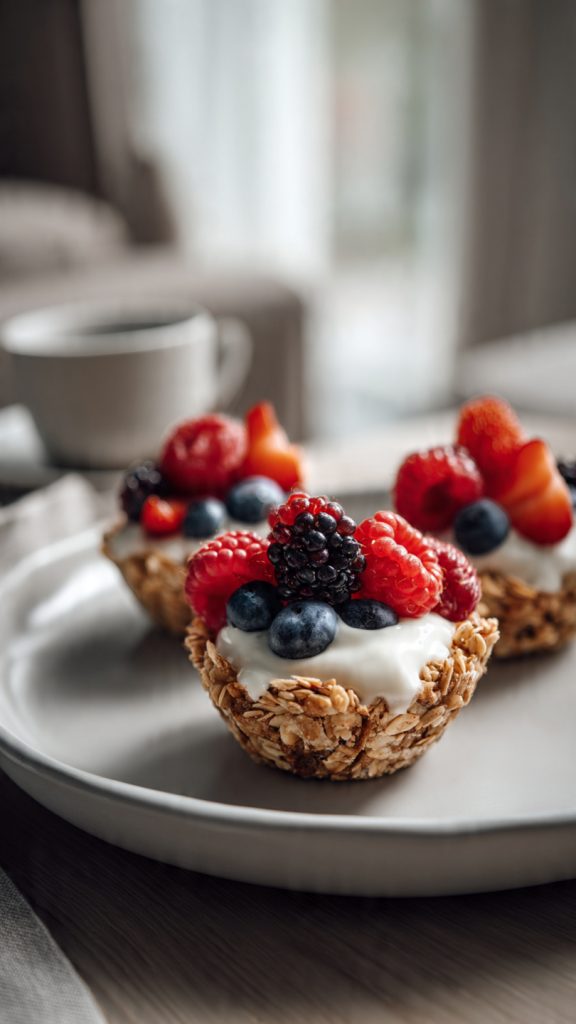
There’s something wonderfully satisfying about a breakfast that looks special, tastes indulgent, and still feels wholesome. Breakfast Granola Cups deliver all three. Imagine a crisp, golden oat cup with toasty edges, filled with cool, creamy yogurt and jeweled with fresh fruit. They’re playful to assemble, convenient to grab, and endlessly customizable. In this guide, I’ll walk you through exactly how to make them—from the ingredients that push flavor and texture over the top, to clever tips that guarantee your cups keep their shape. Whether you’re feeding a crowd, prepping for the week, or treating yourself to a quiet morning ritual, these granola cups are a nourishing, joyful way to start the day.
What Makes These Breakfast Granola Cups Irresistible
These breakfast cups strike the perfect balance: crunchy and lightly sweet outside, creamy and fresh inside. They’re as practical as they are pretty—prepare them ahead, then fill just before serving. The oat-and-nut base has enough structure to hold its shape, yet it still crumbles gently under a spoon. And because the filling is up to you (yogurt, ricotta, cottage cheese, or dairy-free alternatives), they fit almost any morning routine or dietary preference.
What You’ll Need: Ingredients for Breakfast Granola Cups
- Rolled oats (3 cups) — The backbone of the cups, providing hearty texture and toasty flavor. Avoid instant oats for best structure.
- Chopped nuts (1/2 cup) — Almonds, walnuts, or pecans add crunch, richness, and healthy fats that help bind the mixture.
- Unsweetened shredded coconut (1/2 cup, optional) — Adds gentle sweetness and chew; optional but lovely for flavor and structure.
- Honey or maple syrup (1/3 cup) — Sweetener and binder. Honey gives a glossy finish; maple brings a deeper caramel note.
- Nut or seed butter (1/3 cup) — Peanut, almond, cashew, or sunflower seed butter helps hold the oats together and adds creaminess.
- Coconut oil or unsalted butter (3 tablespoons, melted) — Adds crispness as the cups bake and carries flavor.
- Vanilla extract (1 teaspoon) — Lends warmth and rounds out sweetness.
- Ground cinnamon (1/2 teaspoon) — A cozy spice that pairs beautifully with oats and fruit.
- Fine sea salt (1/4 teaspoon) — Balances sweetness and makes flavors pop.
- Greek yogurt or dairy-free yogurt (for filling) — Thick, creamy base that sits inside the cup; choose your preferred style.
- Fresh fruit (for topping) — Berries, sliced kiwi, peach, mango, or pomegranate seeds add juicy brightness.
- Optional extras — Chia seeds for crunch, mini chocolate chips for a treat, orange zest for brightness, or a drizzle of nut butter on top.
How to Make Your Granola Cups, Step by Step
- Preheat and prepare the pan. Set your oven to 325°F (165°C). Lightly grease a standard 12-cup muffin tin with a thin film of oil or use silicone liners for easy release.
- Mix the dry ingredients. In a large bowl, stir together rolled oats, chopped nuts, shredded coconut (if using), cinnamon, and salt until everything looks evenly dispersed.
- Warm the binders. In a small saucepan over low heat, gently warm the honey or maple syrup with the nut/seed butter and coconut oil. Stir until fluid and smooth, then remove from heat and add the vanilla.
- Combine wet with dry. Pour the warm mixture over the oat mixture. Use a spatula to fold until every flake and nut is lightly coated. The mix should feel tacky, not wet.
- Test for stickiness. Pinch a bit of the mixture between your fingers. It should clump and hold. If it crumbles, add 1–2 teaspoons more honey/maple or a small drizzle of melted coconut oil and mix again.
- Portion into the muffin tin. Divide the mixture among the 12 cups (about 1/4 cup per well). It may look loose at first—don’t worry.
- Press firmly to form cups. Use the back of a spoon or a small measuring cup to press the mixture firmly into the bottom and up the sides of each well. Firm pressure is key; compacting helps the cups keep their shape after baking.
- Bake until golden. Bake for 12–15 minutes, rotating the pan once halfway through. The edges should be golden brown and fragrant.
- Re-press while warm. As soon as you remove the pan from the oven, use the back of the spoon to gently press down the centers again. This reinforces the cup shape as they cool.
- Cool completely in the pan. Let the cups cool in the tin for at least 30 minutes; then run a thin knife around the edges and carefully lift them out. Do not rush this step—cooling sets their structure.
- Fill just before serving. Spoon in a generous dollop of yogurt, then top with fresh fruit. Add a sprinkle of chia seeds or a drizzle of honey if you like.
- Serve and enjoy. The contrast of crisp cup and creamy center is best enjoyed right after filling, but unfilled cups store beautifully for later.
Time, Temp, and Prep: When They’re Ready
These granola cups come together quickly and reward a bit of patience during cooling. Here’s the timeline so you can plan your morning with ease.
- Prep time: 15–20 minutes, including mixing and forming the cups.
- Bake time: 12–15 minutes at 325°F (165°C), until the edges are golden.
- Cooling time: 30–45 minutes in the pan, so they firm up and release cleanly.
- Total active time: About 30 minutes.
- Total time (including cooling): 60–70 minutes.
- Yield: 12 cups.
When are they ready to eat? As soon as they are fully cooled and feel crisp, they’re ready to fill and enjoy. If you’re prepping ahead, store the baked cups plain, then fill them within 15 minutes of serving for the best texture.
Pro Tips to Nail It Every Time
- Pack the cups firmly. The tighter you press the mixture into the muffin wells, the better your cups will hold their shape. Don’t be shy—press up the sides to form a real shell.
- Warm your binders. Heating honey/maple with nut butter and coconut oil makes them mix more evenly, reducing dry patches and encouraging crispness.
- Use thick yogurt for filling. Greek-style or strained yogurt won’t water down the cups. If your yogurt is thin, strain it briefly through a coffee filter.
- Don’t skip the re-press after baking. Pressing the centers again while they’re warm helps redefine the cup and prevents puffing.
- Let them cool completely. Warm cups are fragile. Cooling in the pan is what transforms them from tender to sturdy.
- Choose the right oats. Old-fashioned rolled oats hold up best. Quick or instant oats can turn mushy and won’t give the same crunch.
- Make them your own. Add orange zest to the oat mix for brightness, a pinch of cardamom for elegance, or mini chocolate chips for a treat.
- Store smartly. Keep unfilled cups in an airtight container at room temperature for up to 4 days, or refrigerate for 1 week. Freeze for up to 2 months; thaw at room temperature, then crisp briefly in a low oven if desired.
- Vegan or gluten-free? Use maple syrup instead of honey and a dairy-free yogurt. For gluten-free, choose certified gluten-free oats.
Nutrition at a Glance
The exact numbers will vary based on your ingredients and fillings, but here’s a general snapshot per cup when filled with about 2 tablespoons of plain Greek yogurt and a few berries:
- Calories: ~280
- Protein: ~6–8 g
- Total fat: ~14–16 g
- Saturated fat: ~6–8 g
- Carbohydrates: ~30–34 g
- Fiber: ~4–5 g
- Sugars: ~10–14 g (from honey/maple and fruit)
- Sodium: ~80–120 mg
To reduce sugar, opt for unsweetened yogurt and top with low-sugar fruit like berries. To boost protein, use high-protein yogurt, add hemp hearts, or sprinkle with chopped roasted soy nuts.
Common Questions, Answered
Can I make the cups without nuts?
Yes. Swap the nuts for seeds like pumpkin or sunflower, or add extra oats. Use sunflower seed butter or tahini as the binder. The cups will still be crunchy and flavorful.
How do I keep the cups from getting soggy?
Fill them right before serving and use thick yogurt. If making ahead, store cups and filling separately. You can also brush the inside of cooled cups with a thin layer of melted dark chocolate and let it set—it creates a moisture barrier.
What if my cups crumble when I remove them?
They likely needed more binder, firmer pressing, or more cooling time. Next batch, add 1–2 teaspoons extra honey or nut butter, press firmly up the sides, and allow to cool completely in the pan before releasing.
A Warm Send-Off
Breakfast Granola Cups fit that sweet spot between simplicity and charm. They’re a joy to make, even more fun to customize, and they invite everyone at the table to choose their own favorite toppings. Whether you’re setting out a colorful spread for brunch or tucking a few into your weekly meal prep, these little cups offer comfort, nourishment, and a touch of everyday celebration. I hope they find a spot in your routine and bring a bright, crunchy start to your mornings. Happy baking—and even happier breakfasts.